Getting your controller settings dialled in for Black Ops 7 will give you a big edge. Many players jump straight in and stay with the defaults, but fine-tuning your setup helps with aim consistency, movement control, and faster reaction time. In this best Black Ops 7 controller settings guide, we’ll go through all the key controller settings you should set up, why they matter, and tips to test and tweak them until they feel perfect for you.
You can buy ranked-ready Call of Duty accounts on Playhub and get straight into the fray. You can also get accounts with prestige rewards and the rarest camos, all delivered safely and quickly.
Why Black Ops 7 Gamepad Settings Matter
Black Ops 7’s game pace is insanely fast. Whether you’re tactically sliding, wall-jumping, or turning corners, your controller input needs to keep up with the game’s speed. The default settings often cater to a general audience of casual gamers, but competitive players are looking for max precision and responsiveness. Well-set Black Ops 7 gamepad settings let you focus less on your gadgets and more on the actual fight. If your aim stick sensitivity is off, you’ll either overshoot targets or struggle to efficiently track them. If your deadzones are too big, your input can start feeling sluggish. Getting these things right lets you move fluidly and aim effectively.
Best Black Ops 7 Settings for Gamepad
Let’s start with the core basics. These Best Black Ops 7 settings for gamepad apply on every platform - whether you’re on PS5, Xbox Series, or a PC using a controller.
-
Set the controller's vibration to Off or Low, as strong vibration can interfere with aiming.
-
Confirm the controller is recognized correctly by your system and by the game to exclude the possibility of ghost inputs.
-
Choose your preferred stick layout (default is fine unless you use something like Tactical or Bumper Jump). If you use Tactical or other advanced layouts, make sure you’re comfortable with them before diving into sensitivity tweaks.
-
Consider setting Slide/Crouch to a button you can reach without taking your thumb off the right stick, so you don't lose any time.
-
Sprint behaviour: set to Tap or Toggle depending on your style (Tap gives more control, Toggle is easier for sustained long-distance sprint runs).
-
Make sure mantle/climb assistance is On only if you prefer it; many competitive players turn it Off so climbing feels more consistent and less automatic.
-
Aim down sights (ADS) behaviour: falls to a personal preference, but ensure that there is no weird click delay.
These are the best BO7 controller settings, time-tested and widely used by the most serious players. Of course, everything comes down to what works for you, so tweak them around and figure out what works best for your playstyle.
Best BO7 Sensitivity for Controllers
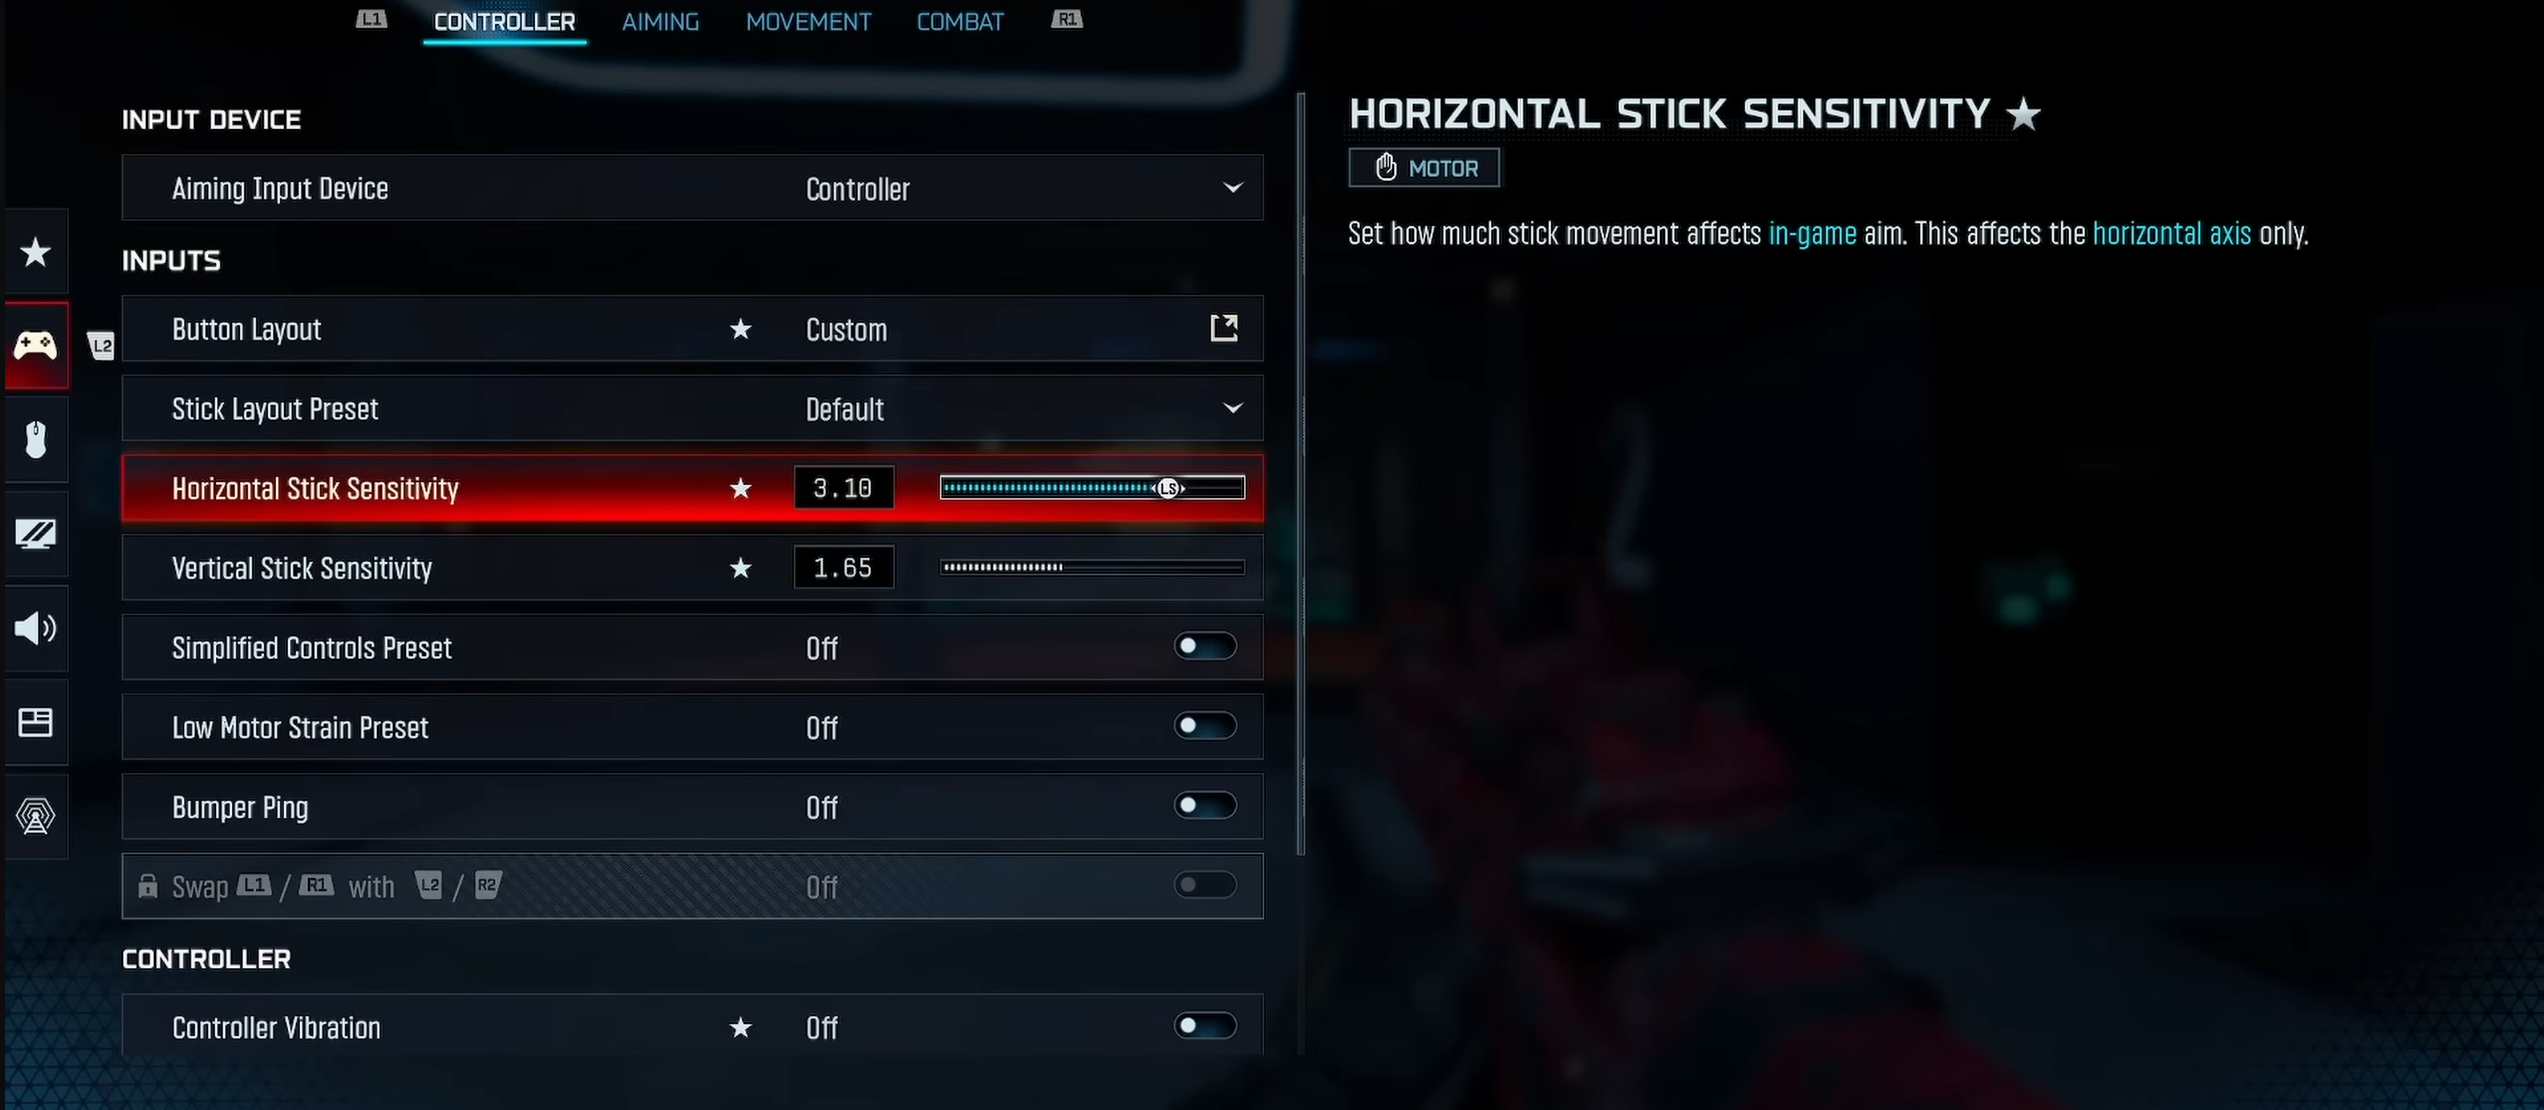
Understanding what the best BO7 sensitivity for controllers is is crucial to playing optimally. You want to find a balance between quick turning and stable aim. Overshooting becomes a major issue if sensitivity is too high. However, set it to be under-sensitive, and you’ll be too slow to react to the fast movement of your opponents. A good starting point would be:
|
Setting |
Value |
Explanation |
|---|---|---|
|
Left Stick Deadzone |
~ 5–7% |
Keeps movement responsive without causing excessive stick drift. Lower values give faster movement input. |
|
Right Stick Deadzone |
~ 5–7% |
Helps maintain accurate aim while preventing unwanted camera drift. |
|
Left Stick Sensitivity (Horizontal) |
6 |
Balanced speed for strafing and turning while staying in control. |
|
Left Stick Sensitivity (Vertical) |
6 |
Keeps vertical movement consistent with horizontal for smoother navigation. |
|
Right Stick Sensitivity (Horizontal) |
6 |
Ideal for tracking and flick-turning without overshooting targets. |
|
Right Stick Sensitivity (Vertical) |
6 |
Smooth vertical recoil control and comfortable ADS adjustments. |
|
Aim Acceleration / Response Curve |
Standard or Medium |
Provides predictable stick behavior; Standard is the most stable for aim consistency. |
|
Aim Assist |
On |
Essential for controller users; helps stabilize tracking and improve hit consistency in firefights. |
These values aren’t set in stone - they’re a foundation of your perfect settings setup. If you overshoot targets, reduce sensitivity by 1. If your aim feels too slow and sluggish, increase it by 1. Keep your screen size and resolution in mind since they also impact how fast your sensitivity feels.
It also helps to revisit these inputs every few weeks as you improve. What feels perfect on day one might feel restrictive due to your mechanical skill increasing. High-level players’ Black Ops 7 pro gamepad settings see changes seasonally or even weekly to stay aligned with their evolving play level. Treat your controller setup as something flexible and not explicitly rigid.
Best Aim Settings in BO7
Now let’s dig deeper into the best aim settings in BO7: aim assist, aim response, and how to tailor them for controller play in Black Ops 7.
Controller players benefit from aim assist, but it’s not a magic button-it still requires your input to track correctly. According to a recent developer comment, controller players are winning slightly more in close-range fights due to stronger aim assist in that range. So you should set it up to help you, not let it do everything.
-
Aim Assist: On
-
Aim Assist Strength: Default or slightly above (if the game allows adjustment)
-
Aim Assist Window: Default
-
Rotational Aim Assist: Enabled (if available)
The key tip: Use aim assist to smooth your tracking, not drag your aim. If your aim sticks are fighting aim assist, consider reducing the strength. Training your tracking movement remains essential.
Best Movement Settings in Black Ops 7
Since Black Ops 7 features high mobility - sliding, wall-running, and diving all while shooting, your config should feature the best movement settings in Black Ops 7 that are аdequately responsive and quick.
-
Sprint Mode: Choose based on preference - tap is best to free up your finger.
-
Slide Behavior: Set to Tap (if you want to slide quickly) or Hold (for steady control).
-
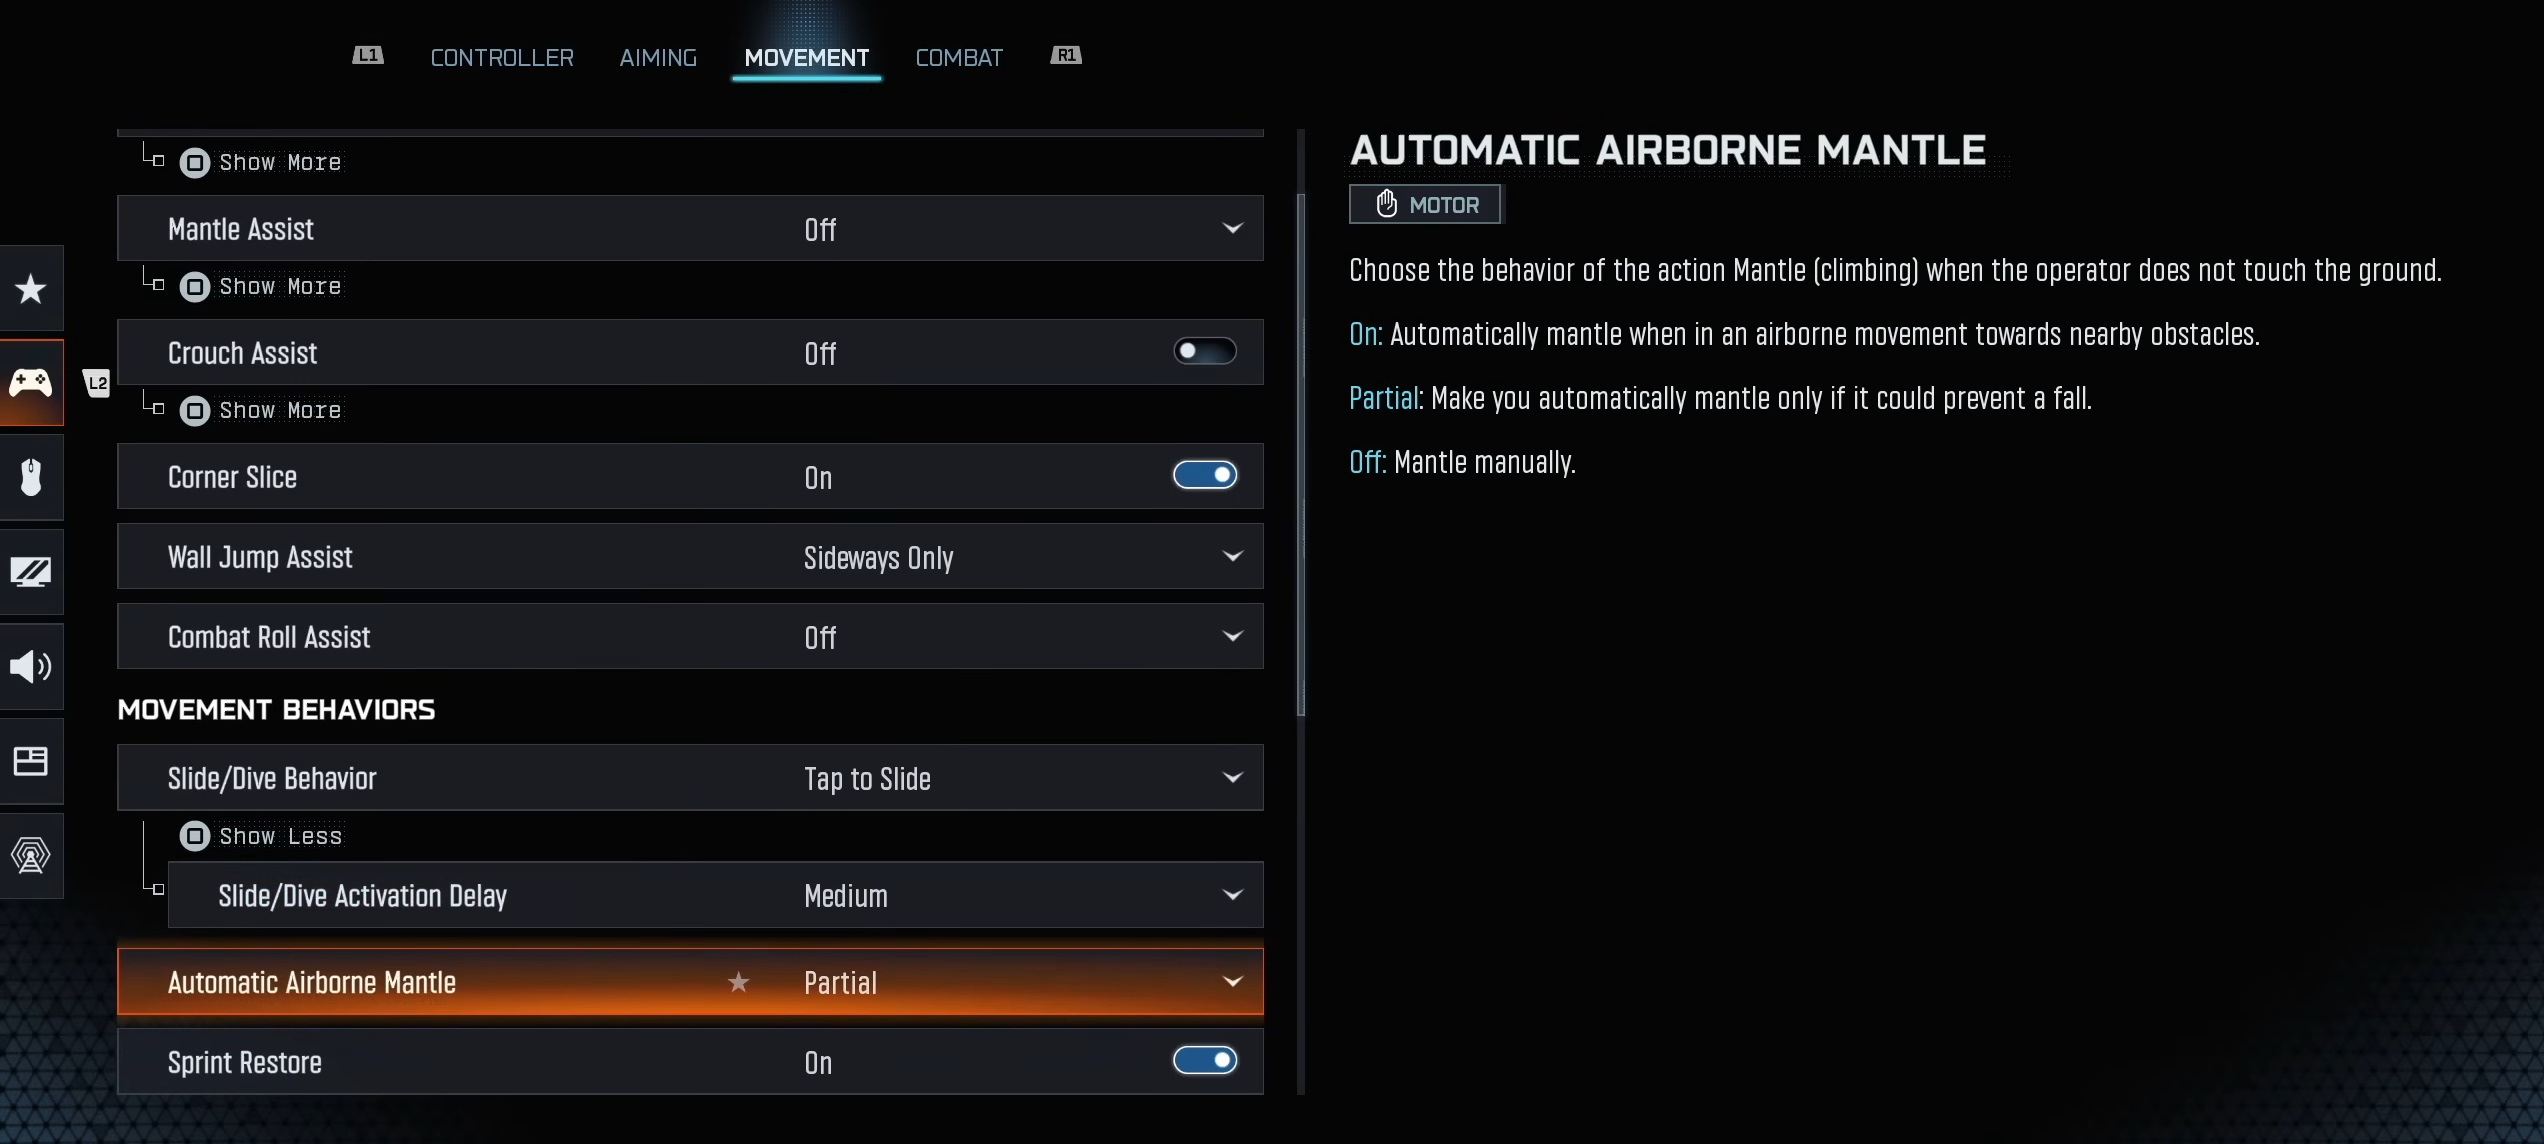
Mantle / Climb Assist: Consider turning off so you have full control when climbing instead of automatic patches.
-
Jump Behavior: Test whether auto-jump or manual jump suits your style. Manual jump gives more precision, especially when aiming mid-air.
-
ADS Movement Smoothing: Lower or disable-when you’re aiming, you want less unintended drift.
-
Auto-Aim when Sliding: Turn it off (if available) if you find it throws off your aim after sliding.
-
Lean and Peek Behavior: Set to manual or hold so you control the peek speed.
These settings provide the most comfortable feel and let you focus almost exclusively on aiming. Fine-tuned movement settings also reduce the physical strain of playing long sessions. A layout that minimizes unnecessary finger stretching or awkward button combinations helps you maintain input speed without extra fatigue. Even small ergonomic improvements can add up over hours of gameplay, especially during strenuous competitive grinds.
Testing and Tuning Your Settings
Now that you’ve set all your numbers right. Now it’s about practicing your newly changed settings and adjusting them to your liking. Before you jump into ranked matches, load up a practice range. Spend 10-15 minutes doing the following:
-
Hip-fire tracking of moving targets.
-
ADS tracking of targets at medium range (~20-30m).
-
Snap turns (180°) – turn fully around and immediately aim at a target behind you.
-
Slide or wall-run, then immediately ADS and shoot.
When identifying shortcomings, make one small change at a time. Play a few matches with the new change implemented. If you feel the improvement, keep it. If not, revert or try another small tweak. Over time, you’ll find your ideal setup.
Conclusion
The tweaks listed in our Black Ops 7 controller settings guide are the key to wins. The difference between a good player and a great player often comes down to how confident and precise their input settings are. By fine-tuning your controller settings - sensitivities, deadzones, aim assist, movement behaviour - you’ll give yourself a strong foundation.
Start with the baseline settings listed above. Then adjust slowly and make tweaks when you feel something is off. Over time, you’ll find the perfect configuration.
