
AION 2 Leveling Guide TL;DR
-
Follow the main campaign until progress becomes too difficult or locked entirely.
-
Complete system-unlock quests whenever they become available to you, even when they conflict with your main quest route.
-
Stack lots of nearby side quests to get the most XP as quickly as possible.
-
Upgrade leveling gear only enough to keep the campaign comfortable.
Want to start Global with more resources? You can get AION 2 Kinah on Playhub with quick delivery, competitive prices, and full privacy.
How to Level Fast in AION 2
The campaign is the backbone of your leveling journey. It moves you through the world, introduces important systems, and keeps your character on the intended progression route. Side activities support that journey, serving as a side source of gear and XP. If enemies suddenly start taking too long to be killed, it’s always worth it to clear the nearby quests.
An optimized campaign-oriented run takes you to level 45 in three to four hours. First completions would probably take you much longer, since watching cutscenes and admiring the world should cost you an hour or two.
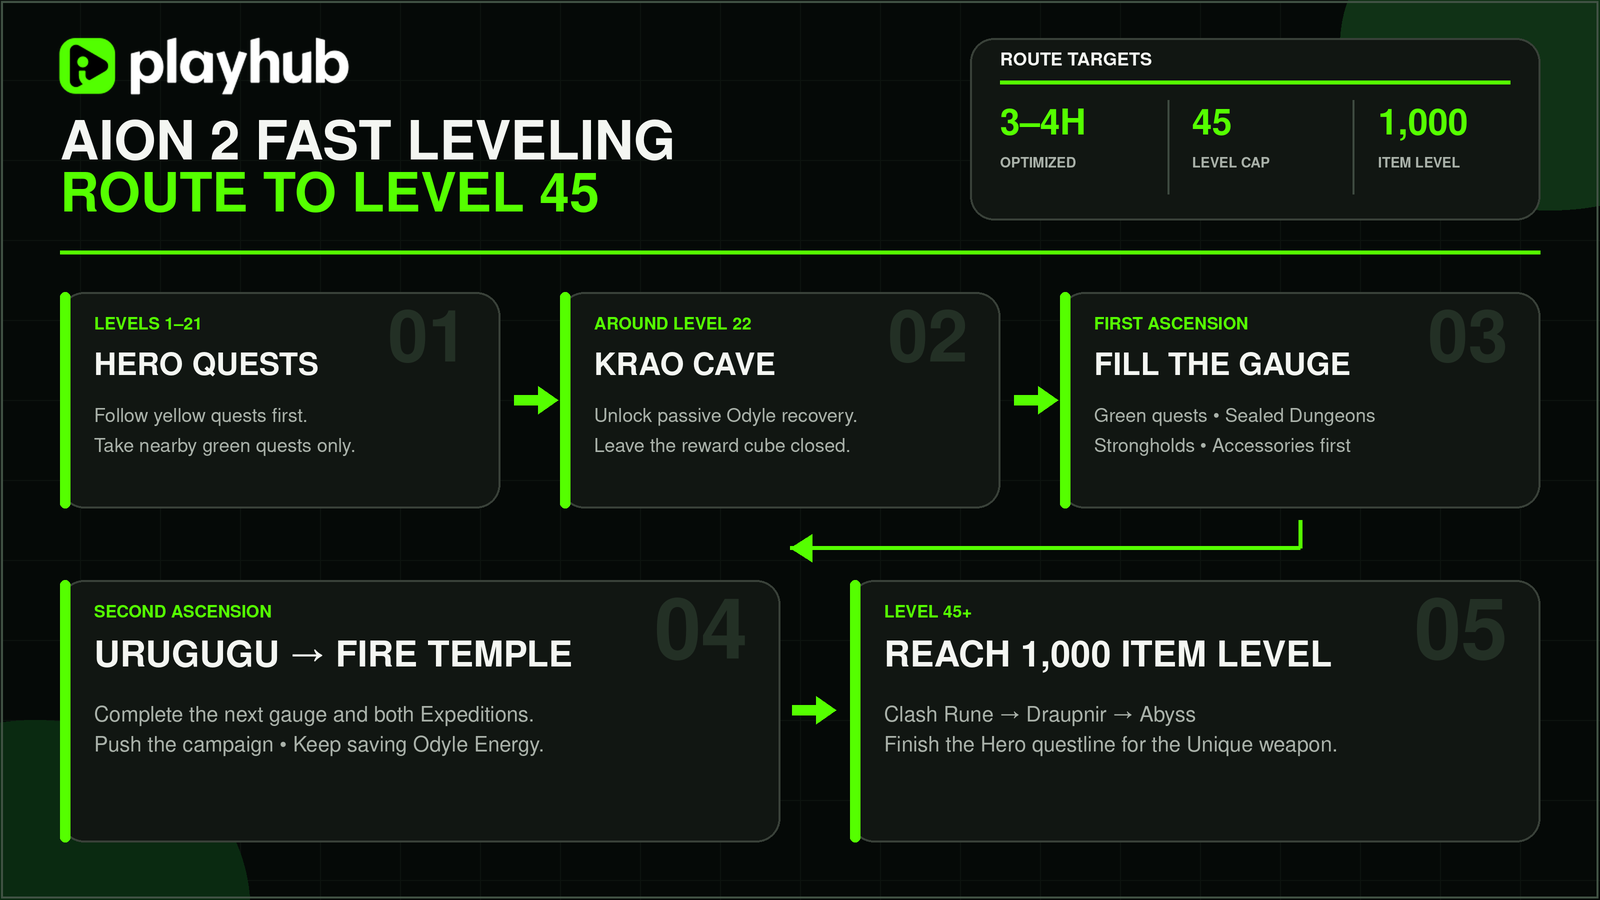
Best AION 2 Leveling Route
I like to divide the journey into phases - this way the route is clear even if NC adjusts XP or quest requirements at or post-launch. Here’s the route that focuses on reaching 45 asap and without wasting Odyle and ench mats:
|
Stage |
Main Objective |
Important Content |
|---|---|---|
|
Levels 1–21 |
Follow yellow Hero quests |
Skills, Daevanion, efficient green quests |
|
Around level 22 |
Unlock Expeditions and Odyle recovery |
Krao Cave Exploration |
|
First Ascension |
Fill the first Ascension gauge |
Green quests, Sealed Dungeons, Strongholds |
|
Mid-campaign |
Continue yellow quests |
Urugugu Canyon Exploration |
|
Second Ascension |
Fill the second Ascension gauge |
Accessory quests and nearby map activities |
|
Late campaign |
Push directly toward the cap |
Fire Temple Exploration |
|
Level 45 |
Begin endgame preparation |
Dimensional Invasion and Shugo Festival |
|
Post-cap campaign |
Meet Item Level requirements |
Draupnir, Spacetime Rift, and the Abyss |
Levels 1–21: Yellow Quests Grind
Yellow Hero quests form the main leveling route, and they’re what you’re going to be doing a lot. Follow them unless the campaign requires extra Ascension progress - random mob grinding is almost useless compared with generous campaign experience rewards.
Green quests are optional during this opening stretch. I only take them when the objective is near the yellow route. Completing a five-minute detour for one small reward slows everything down. Don't enhance gear or collect feathers for leveling power just yet. Neither is necessary - just spend the points provided by quests on your skills and Daevanion progression.
Stigmas become another priority once they unlock. Make sure to keep your setup updated as new choices appear - an improved rotation saves more time than upgrading equipment you’ll stop using in a couple of minutes anyways.
Around Level 22: Unlock Odyle Energy Recovery
Your first Expedition unlocks on level 22ish. Reaching this point activates passive Odyle Energy recovery - from this point on, Odyle accumulates while you play or remain offline. Odyle Energy opens the reward cubes appearing after Expedition, Transcendence, and Sanctuary clears. That makes it one of your most valuable early resources.
The campaign gets you to Krao Cave as your first Exploration Expedition. Clear the dungeon to move the story forward, but do not open the reward cube afterward to not waste your Odyle Energy. Exploration rewards are way weaker than level-45 Conquest rewards, so saving your energy gives you more chances at stronger endgame equipment. Krao Cave is soloable in Exploration mode, but you can also enter it with other players if you like.
First Ascension: Fill the Gauge
The campaign eventually reaches its first Ascension checkpoint. Your level gauge should sit near 85% if you mostly followed yellow quests. There are three activities that increase Ascension progress:
-
Green optional quests
-
Sealed Dungeons
-
Strongholds
Each completed activity provides roughly 3% at this stage. Starting near 85% means you need approximately five completions. Any green quests completed earlier reduce that number.
At this point, you should try to prioritize quests rewarding accessories. Later Expeditions have steep Item Level requirements, and accessories fill important equipment slots, so grabbing the right rewards now prevents extra farming later. Once the gauge reaches 100%, finish the Ascension quest, then return to the main campaign.
Urugugu Canyon and the Second Ascension
Urugugu Canyon is the second Exploration Expedition on the campaign route - complete it when the story sends you there. Once again, leave its reward cube unopened. The second Ascension checkpoint follows this part of the campaign, a minimal yellow-quest route usually reaches it with approximately 81% progress.
At this stage, each green quest, Sealed Dungeon, or Stronghold adds roughly 4%. You will need around five extra activities completed again. Choose accessory quests or the nearest objectives whenever possible. This is also a good moment to clear mandatory content. Every Sealed Dungeon and Stronghold eventually matters, so completing nearby ones now saves a return trip after level 45.
Fire Temple and the Final Push to Level 45
After the second Ascension, the remaining leveling route asks you to continue following yellow quests and complete Fire Temple when it unlocks. Fire Temple is the third Exploration Expedition used during leveling, skip its reward cube too. The main exception is players specifically chasing its PvP weapon.
Even then, I would save the Odyle for Conquest Expeditions - they just provide much stronger progression gear after level 45. One temporary leveling weapon rarely justifies reducing those reward attempts.
You should reach level 45 before finishing the complete Hero questline. Do not stop when the experience bar disappears. The remaining campaign unlocks the Abyss and awards a Unique weapon.
Should You Enhance Gear While Leveling?
This fast route does not require equipment enhancement before level 45. The campaign provides enough fresh gear, and accessories and the Clash Rune solve later requirements. Instead, focus your resources on this priority order:
-
Level your active skills.
-
Spend available Daevanion points.
-
Equip and improve useful Stigmas.
-
Replace outdated equipment through quests.
-
Prioritize getting accessories from green quests.
It’s generally advised to avoid enhancing leveling gear since it may waste materials on items replaced immediately after clearing Draupnir. The same rule applies after completing the campaign. Finish your one-time progression first. Then invest once you know which equipment supports the next dungeon tier.
What to Do After Reaching Level 45
Level 45 is not the end of the campaign. It changes your priorities from experience toward Item Level and permanent progression.
Start Dimensional Invasion and Shugo Festival
Dimensional Invasion and Shugo Festival become relevant at level 45. If you saved Shugo Keys while leveling, this is where you should start using them.
These activities go into your early endgame progression. Complete them before spending resources on random upgrades - their rewards will replace equipment you were considering enhancing so quick.
Equip the Clash Rune
One of your newly available green quests awards a Clash Rune box - make sure to equip the rune immediately. The Clash Rune improves PvE damage and occupies the Rune equipment slot. More importantly, it provides a noticeable Item Level increase. That makes it essential for the upcoming Draupnir gate.
Clear the Opposing Faction’s Map
Your faction’s map does not contain every required Sealed Dungeon and Stronghold. Use an open Spacetime Rift to visit the opposing faction’s region, just make sure to pick up the Spacetime Rift green quest before entering. You only receive one hour on the other side. New players will probably need several trips to finish everything.
The Global route places players in PvE mode after crossing, so you don’t need to fight the opposing faction while completing these objectives. Prioritize Sealed Dungeons, Strongholds, and accessory quests since their completion raises progression and helps close the remaining Item Level gap.
Meet the Draupnir Item Level Requirement
Draupnir is the first serious wall after reaching level 45. Current Global data places its entry requirement at 1,000 Item Level.
If you fall short, just complete missing Sealed Dungeons, Strongholds, and green quests. Make sure the Clash Rune is equipped. Accessory rewards matter heavily here. Empty or outdated jewelry slots can hold your entire build just below the required level. This is why the route prioritizes accessories during both Ascension stops. Clear Draupnir solo or with a group once you can; that’s where continuing to save your Odyle instead of opening the Exploration reward cube matters.
Enter the Abyss and Finish the Main Story
Completing Draupnir sends the Hero questline toward the Abyss completion. The Global Abyss entrance has a 1,000 Item Level requirement.
Complete the required Abyss mission to finish the launch campaign. The final quest awards a Unique weapon. Only then would I begin planning serious enhancements.
AION 2 Fast Leveling Checklist
If you’re looking for a quick reference list to follow during leveling, use the following route:
-
Follow yellow Hero quests whenever they remain available.
-
Reach the first Expedition around level 22 and complete it.
-
Spend skill, Stigma, and Daevanion points whenever you get them.
-
Fill Ascension gauges through nearby activities.
-
Choose accessory rewards whenever possible.
-
Clear Krao Cave, Urugugu Canyon, and Fire Temple, but do not open their Odyle Energy reward cubes.
-
Save Shugo Keys until level 45.
-
Equip the Clash Rune before Draupnir.
-
Clear both factions’ Sealed Dungeons and Strongholds.
-
Reach 1,000 Item Level for Draupnir and the Abyss.
-
Finish the Abyss mission for your Unique weapon.