Rocket League Best Settings TL;DR:
-
Disable Camera Shake and Vertical Sync.
-
Change the Boost button binding if you can’t press Boost and Jump at the same time.
-
Always pick the default monitor resolution and FPS that matches the refresh rate.
-
Camera FOV, distance, angle, and height are all very important settings and should not be left on default.
-
Enable CSTS Input Buffer if you’re experiencing lags or freezes from a poor internet connection.
Struggling in your current rank? Buy Rocket League Rank boost at Playhub and reach any rank you want!
Training Settings

This tab is only available when you’re actually in the Free Play Training mode. If you’re trying to practice some skills, there are a few settings that you can mess around with to make sure you’re doing it right.
-
Game Speed - 100%
-
Controls Display - Always Visible
-
Disable Goal Reset - Off
-
Boost Options - Standard
-
Boost Recharge Delay - 1.5 (active if Boost Options is set to Auto-Refill)
The most important setting here is Boost options. If you want to practice different aerial moves and stuff, having unlimited boost is fine, but if you want to get used to how much boost you’re given during a real match, it’s best to set it to Standard. The Goal Reset option resets the position of the ball to the center of the arena, just like it happens in a real match. You can turn that off if you don’t need it.
If you’re trying to practice some moves and you can’t quite get it right, you could lower the game speed to enable a slow-mo that should make it easier for you to practice.
Gameplay Settings
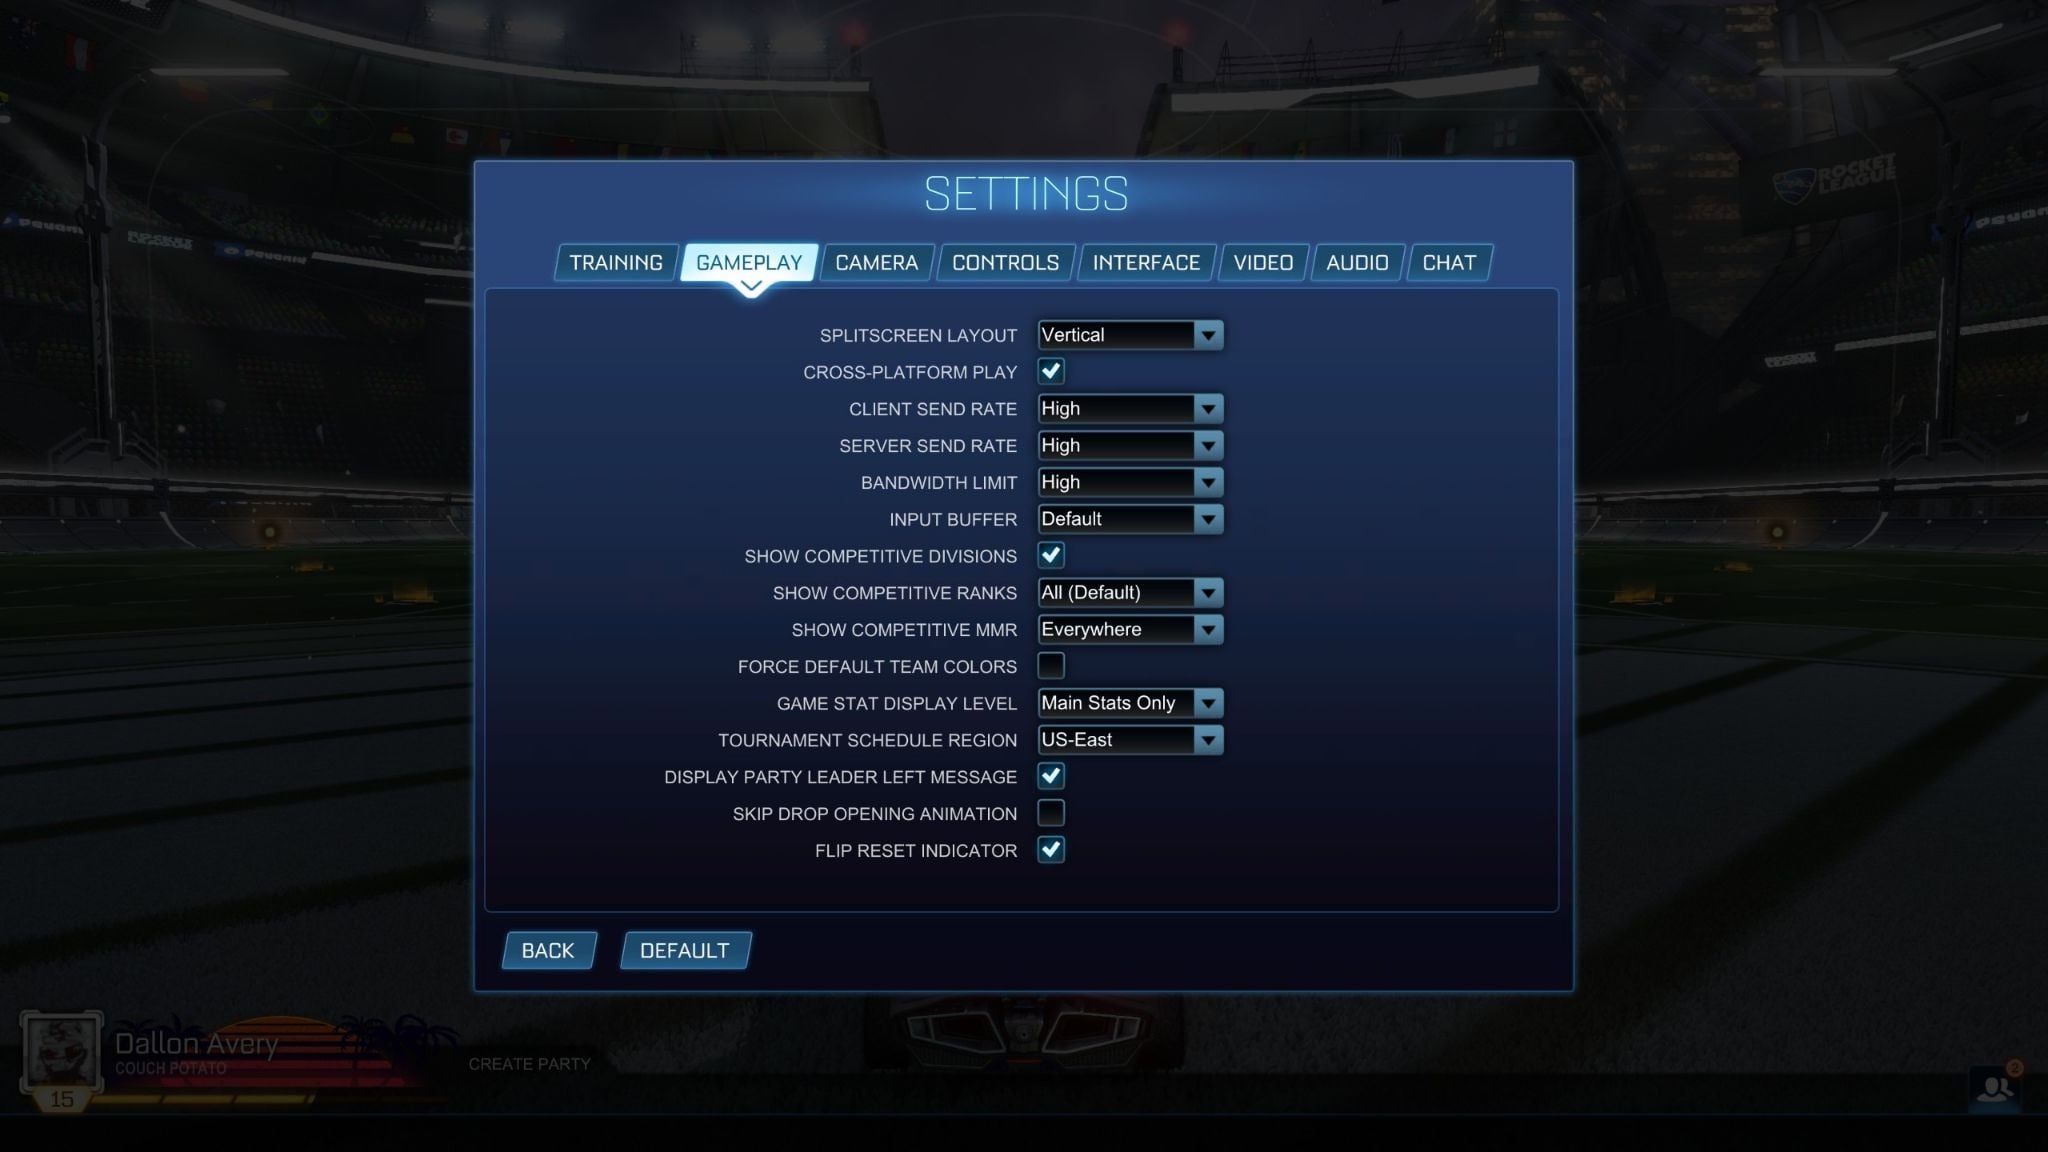
There aren’t many important settings in this tab, and I prefer leaving most of them on default. Also, if you don’t know what the setting changes are, hover over available options, and you’ll see a description show up at the bottom of the settings window.
-
Splitscreen Layout - Vertical
-
Cross-Platform Play - On
-
Client Send Rate - High
-
Server Send Rate - High
-
Bandwidth Limit - High
-
Input Buffer - Default
-
Show Competitive Divisions - On
-
Show Competitive Ranks - All (Default)
-
Show Competitive MMR - Everywhere
-
Force Default Team Colors - Off
-
Game Stat Display Level - Main Stats Only
-
Tournament Schedule Region - US-East
-
Display Party Leader Left Message - On
-
Skip Drop Opening Animation - Off
-
Flip Reset Indicator - On
If you have a bad internet connection, try switching the Input Buffer to CSTS. CSTS means Continuous Sim Time Scaling. In simple terms, CSTS tries to keep your input buffer more stable during online play. That can help if your connection has jitter, small spikes, or uneven packet timing.
Also, there’s a 24-hour lockdown for selecting the Tournament Schedule Region. If you intend to participate in or follow tournaments from different regions, you have to wait 24 hours before changing.
Camera Settings
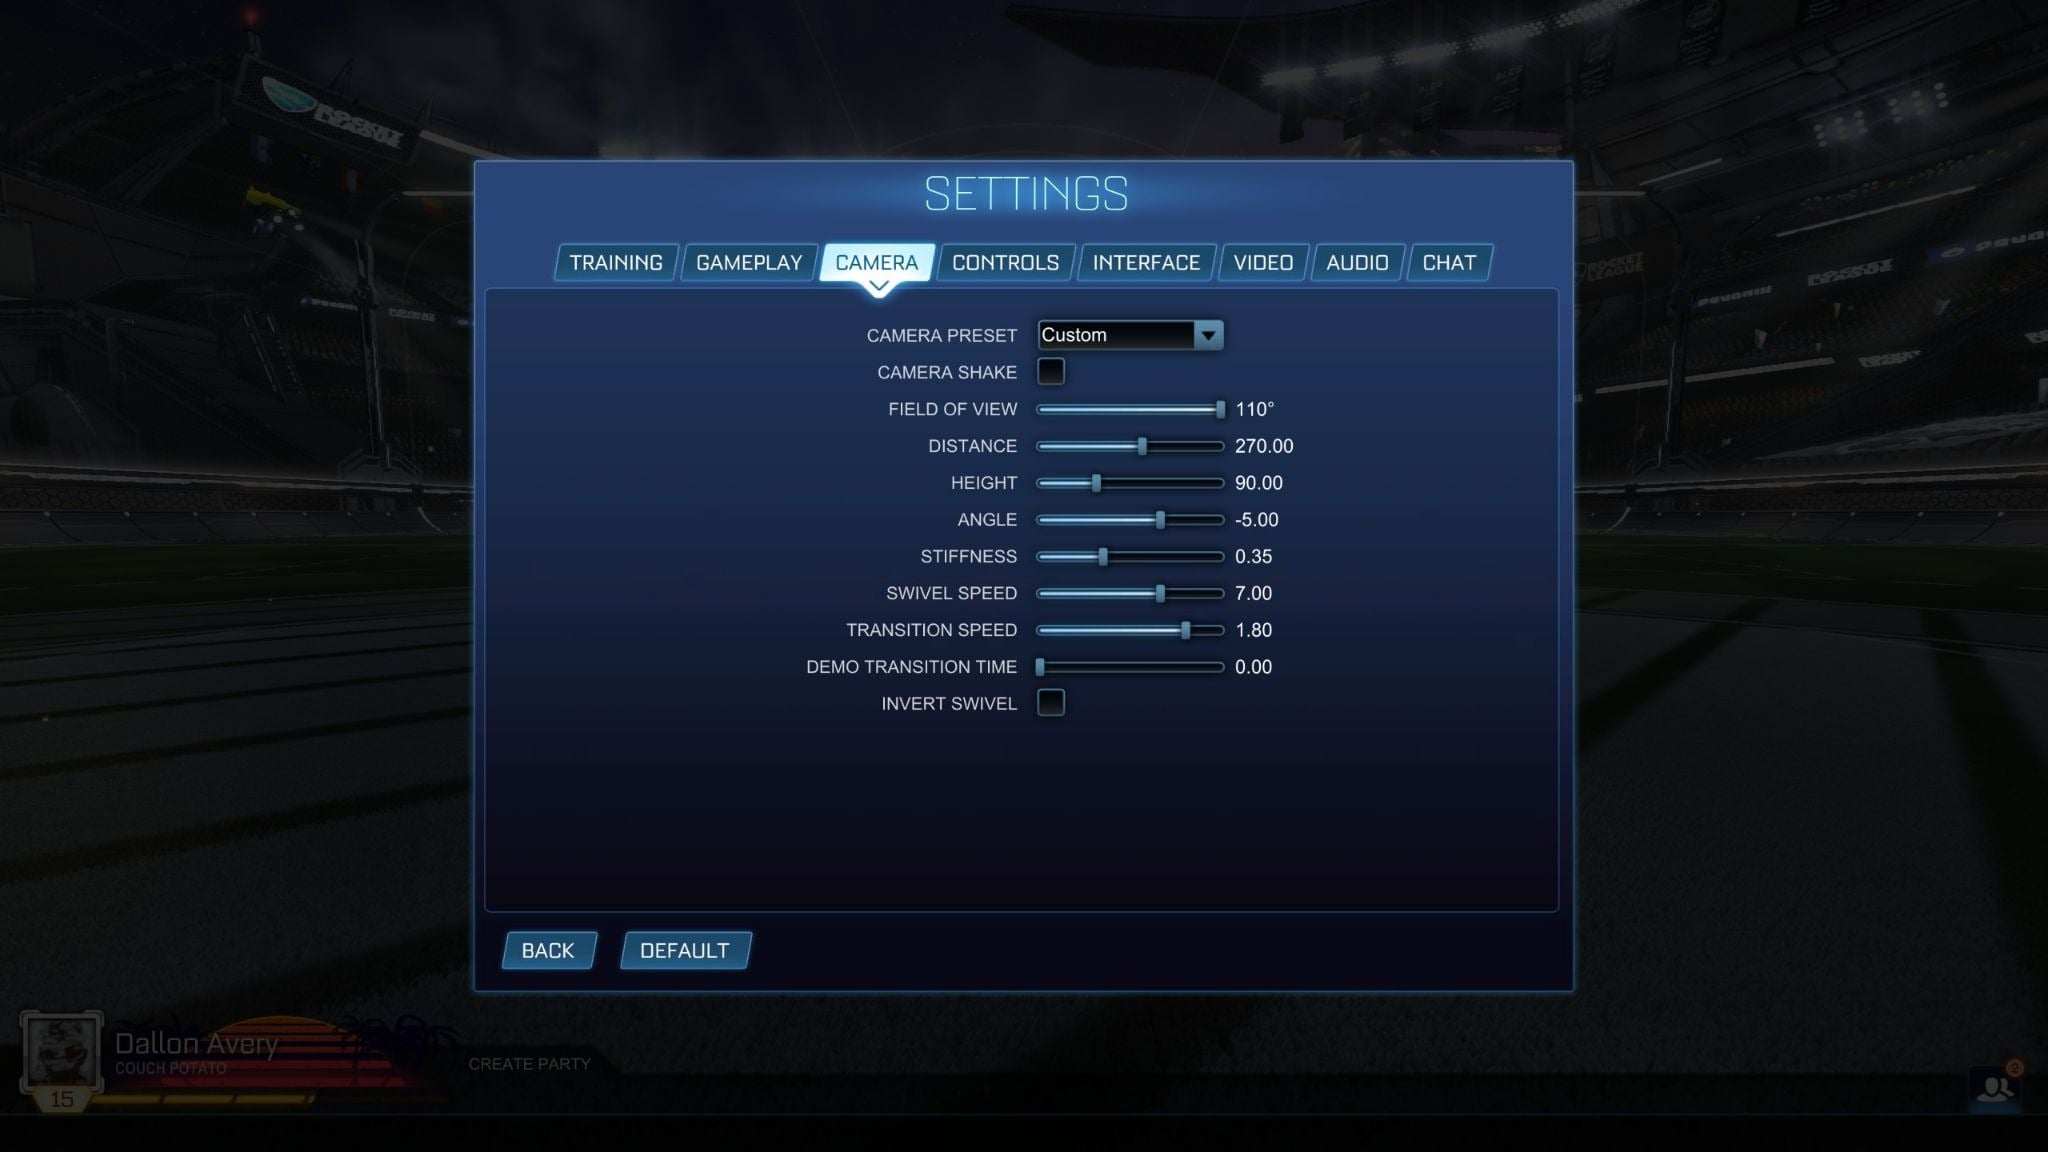
This is one of the most important tabs for settings.
-
Camera Preset - Custom
-
Camera Shake - Off
-
Field of View - 110°
-
Distance - 270.00
-
Height - 90.00
-
Angle - -5.00
-
Stiffness - 0.35
-
Swivel Speed - 7.00
-
Transition Speed - 1.80
-
Demo Transition Time - 0.00
-
Invert Swivel - Off
Let me go over some of these in more detail. Camera Shake should never be on. It just adds unnecessary screen shake. Anytime you jump, dribble, or make contact with the ball, your screen shakes. It just makes the game harder to play.
110 FOV is basically universally decided on. This is the best FOV in the game. You will occasionally see 109, and even more rarely 108, but 109 to 110 is the range. Honestly, just leave it at 110. The default 90 is just unplayable.
Camera distance is a bit of a loose setting when it comes to acceptable values, but it's never the default one. The range most players work with is usually 260 to 270, and 270 is by far the most common. It gives you a lot of field of view while still keeping good control of your car.
Note: the rest of the camera settings are tuned for a camera distance of 270. If you’re choosing a different value, you’ll need to adjust the rest accordingly.
Height is also split between 90 and 100 (default). Those are the two real options now. 110 is no longer really in the mix. A lot of players are on 90 now, and it has become a go-to setting. Height and angle depend on each other. If you use 90 height, you want to use -5 or -4. If you use 100 height, you want to use -3. For a 90 height, -5 is a very good option and feels really good.
Stiffness is probably the most important setting for how your camera is going to feel. Lower stiffness lets the car escape the camera a little bit at speed, while higher stiffness keeps it more locked in. Basically, you see the effect of Stiffness when you use the boost. At high Stiffness (1), when you hit boost, the car goes away from the camera, creating an effect of speed increase. If you set it to 0, you will see no difference when using boost. The camera will follow the car at the same distance as always, which sometimes can be confusing. .35 is a really good middle ground. It does not feel too disconnected, but it also does not feel stuck to you either.
Most of these are Rocket League competitive settings, so if you’re a new player, getting used to them instead of the defaults will help you get better with time compared to those who do not change anything.
Swivel Speed is not super important, but 7 is a really good middle ground. You want to be able to snap around quickly and get information, but still have control. You do not want it to be pointlessly fast.
Transition Speed is another setting with a bit more leeway, but 1.8 feels really good. It's basically how fast or floaty the camera switches from side to side. It gives you information a little bit quicker and also makes the game feel smoother at the same time. 1.2 to 1.8 is a good range to play around with, and 1.8 is the high end of that.
Controls
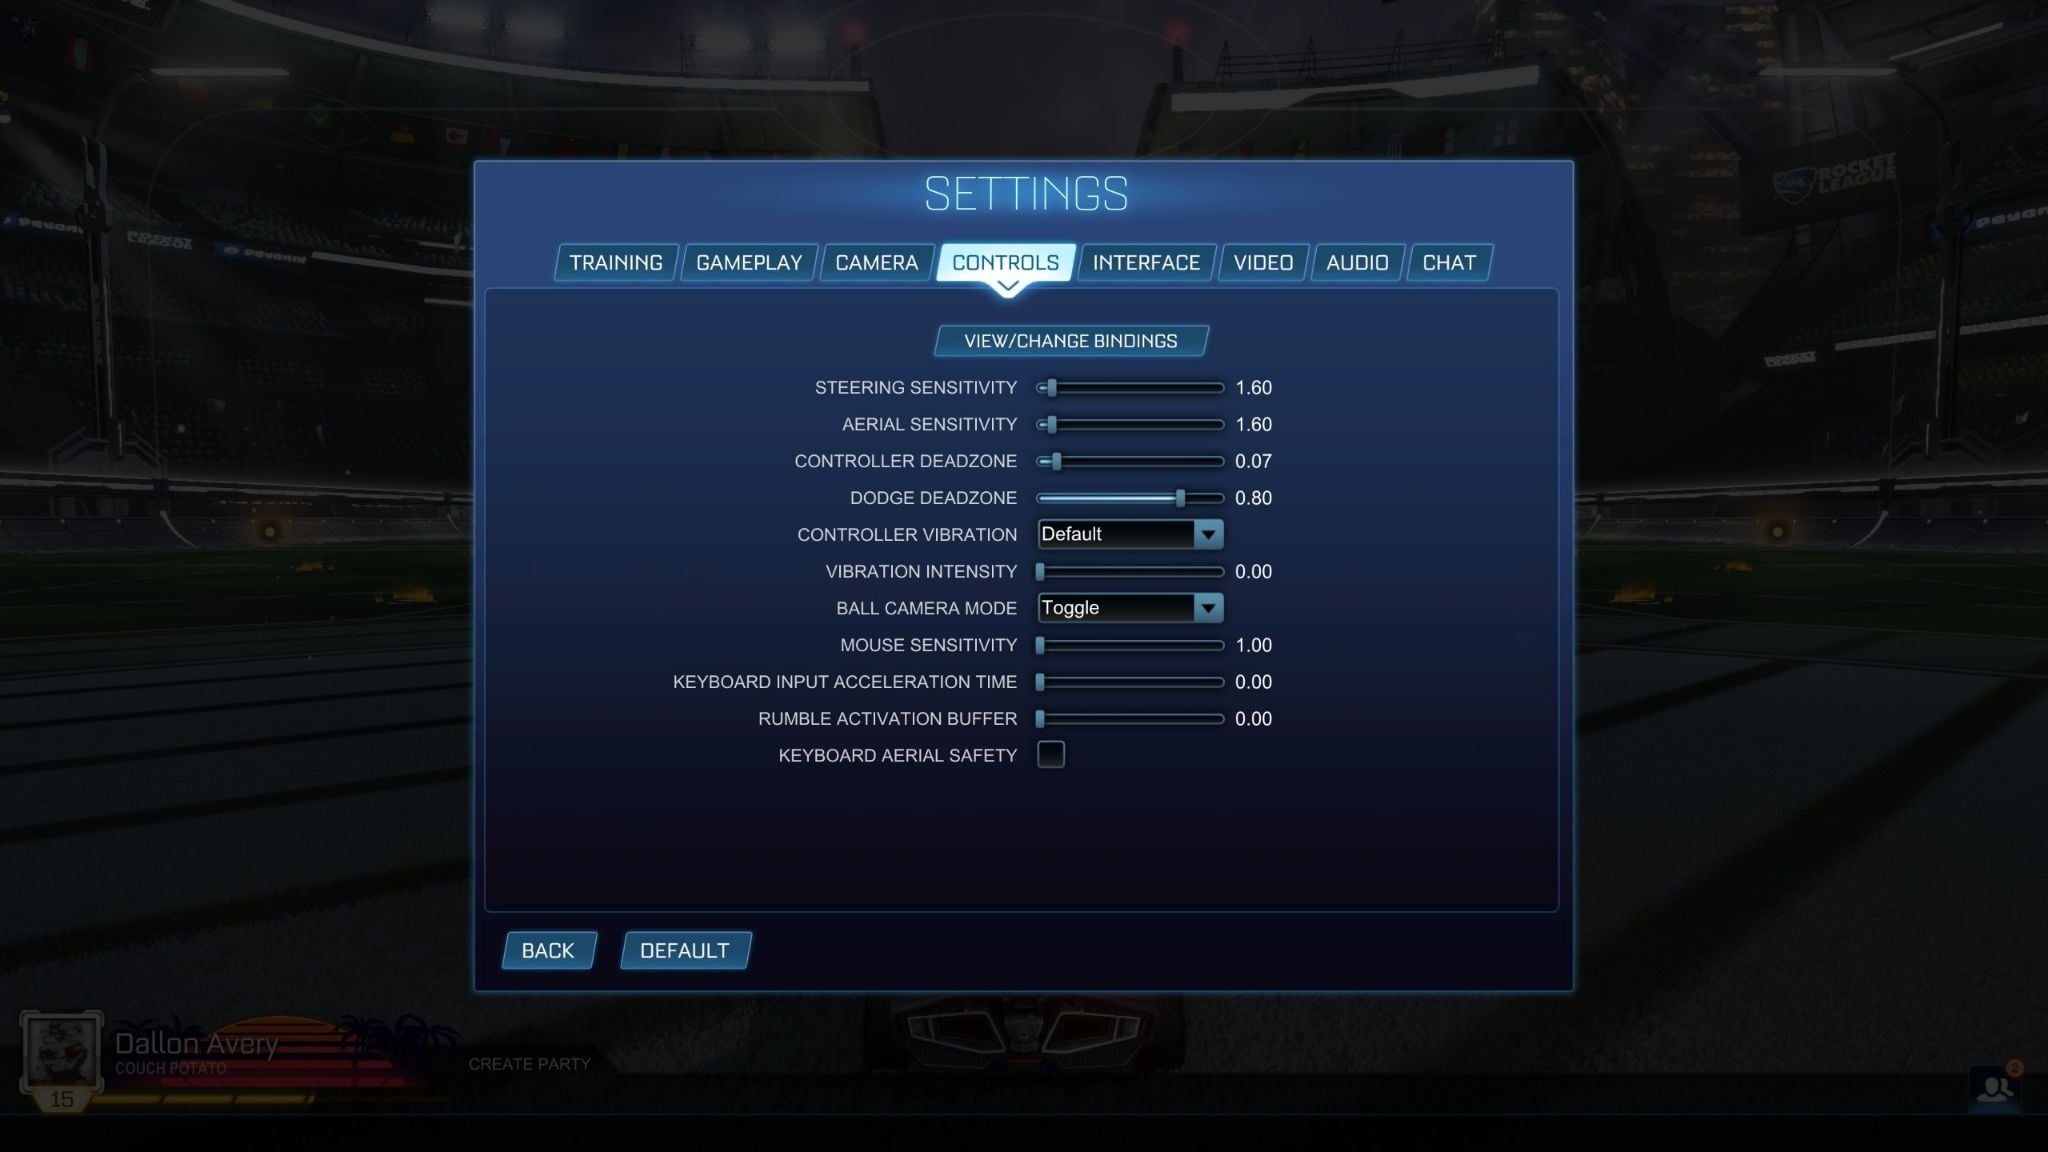
Controls settings are always very personalized. I could give you the values used by most pro players, but you do have to find your own values you’re comfortable with.
Tip: To get the exact value for a setting, use the D-Pad on your controller or the arrows on the keypad to increase or decrease the value by 1 step.
-
Steering Sensitivity - 1.60
-
Aerial Sensitivity - 1.60
-
Controller Deadzone - 0.07
-
Dodge Deadzone - 0.80
-
Controller Vibration - Default
-
Vibration Intensity - 0.00
-
Ball Camera Mode - Toggle
-
Mouse Sensitivity - 1.00
-
Keyboard Input Acceleration Time - 0.00
-
Rumble Activation Buffer - 0.00
-
Keyboard Aerial Safety - Off
Steering Sensitivity and Aerial Sensitivity have a pretty small range where players find their comfortable value. Most players right now are using anywhere between 1.3 and up to 1.75. If you want a consistent, solid range and you're not someone who strives for super high sense, 1.3 to 1.6 for both settings is perfect. I've been liking 0 or 1.6 here for both of these sensitivities. 1.5 is also usable, but I really like 1.6.
Controller dead zone 0.05 to 0.07 is perfect. I recommend 0.07. 0.07 is a solid starting point and sits in the middle of the 0.05–0.15 pro range. If you have stick drift, go up by 0.01 increments until the ghost input disappears. Dodge Deadzone range is anywhere between .6 and .8 is fine. think anything lower is kind of hurting yourself. You have some Middle Eastern players who like to use the low dodge dead zone. There are some benefits to that, but there are a lot of downsides to it if you're not careful and you're not extremely precise with your flips. So, I recommend 0.8.
Control Bindings
These are completely up to you, but if there’s one piece of advice I can give, it's that if you’re having problems pressing boost and jump buttons at the same time on the controller, remap the boost to R1/RB. That is a big long-term improvement, especially for players who cannot fat-finger both inputs comfortably.
I also think Powerslide and air roll should be on the same button. My recommendation is L1/LB for air roll and power slide because it helps a lot with recoveries, landing, and overall smoothness. If I air roll on the way down from an aerial, I want to be able to land and power slide out of it cleanly. Once comfortable with the single air roll, map Air Roll Left to L1 and Air Roll Right to R1. This unlocks tornado shots, Breezi rolls, and other more advanced moves.
Interface Settings
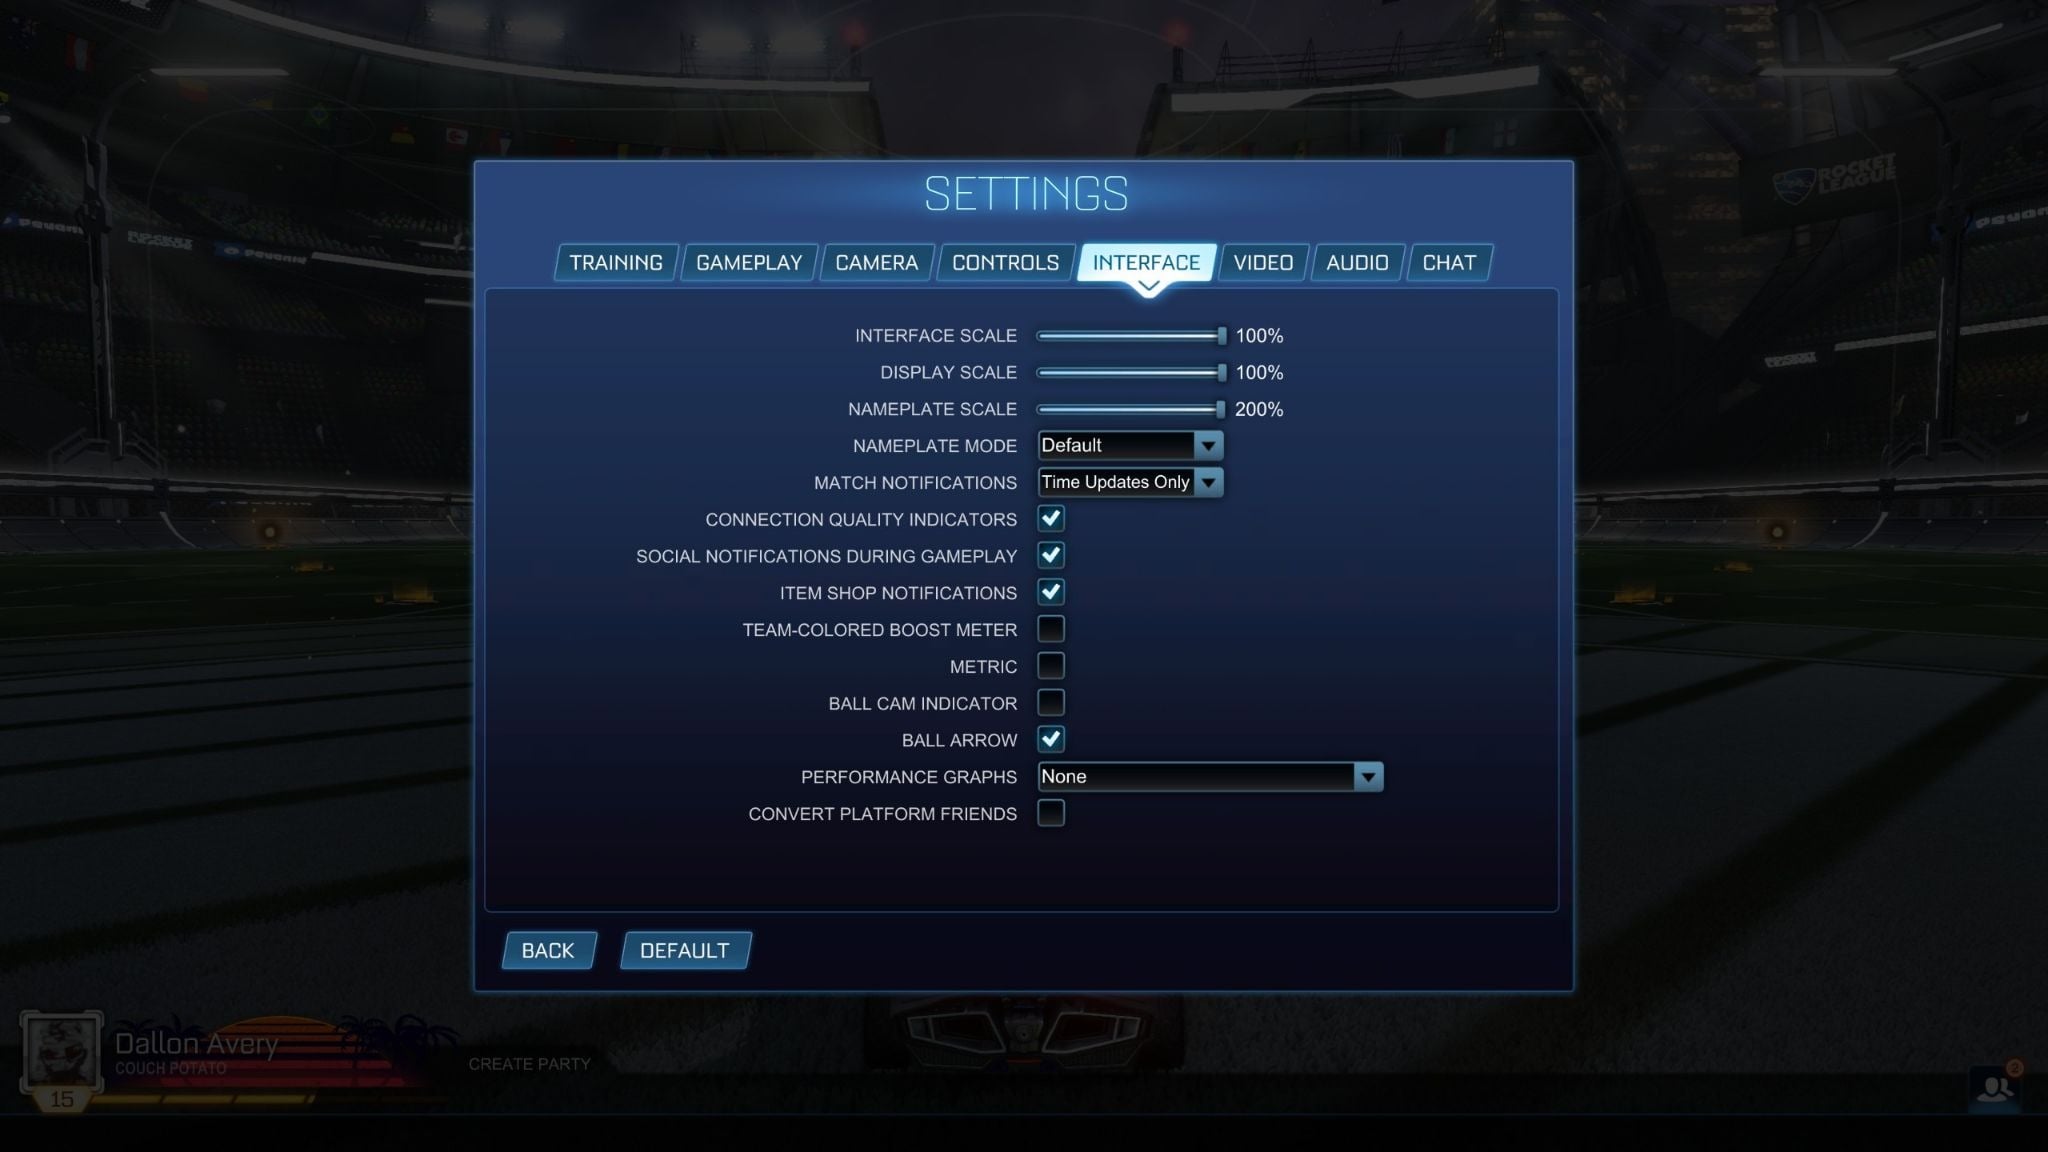
The interface settings are important because they help you process valuable information during a match where all of your focus goes towards your car, the ball, and spatial awareness.
-
Interface Scale - 100%
-
Display Scale - 100%
-
Nameplate Scale - 200%
-
Nameplate Mode - Default
-
Match Notifications - Time Updates Only
-
Connection Quality Indicators - On
-
Social Notifications During Gameplay - On
-
Item Shop Notifications - On
-
Team-Colored Boost Meter - Off
-
Metric - Off
-
Ball Cam Indicator - Off
-
Ball Arrow - On
-
Performance Graphs - None
-
Convert Platform Friends - Off
One of those helpful options is the Ball Arrow that’s always located by your car when enabled. It shows the direction of where the ball is and is just very helpful for spatial awareness. Performance Graphs and Friends Platforms are something that is not important to the game’s outcome, so these things are turned off.
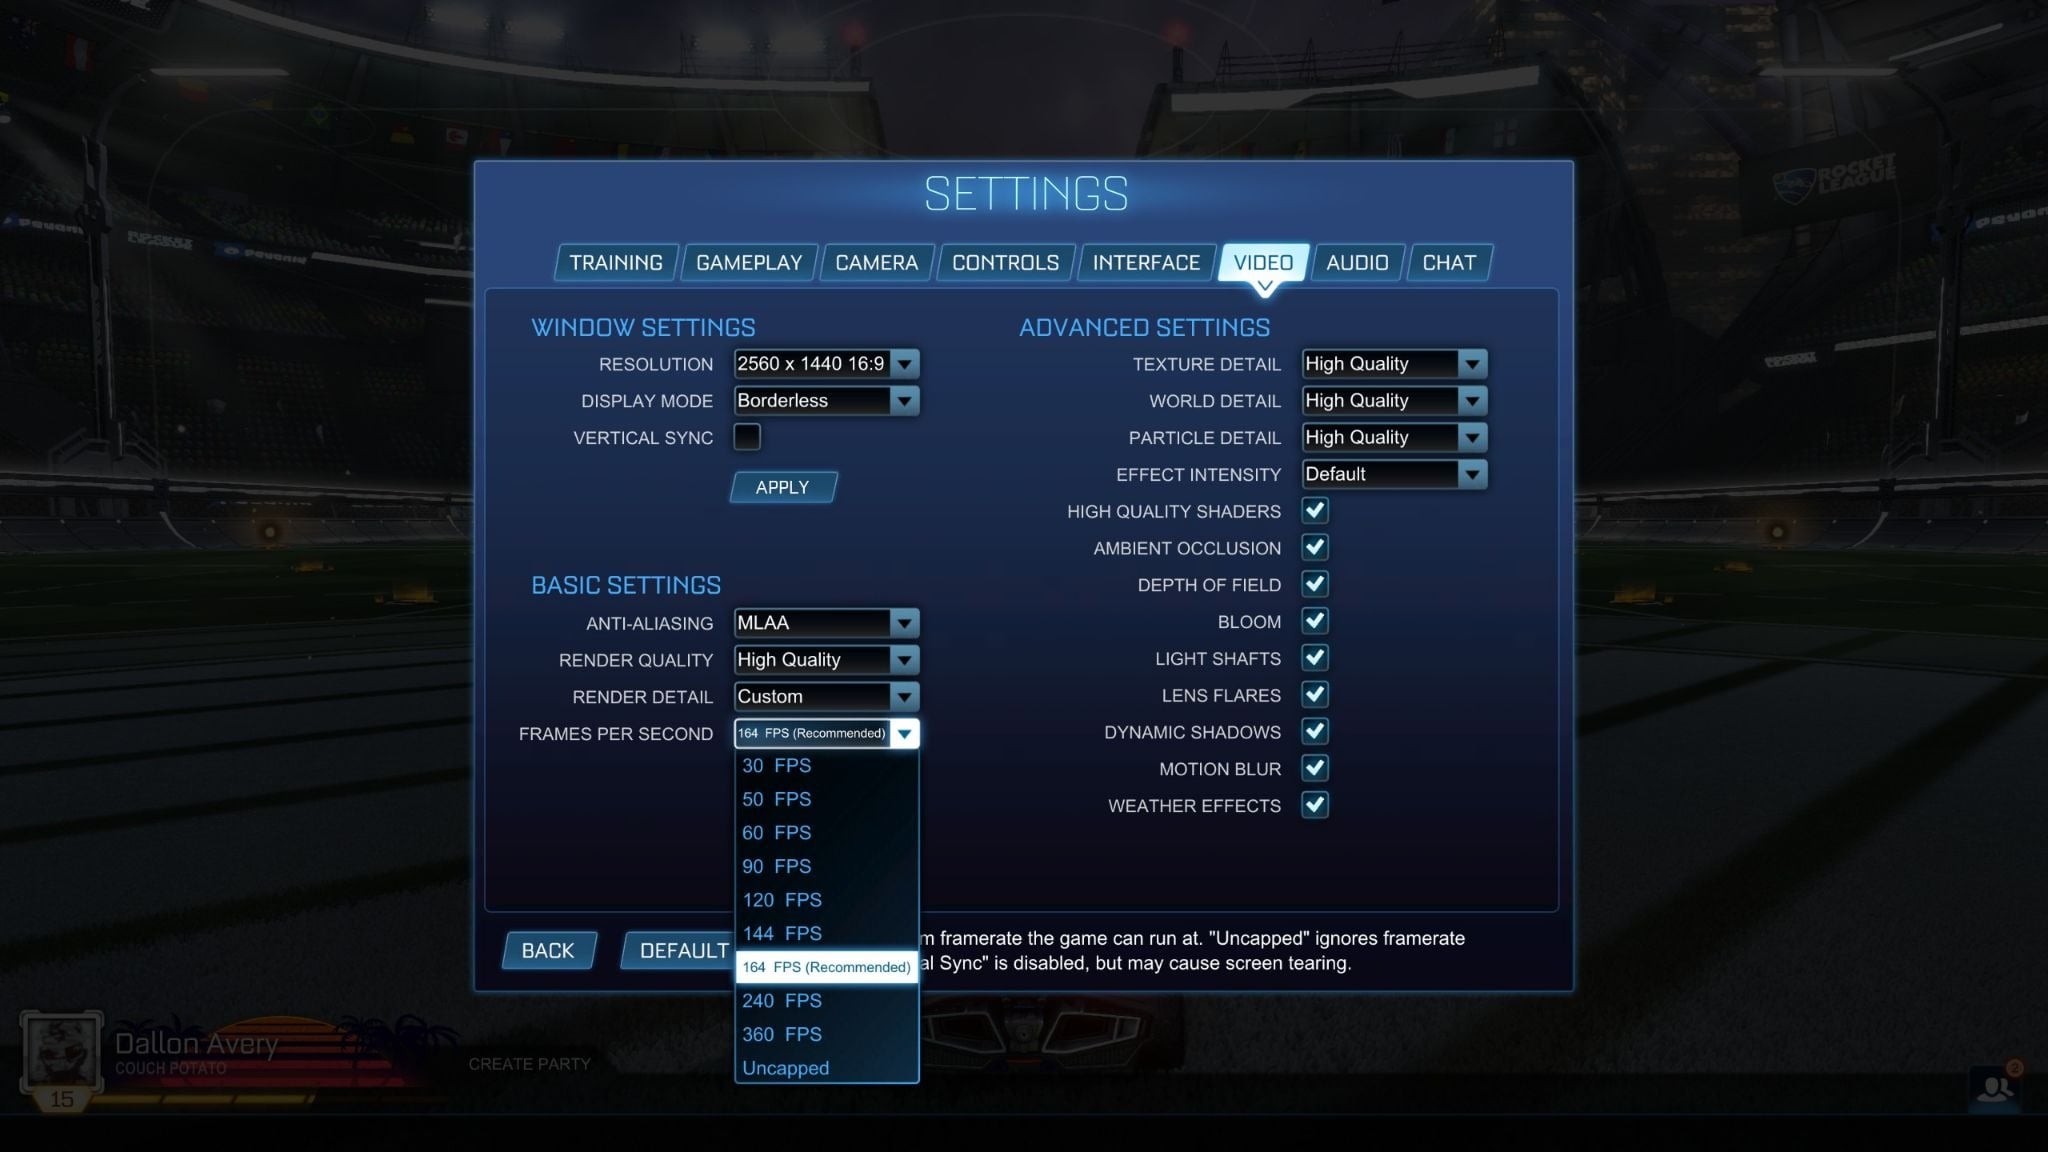
Video Settings
Graphics settings are mostly preferential and should correspond to your PC’s specs, if you’re playing on PC, that is.
-
Resolution - 2560 x 1440 16:9
-
Display Mode - Borderless
-
Vertical Sync - Off
-
Anti-Aliasing - MLAA
-
Render Quality - High Quality
-
Render Detail - Custom
-
Frames Per Second - 164 FPS (Recommended)
-
Texture Detail - High Quality
-
World Detail - High Quality
-
Particle Detail - High Quality
-
Effect Intensity - Default
-
High Quality Shaders - On
-
Ambient Occlusion - On
-
Depth of Field - On
-
Bloom - On
-
Light Shafts - On
-
Lens Flares - On
-
Dynamic Shadows - On
-
Motion Blur - On
-
Weather Effects - On
The one setting that should always be off, regardless of your hardware, is Vertical Sync. It creates an input lag, which is detrimental to everything this game is. The resolution and FPS should be set to your monitor’s default resolution and refresh rate. Display Mode can be set to Borderless or Full Screen, which is technically better but not by much. Full Screen gives the GPU exclusive focus on Rocket League, which means lower display latency than Borderless. Use Borderless only if you need to Alt-Tab often.
Here’s the deal - you want to get as many FPS as possible, hitting your monitor’s refresh rate. To do that, you need to disable everything in the Basic and Advanced settings. Just turn off everything or pick the lowest available setting. There’s going to be a visual difference going from high fidelity to lower fidelity graphics, but that difference isn’t huge, to be honest. But if your PC can run the game at the highest possible refresh rate on the highest settings, you can choose them.
However, even on a high-end rig, keep Bloom, Motion Blur, DoF, and Lens Flares off. The FPS difference is marginal, but the visual clarity gain during aerials and fast ball-tracking is real.
Audio Settings
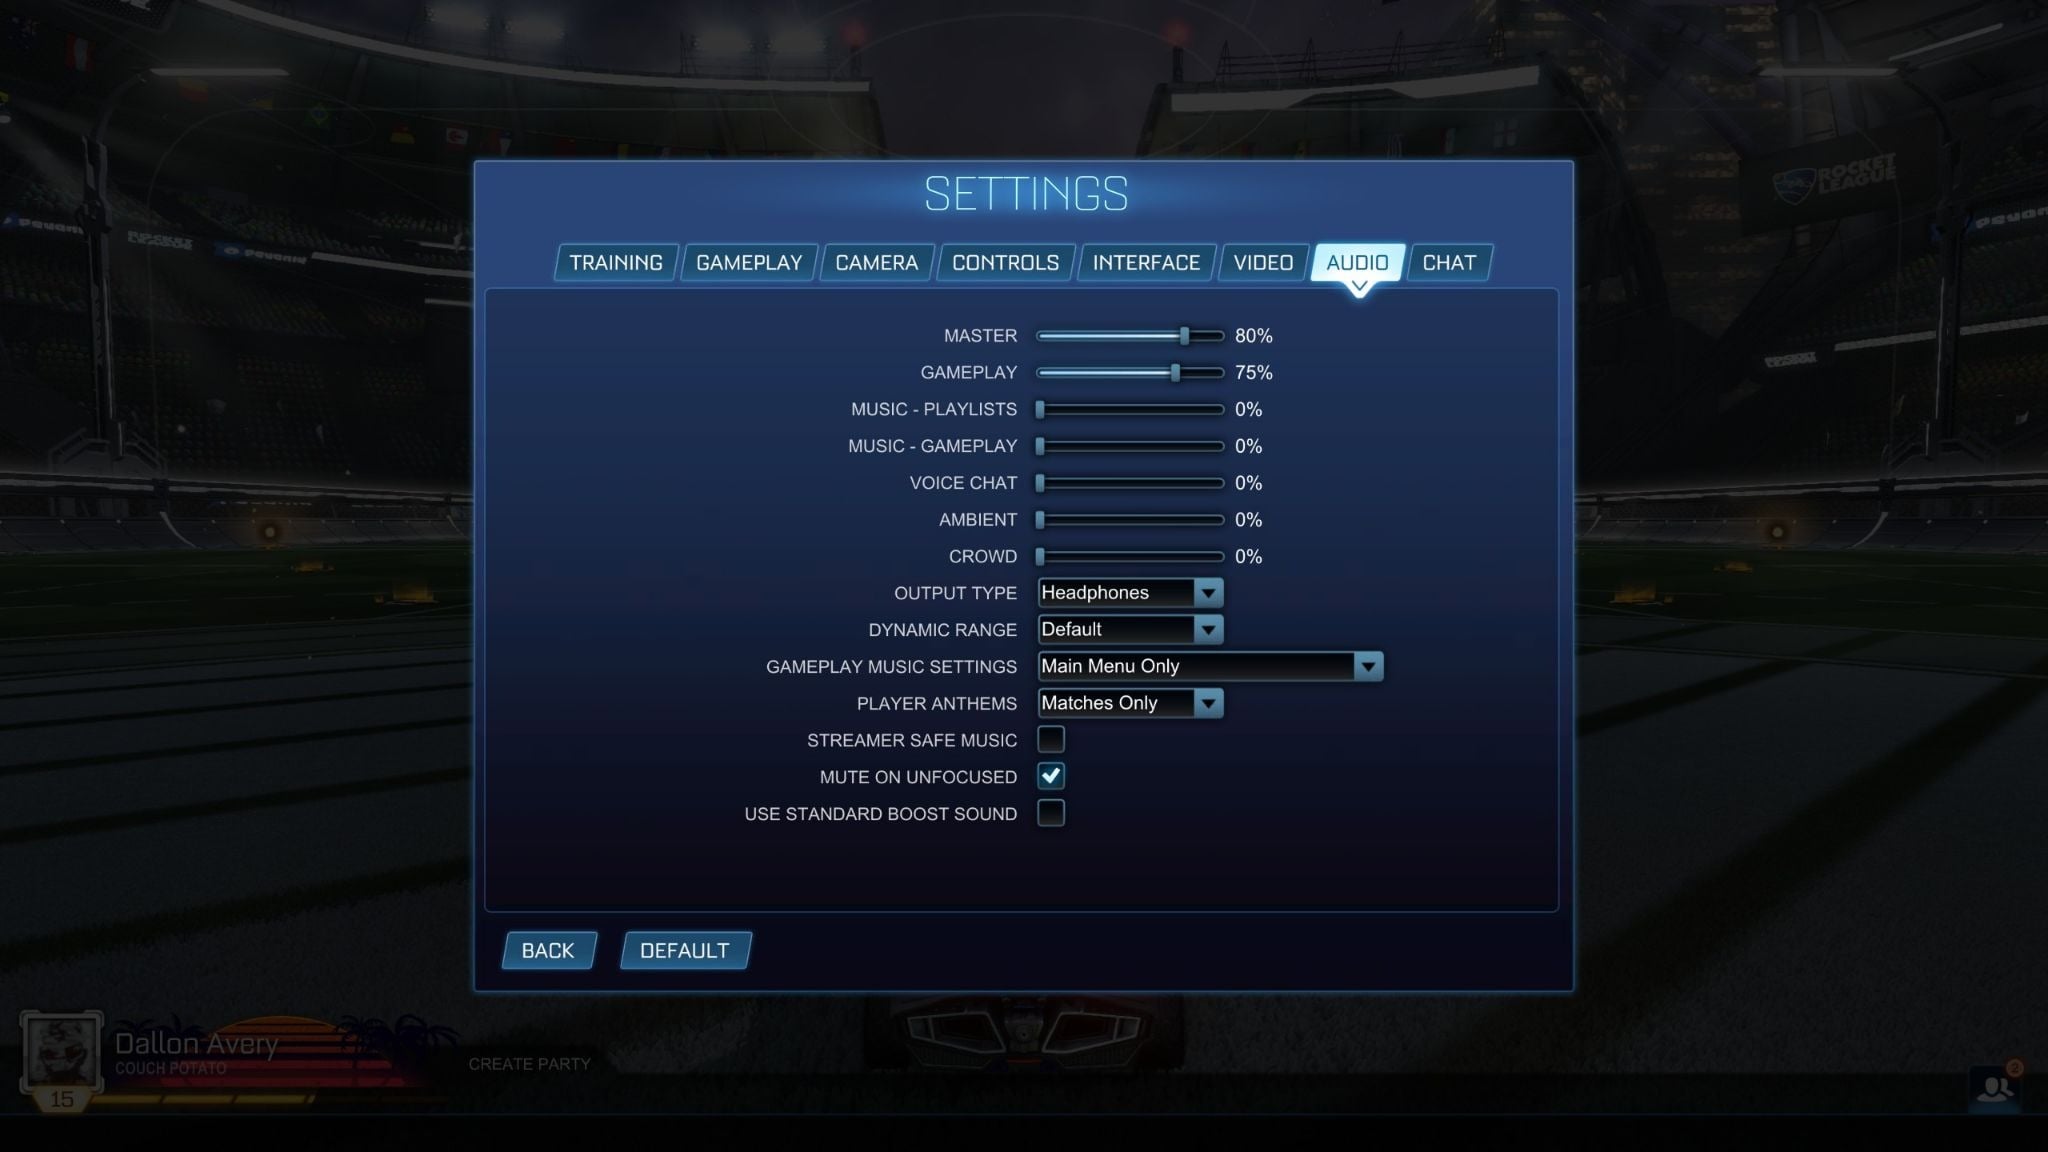
Audio settings are also mostly preferential, but what you’re trying to achieve here is to reduce audio clutter that has nothing to do with the game.
-
Master - 80%
-
Gameplay - 75%
-
Music - Playlists - 0%
-
Music - Gameplay - 0%
-
Voice Chat - 0%
-
Ambient - 0%
-
Crowd - 0%
-
Output Type - Headphones
-
Dynamic Range - Default
-
Gameplay Music Settings - Main Menu Only
-
Player Anthems - Matches Only
-
Streamer Safe Music - Off
-
Mute on Unfocused - On
-
Use Standard Boost Sound - Off
Obviously, you’ll need to pick the master volume and Output Type that suits you. But turning off music, ambient, and crowd volumes will help you focus on the game and not the things around it. Obviously, if you’re playing in public lobbies, you might want to turn on the voice chat volume.
The chat settings tab is missing because it has nothing that can improve your gameplay, so there’s no sense in posting the list of settings for it.
