
Mount Hyjal Raid Guide TL;DR
-
Mount Hyjal is a 25-player raid with five bosses. The first four bosses arrive after eight fixed trash waves each, and Archimonde is the last enemy.
-
Attunement requires Revered reputation with the Keepers of Time and The Vials of Eternity, which sends you to defeat Lady Vashj and Kael'thas Sunstrider.
-
A steady first-clear roster uses three tanks, five or six healers, strong area damage, several reliable interrupts, and at least one Protection Paladin for the ground waves.
-
Every player needs Tears of the Goddess before Archimonde. Without the item or another slow-fall effect, Air Burst is a wipe mechanic.
-
There’s a lot of loot to get - namely, Azgalor drops Tier 6 glove tokens, Archimonde drops Tier 6 helm tokens, and his loot reaches item level 151.
Tired of farming gold in another re-release? You can skip the gold grind entirely and buy WoW Classic Anniversary gold on Playhub. Best prices and quick delivery from verified sellers.
Mount Hyjal Attunement
Mount Hyjal requires completing The Vials of Eternity. The chain is much shorter than the Black Temple attunement, but it requires the final bosses of both Phase 2 raids.
-
Reach level 70 and Revered reputation with the Keepers of Time.
-
Find Soridormi walking around the Caverns of Time and accept The Vials of Eternity.
-
Defeat Lady Vashj in Serpentshrine Cavern and loot Vashj's Vial Remnant.
-
Defeat Kael'thas Sunstrider in Tempest Keep and loot Kael's Vial Remnant.
-
Return both remnants to Soridormi to complete the attunement and unlock Mount Hyjal.
Completed raid attunements are account-wide in TBC Anniversary. Partial quest progress is not, so another character cannot continue from one vial collected by the first character. Completing The Vials of Eternity also opens the Scale of the Sands reputation ring chain.
Mount Hyjal Location
Mount Hyjal is accessed through the Caverns of Time in eastern Tanaris. Enter the cavern, ride down the central spiral, and follow the forested northern path marked by Night Elf glaive throwers. The raid portal stands at the end of that path.
/way Tanaris 64.8 50.0 Caverns of Time
Gadgetzan is the closest flight path. Unlike Black Temple, Mount Hyjal is entirely linear: the raid begins at Jaina Proudmoore's Alliance base, moves to Thrall's Horde base after Anetheron, and finishes near Nordrassil against Archimonde.
Mount Hyjal Raid Composition and Preparation
Mount Hyjal is designed for 25 players. A safe progression setup looks like this:
-
3 tanks: one boss tank, one Protection Paladin for large ground packs, and one off-tank for Abominations, Infernals, Towering Infernals, or Lesser Doomguards.
-
5-6 healers: six gives the raid more coverage during Anetheron's Carrion Swarm, Azgalor's silences, and early Archimonde attempts.
-
16-17 DPS: favor strong area damage without sacrificing interrupts, decurses, and ranged damage for flying enemies.
Several class tools have an unusually high value specifically in Mount Hyjal:
|
Assignment |
Why It’s Used |
|---|---|
|
Protection Paladin ground-wave tank |
Easily collects Ghouls and Crypt Fiends for controlled area damage |
|
Priests |
Shackle Undead controls dangerous Abominations, Banshees, Crypt Fiends, and Ghouls |
|
Warlocks |
Banish separates Giant Infernals during the final wave sets |
|
Mages and Druids |
Remove Banshee Curse and Archimonde's Grip of the Legion |
|
Hunters |
Misdirect bosses and loose adds, then handle Gargoyles and Frost Wyrms at range |
|
Shamans |
Tremor Totem is one of the safest answers to Archimonde's Fear |
|
Warrior, Rogue, or Hunter |
Mortal Strike, Wound Poison, or Aimed Shot reduces Anetheron's Vampiric Aura healing |
At least one Shaman will be a must-have in every group for Archimonde. Spread Mages and Druids across the raid so every group has a nearby decurser, and assign every Necromancer an interrupt before starting pulls.
Mount Hyjal Consumables Checklist
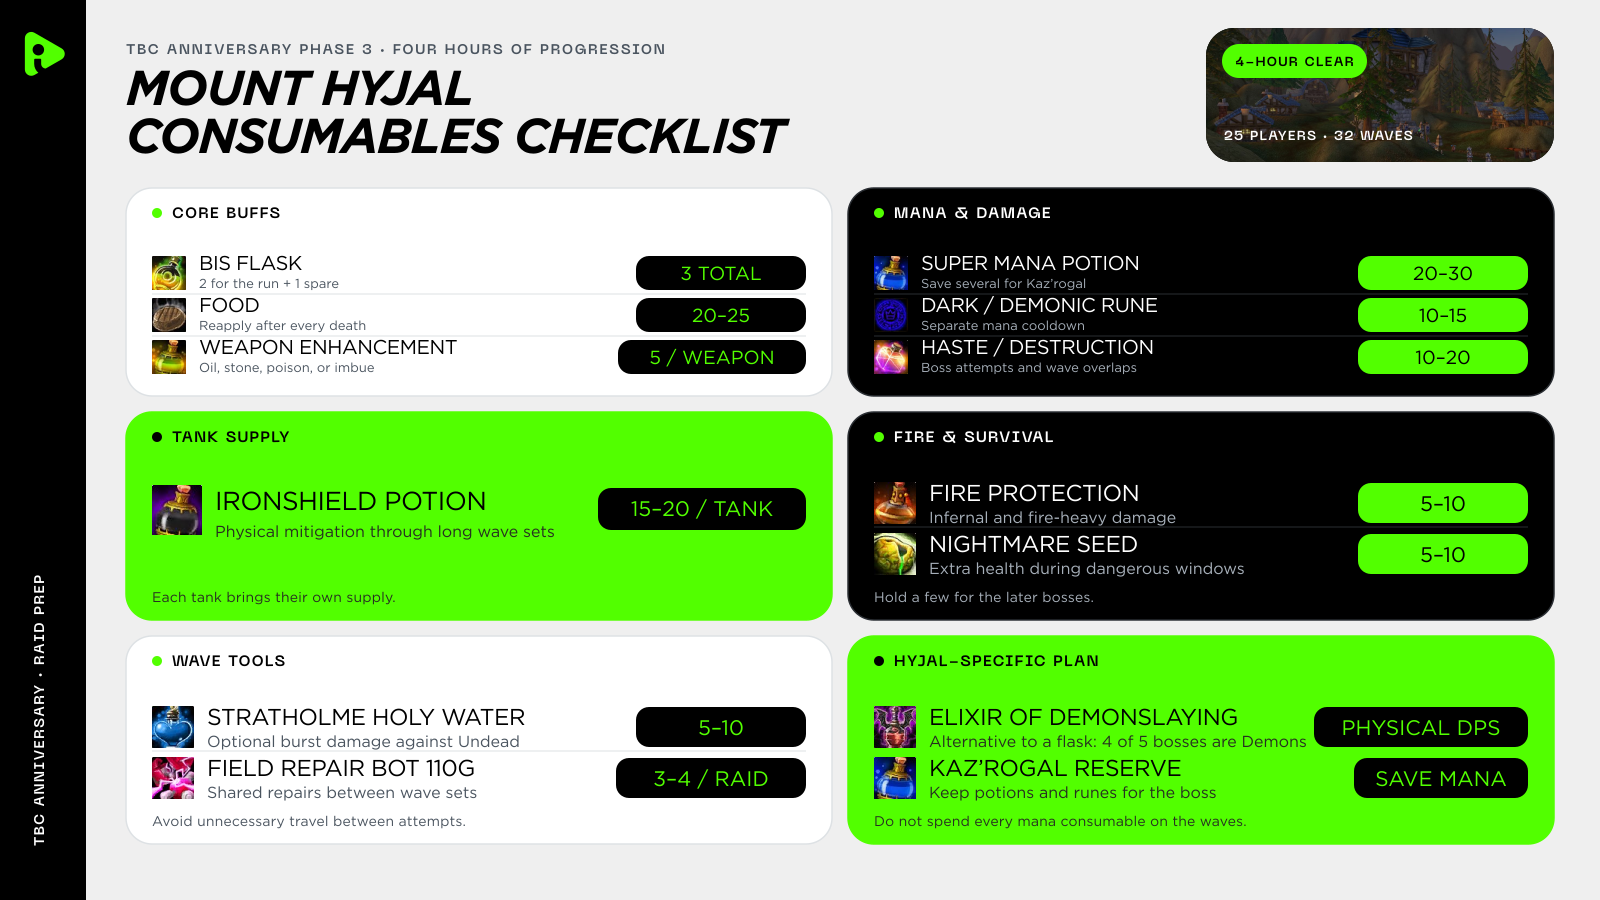
These quantities cover approximately four hours of progression:
|
Consumable |
Recommended Amount |
|---|---|
|
Your BIS flask |
2, plus 1 spare |
|
Food |
20-25 |
|
Weapon oil, stone, poison, or imbue |
5 applications per weapon |
|
Super Mana Potion |
20-30 |
|
Dark Rune or Demonic Rune |
10-15 |
|
Haste Potion or Destruction Potion |
10-20 |
|
Ironshield Potion |
15-20 per tank |
|
Major Fire Protection Potion |
5-10 |
|
Nightmare Seed |
5-10 |
|
Stratholme Holy Water |
5-10, optional |
|
Field Repair Bot 110G |
3-4 per raid |
Four of the five bosses are Demons, so physical DPS can consider using Elixir of Demonslaying instead of a flask. Healers and mana users should save several mana potions and runes specifically for Kaz'rogal; don’t just spend everything on the preceding waves.
Mount Hyjal Bosses
Mount Hyjal contains five bosses in a fixed order:
-
Rage Winterchill
-
Anetheron
-
Kaz'rogal
-
Azgalor
-
Archimonde
Rage Winterchill and Anetheron are fought at the Alliance base with Jaina Proudmoore. Kaz'rogal and Azgalor are fought at the Horde base with Thrall. Each of these four encounters starts with eight timed trash waves. If the raid wipes to a wave or its boss, the entire eight-wave sequence for that encounter must be repeated. After all 4 bosses are dead, Archimonde waits near the World Tree and has no preceding wave event.
Mount Hyjal Trash Wave Strategy
The waves are a core part of Mount Hyjal, I think it’s fair to count them as a pseudoboss on their own. New enemies arrive on a timer, so a slow kill speed can make the waves overlap and overwhelm the group. Here’s how to counteract them:
-
Position the main ground tank near the camp entrance, far enough forward that enemies do not spread through the friendly NPCs.
-
Let the Protection Paladin collect Ghouls and Crypt Fiends before cleaving begins. The other tanks separate Abominations or Infernals so one stun does not hit the entire pack.
-
Mark and control Necromancers, Banshees, and Fel Stalkers. Do not break Shackle, Polymorph, or Banish until the active kill targets are stable.
-
Assign a ranged team to watch the rear and sides of the camp for Gargoyles and Frost Wyrms. These enemies do not always arrive with the main ground pack.
-
Don’t go chasing stragglers when the next wave start is close. Pull surviving enemies toward the next tank position, resurrect quickly, and use every available second to drink.
During the encounter, you’ll see a bunch of different enemy types spawning, and there’s definitely a clear priority you have to keep in mind:
|
Enemy |
Priority and Response |
|---|---|
|
Shadowy Necromancer |
Interrupt Shadow Bolt, CC extras, and kill quickly before Unholy Frenzy doubles another enemy's attack speed |
|
Fel Stalker |
Stop Mana Burn and kill early so that your healers don’t lose mana |
|
Frost Wyrm |
Spread its targets by at least eight yards and use the dedicated ranged team |
|
Gargoyle |
Ranged players gain threat and kite it toward the camp so it descends into melee range; watch for spawns behind the camp |
|
Banshee |
Decurse Banshee Curse immediately and prioritize physical damage when Anti-Magic Shell is active |
|
Abomination |
Split or kite them to reduce Knockdown chains and five-yard Disease Cloud damage |
|
Giant Infernal |
Banish extras or divide them between tanks to prevent stacked Immolation damage |
|
Ghoul and Crypt Fiend |
Collect on the area tank and kill with controlled area damage |
Bloodlust should be used to prevent a wave overlap. It should be available again before the boss, so keep that in mind, too.
Rage Winterchill Strategy

Rage Winterchill is the first boss and one of the simplest encounters in Mount Hyjal. The raid's main job is to react immediately to Icebolt and Death and Decay.
-
Misdirect Winterchill to the main tank and position him away from Jaina and the remaining Alliance NPCs.
-
Spread the raid around the boss. Melee can use his hitbox, but nobody should cluster tightly enough for several players to lose the same escape route.
-
When Icebolt hits a random player, healers immediately switch to that target. The victim is stunned and takes heavy Frost damage over several seconds.
-
Move out of Death and Decay as soon as the 20-yard ground effect appears. It removes 15% of maximum health every second, so finishing a cast inside it is never worth the risk.
-
Dispel Frost Nova or use movement-breaking abilities if it overlaps Death and Decay.
Use Bloodlust or Heroism after the tank establishes threat. Winterchill has no later burn phase, and killing him faster reduces the number of dangerous Icebolt targets.
Anetheron Strategy
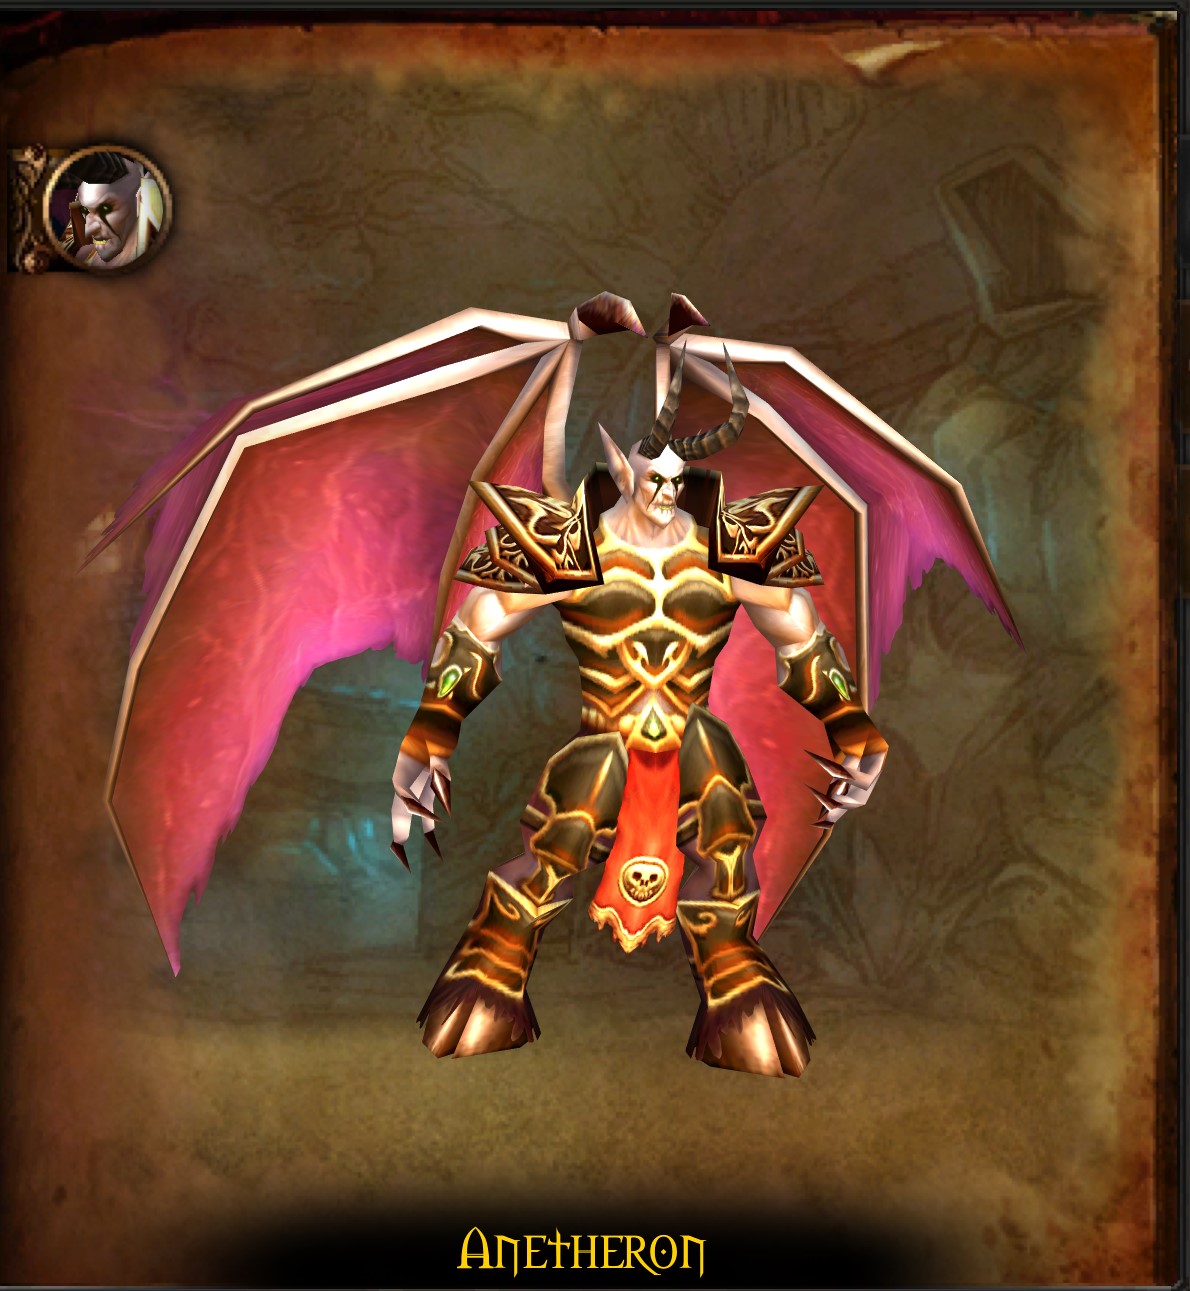
Anetheron combines raid positioning with regular target swaps to Towering Infernals. His Vampiric Aura heals him for 300% of the melee damage he deals, so a healing-reduction effect should remain active throughout the fight.
-
Tank Anetheron near the center of the available area and give the off-tank a separate Infernal position near the tower.
-
Spread the raid in a wide circle. Carrion Swarm targets a random player in a frontal line and reduces the healing done by affected players by 75%, which is especially dangerous when several healers stand together.
-
Keep Mortal Strike, Wound Poison, or Aimed Shot on Anetheron to reduce the healing from Vampiric Aura.
-
Sleep disables three players for ten seconds and cannot be removed normally. Healers must cover one another rather than relying on a dispel.
-
When Inferno targets a player, that player runs to the assigned off-tank location. The spawned Towering Infernal is immune to taunt, so use Misdirection and allow the tank to build threat manually.
-
Ranged DPS kill each Infernal while melee stay on Anetheron and outside the Infernal's pulsing fire damage.
Use Bloodlust or Heroism after the first Infernal is controlled. A clean spread and uninterrupted healing reduction make Anetheron much shorter than trying to ignore his self-healing.
Kaz'rogal Strategy
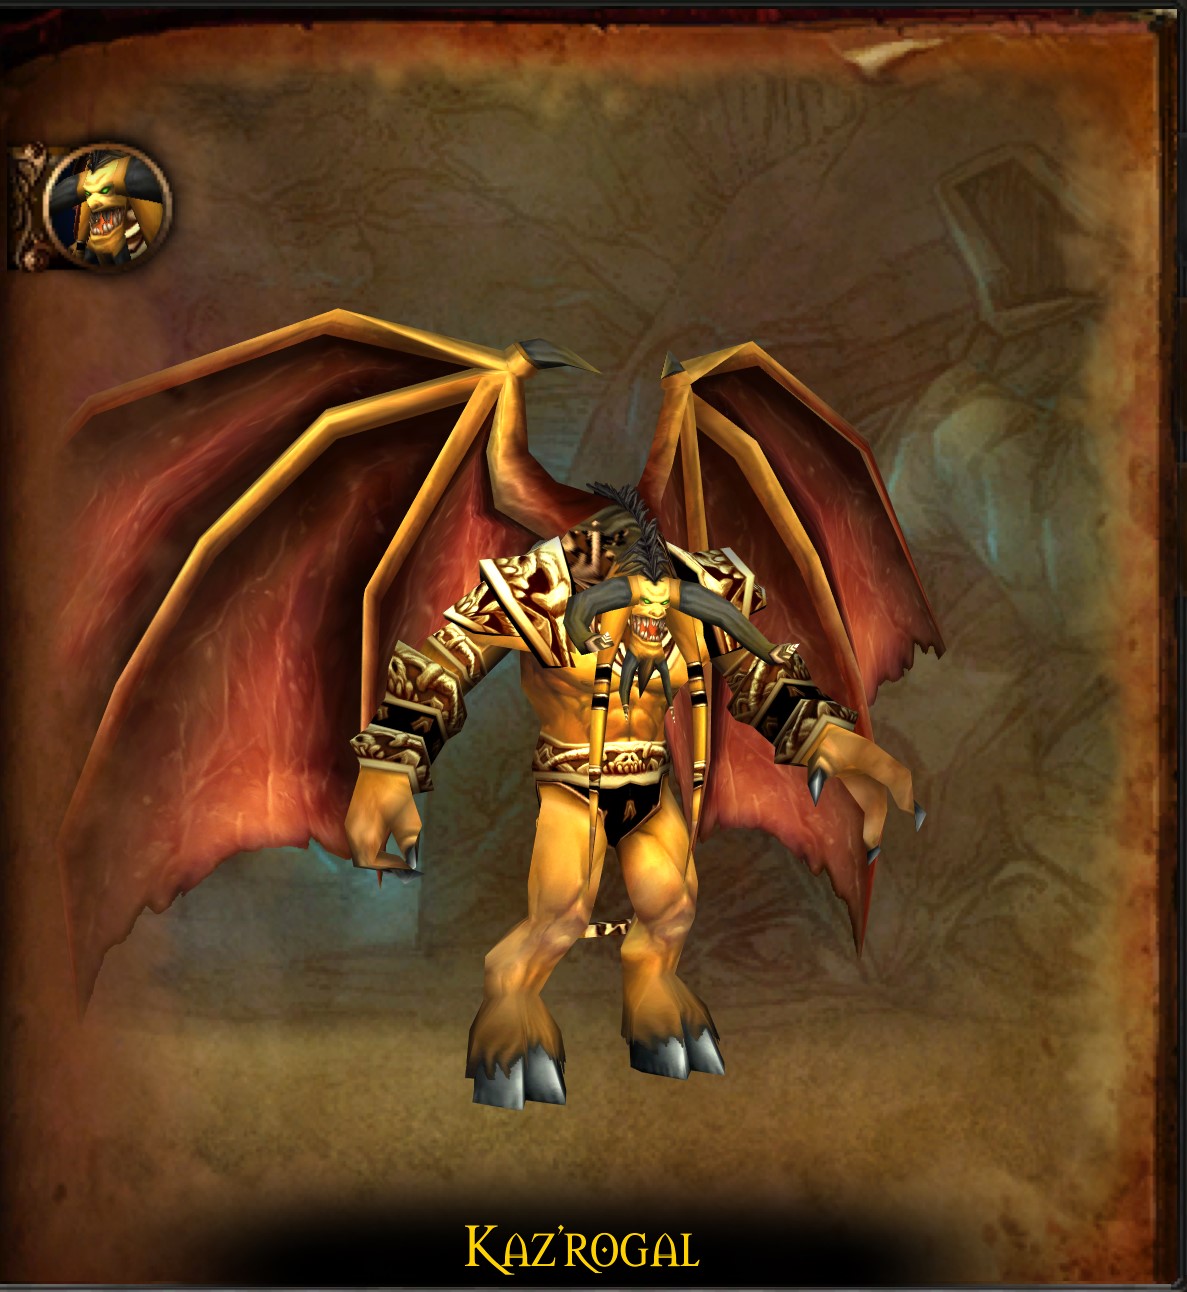
Kaz'rogal is a mana-management damage check. His Mark becomes more frequent as the fight continues, eventually leaving mana users no safe way to recover.
-
The tank positions Kaz'rogal with his back to the raid. Malevolent Cleave splits damage between players in front, so only the tank should occupy that area.
-
Ranged players and healers spread by at least ten yards. Melee use the edge of his hitbox to reduce the impact of War Stomp.
-
Mark of Kaz'rogal afflicts every mana user and drains 600 mana per second for five seconds. If a target reaches zero mana, they explode for roughly 11,000 damage to themselves and players within 15 yards.
-
Use Super Mana Potions, Dark Runes, Demonic Runes, Innervate, Mana Tide Totem, and Shadow Priest support before mana becomes critically low.
-
A marked player who is about to reach zero mana runs away from the raid before exploding. Do not stay stacked and hope the boss dies first.
The first Mark comes after roughly 45 seconds, and its interval shortens by about five seconds after every cast. From what I’ve seen, everyone's using Bloodlust or Heroism on the pull and committing offensive cooldowns early. Non-mana classes should maximize damage while healers use the minimum spell rank needed to keep the raid stable.
Azgalor Strategy
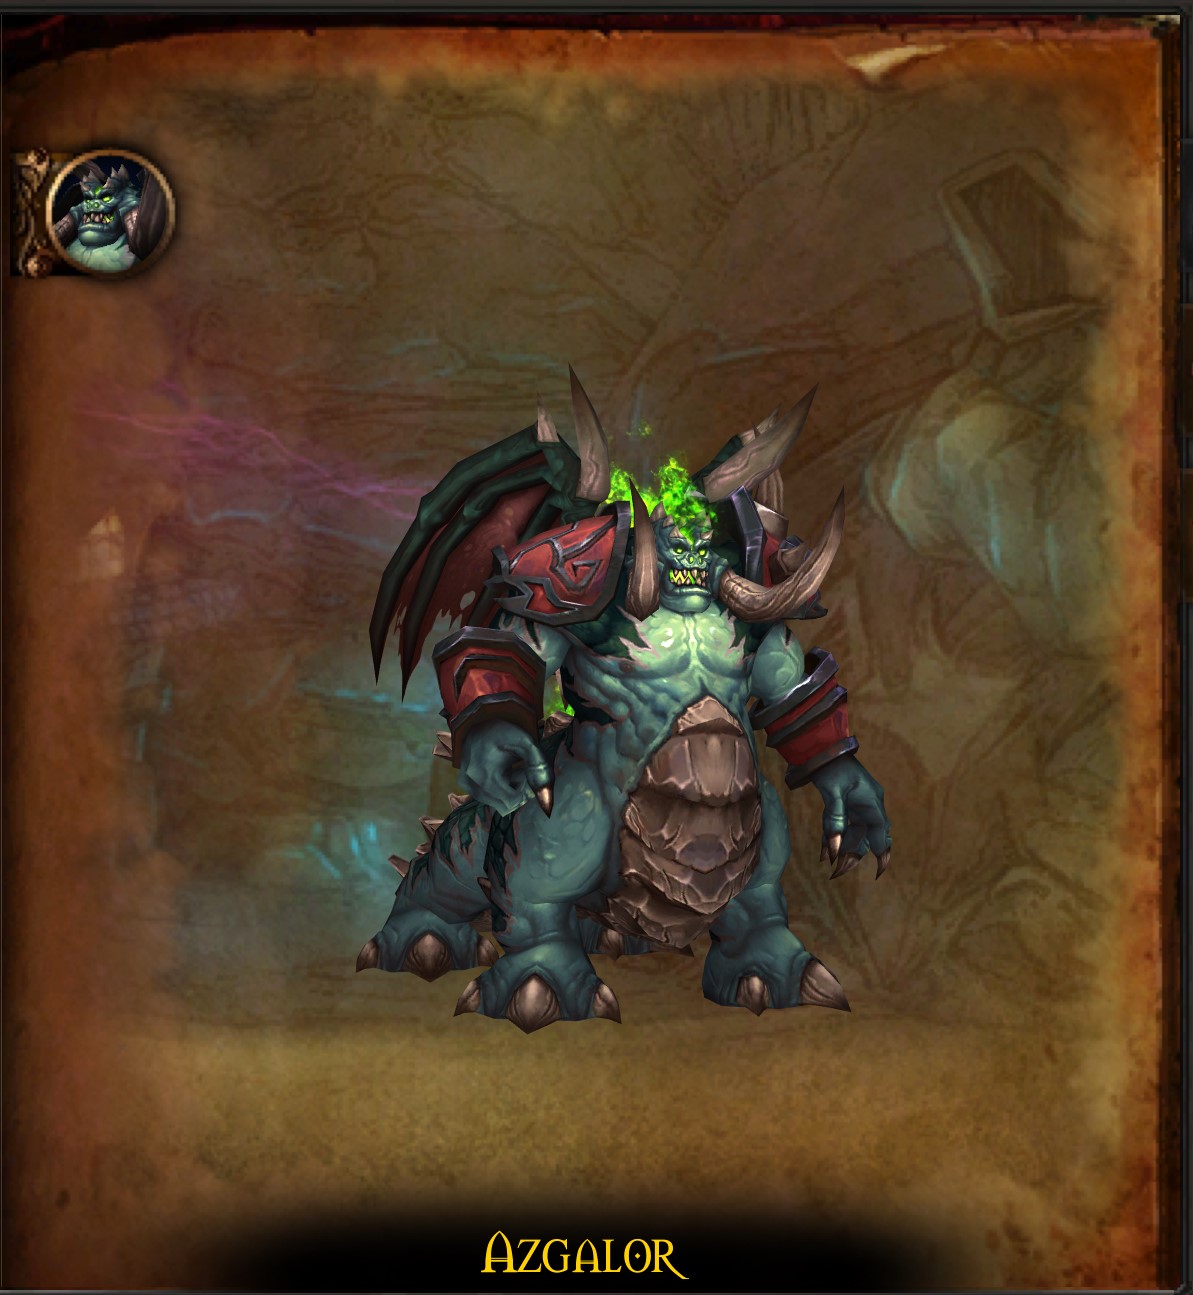
Azgalor is the final Horde-based encounter and the hardest of the four wave bosses. The raid races against repeated Doom targets, and healers are forced to manage their output around five-second-long raid-wide silences.
-
Tank Azgalor near Thrall, but face him away from the raid and friendly NPCs. His frontal Cleave can kill anyone standing beside the tank.
-
Spread ranged players and healers around the boss. Move completely out of Rain of Fire, then watch out for the lingering fire damage after leaving the ground effect.
-
Howl of Azgalor silences the raid for five seconds. Healers pre-cast heals and maintain heal-over-time effects on the boss tank and Doomguard tank before every Howl.
-
Every 45 seconds, Doom marks a random player. After 20 seconds, the effect kills the target and spawns a Lesser Doomguard. Doom cannot be dispelled or prevented with an immunity.
-
The doomed player runs to the assigned Doomguard area before dying. The off-tank picks up the spawn, and a dedicated healer maintains that tank while the raid continues damaging Azgalor.
-
Save combat resurrections for essential healers or damage dealers killed by Doom, and use Bloodlust or Heroism on the pull to reduce the total number of Doom casts.
Do not drag Azgalor into the Doomguard area. The boss tank needs uninterrupted healing during Howl, while the add tank needs enough distance that newly spawned Doomguards do not stun or cleave the main group.
Archimonde Strategy

Archimonde has no trash waves, but he is the raid's largest mechanical check. Raw damage matters less than keeping all 25 players alive because every death gives Archimonde a Soul Charge that can start a raid-wide chain reaction.
Before the pull, every player must speak to Tyrande Whisperwind and obtain Tears of the Goddess. Put the item on an easy keybind and confirm that nobody is missing it.
-
The main tank keeps Archimonde near the center of the area and remains in melee range. If nobody is in melee, Archimonde casts Finger of Death and begins killing players.
-
Spread the raid widely around the boss while staying within range of a Mage or Druid for Grip of the Legion decurses and a Shaman's Tremor Totem for Fear.
-
Move away from every Doomfire trail. Do not cross one to reach the boss, and reposition before Fear can send the group through active fire.
-
Remove Grip of the Legion immediately. Its five-minute curse deals continuous Shadow damage until dispelled.
-
Air Burst launches a player and nearby allies high into the air. Use Tears of the Goddess while falling, not while rising, so the brief slow-fall effect covers the landing.
-
Keep the boss positioned so the tank has a clear route around Doomfire without leaving melee range.
Archimonde's Soul Charge depends on the class that died:
|
Dead Player's Class |
Soul Charge Effect |
|---|---|
|
Warrior, Rogue, or Paladin |
4,500 Physical damage to the raid and 50% increased damage taken |
|
Druid, Shaman, or Hunter |
4,500 Nature damage over eight seconds and a 2,250 mana drain |
|
Priest, Mage, or Warlock |
4,500 Fire damage and a four-second raid-wide silence |
That mechanic makes you really prioritize survival before damage. Stop casting to dodge Doomfire, wait for a safe landing before resuming damage, and do not chase the boss outside decurse or Tremor Totem coverage. Archimonde casts Hand of Death and wipes the raid after ten minutes. Reaching 10% health starts the scripted wisp finale and completes the encounter.
Mount Hyjal Loot Item Levels
Mount Hyjal shares its general item-level structure with Black Temple. The first four bosses and trash drop item-level 141 epics, Tier 6 pieces are item level 146, and Archimonde's regular loot reaches item level 151.
|
Loot Source |
Item Level |
|---|---|
|
Mount Hyjal trash and first four bosses |
141 |
|
Tier 6 armor pieces |
146 |
|
Archimonde regular loot |
151 |
|
Exalted Scale of the Sands rings |
152 |
Mount Hyjal Tier 6 Tokens
Mount Hyjal provides two of the five original Tier 6 set slots. The shoulder, leg, and chest tokens come from Black Temple.
|
Boss |
Slot |
Tokens |
|---|---|---|
|
Azgalor |
Gloves |
Forgotten Conqueror, Forgotten Vanquisher, Forgotten Protector |
|
Archimonde |
Helm |
Forgotten Protector, Forgotten Vanquisher, Forgotten Conqueror |
The token class groups are:
-
Conqueror: Paladin, Priest, and Warlock.
-
Vanquisher: Rogue, Mage, and Druid.
-
Protector: Warrior, Hunter, and Shaman.
Exchange the tokens with Tydormu at the Mount Hyjal entrance. Plan priority across both Phase 3 raids because completing a useful Tier 6 set bonus can be more valuable than distributing every token by raw item level.
Scale of the Sands Reputation Rewards
Mount Hyjal trash and bosses grant Scale of the Sands reputation. Completing The Vials of Eternity opens a role-based Band of Eternity, which Soridormi upgrades at higher reputation levels. The Exalted versions reach item level 152:
|
Role |
Exalted Ring |
|---|---|
|
Tank |
|
|
Healer |
|
|
Caster DPS |
|
|
Physical DPS |
Most repeatable reputation comes from the 32 trash waves, which makes full clears far more efficient than skipping directly to saved boss progress. Indormi inside Mount Hyjal also sells faction rewards and profession recipes as reputation increases.
Mount Hyjal Loot and Rewards
Archimonde's item-level 151 table contains several of Phase 3's most recognizable weapons:
-
Cataclysm's Edge, a two-handed sword for physical damage dealers.
-
Tempest of Chaos, a one-handed caster sword.
-
Apostle of Argus, a two-handed healing staff.
-
Antonidas's Aegis of Rapt Concentration, a caster shield.
-
Scepter of Purification, a healing off-hand.
-
Bristleblitz Striker, a high-level ranged weapon.
Trash waves can drop bind-on-pickup epics such as Claw of Molten Fury, Fist of Molten Fury, and Hammer of Judgement. Their loot pool also has stuff like Hearts of Darkness, Marks of the Illidari, profession recipes, and other valuable epics.
Miners with 375 skill can mine epic gems inside Mount Hyjal. This makes the raid one of the best Phase 3's direct sources of Crimson Spinels, Lionseyes, Empyrean Sapphires, Pyrestones, Shadowsong Amethysts, and Seaspray Emeralds.
Find more helpful WoW TBC Anniversary guides here: