
Ruins of Lordaeron Guide TL;DR
-
Blizzard tunes Ruins of Lordaeron for levels 15–20, but the enemies are tough here, so entering around level 17 would make the run noticeably smoother.
-
The dungeon contains six regular bosses and one Horde-only rare encounter.
-
A most common completion order is Witherfang, The Baron, Viktor the Vile, The Abandoned, Bjork, and Rath’mael.
-
Witherfang and Viktor use Leech Poison, and The Abandoned has an unusually stacked ability kit.
-
The dungeon drops cloth, leather, and mail armor alongside staves, one-handed weapons, two-handed weapons, and a shield.
-
Clear patrols before pulling bosses - trash is responsible for most wipes in this dungeon.
Starting out in a fresh economy? You can get WoW Forever Gold on Playhub, with competitive prices and quick delivery from verified sellers.
What Is Ruins of Lordaeron in WoW Forever?
The dungeon bosses themselves are fairly manageable. In this guide, I’ll walk through a sensible route, explain every documented boss ability, and list exactly what type of gear each boss drops.
Ruins of Lordaeron is a new lvl 15-20 dungeon built into the ruined city above the Undercity. As you’d expect, there’s a bunch of undead enemies in this dungeon. The streets look like a maze here, and the new fog looks extra good in this setting.
|
Detail |
Information |
|---|---|
|
Recommended level |
15–20 officially; approximately 16–22 in practice |
|
Location |
Ruins above the Undercity, Tirisfal Glades |
|
Group size |
Five players |
|
Regular bosses |
Six |
|
Rare boss |
Lordaeron Captain |
|
Layout |
Open and non-linear |
|
Main enemy types |
Undead, spiders, banshees, ghouls, and flesh constructs |
Most groups get into trouble and wipe by pulling an extra spider patrol or taking a Flesh Golem knockback into another pack, so you have to be extra careful simply walking in here.
How to Reach Ruins of Lordaeron
Horde players have the easy trip - you travel toward the Undercity from Brill, enter the outdoor Ruins of Lordaeron, and look for the dungeon portal near the entrance area, on the left.
Alliance players have a much longer journey laid out through hostile Horde territory. The route begins at Stormwind Harbor, continues through Auberdine and Menethil Harbor to Southshore, then heads north past Dalaran and through Lordamere Lake into Tirisfal Glades. Skyborne characters can shorten the journey by using their Stormwind Mage Tower connection to Dalaran, but not by much, to be honest. If you’re on PvP, bring the entire party - having two people waiting at the portal while everyone else gets picked off around Tirisfal is a miserable way to start the run.
Ruins of Lordaeron Quests
There are ten dungeon quests in total: six for Horde characters and four for Alliance characters. Several of them begin inside the instance by picking up specific items, but Horde players should collect their Undercity, Tirisfal, and Silverpine quests before forming the group if they want to get the quests done.
Horde Quests
|
Quest |
Where It Starts |
Objective |
|---|---|---|
|
A Frightened Request |
Tabitha Heartweaver, Silverpine Forest |
Find Edward Heartweaver near Rath’mael |
|
Crest of Lordaeron |
Interactable crest inside the dungeon |
Return the crest to Oran Snakewrithe |
|
Light’s Justice |
Morbin Lightbane, Undercity |
Collect 25 Intact Limbs |
|
The New Plague |
Theodore Griffs, Undercity |
Loot the Highly Toxic Strain from Witherfang |
|
The Wrath of Rath’mael |
Deathguard Kristof, Tirisfal Glades |
Kill Rath’mael |
|
Unending Torment |
Abominable Head dropped by The Baron |
Complete the short follow-up chain |
Alliance Quests
|
Quest |
Where It Starts |
Objective |
|
Crest of Lordaeron |
Interactable crest inside the dungeon |
Return the crest to Lady Dena Kennedy |
|
Abominable Creatures |
Captain Truman at the entrance |
Bring back the Baron’s head |
|
Bloodied Insignia |
Dropped by undead inside |
Collect ten Bloodied Insignias |
|
Remember That I Love You |
Blood-Stained Letter near Rath’mael |
Deliver the letter to Orphan Matron Nightingale |
There’s decent loot behind the quests - the standout quest rewards are:
-
The Stitcher, a one-handed mace;
-
Gnarled Necromancer’s Staff;
-
Slain Baron’s Signet, a ring available to both factions through different quests
-
The Alliance-only Tarnished Locket necklace.
Some of these are definitely worth chasing, since they’re guaranteed unlike the boss drops, and are easily better than what a level-appropriate character will be carrying.
Best Route Through Ruins of Lordaeron
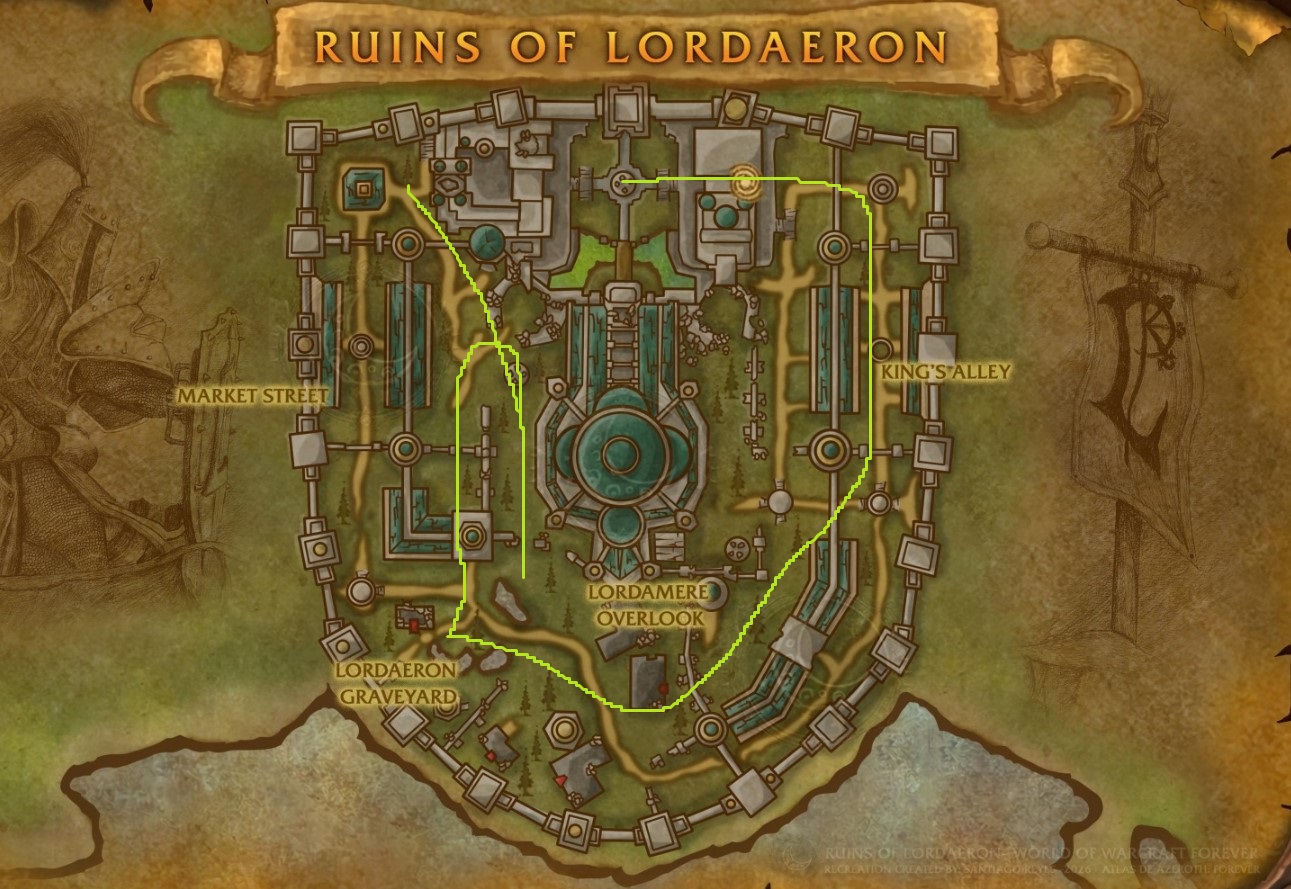
You can change the route depending on quests you want to get done first, but this order avoids most backtracking:
-
Witherfang
-
The Baron
-
Viktor the Vile
-
The Abandoned
-
Bjork
-
Rath’mael
-
Lordaeron Captain, if the rare appears and your group is Horde
Viktor and The Abandoned both require completing wave events, so do not trigger either one while the healer is low on mana - you’ll needs lots of healing. I also recommend clearing a little more trash than seems necessary around the event areas - saving 30 seconds by leaving a patrol alive is not worth wiping when it walks into the fourth wave. You can check out the full map with shortcuts here.
Ruins of Lordaeron Trash Mobs
The dungeon’s trash is not complicated, but its patrol placement makes it easy to pull two patrols at the same time, which is deadly:
-
Venom Lurkers, Spiders, and Tarantulas: Usually appear in packs near the entrance. Pull them backward so a second patrol does not join halfway through.
-
Skeletal Soldiers: Hit surprisingly hard when several of them group up on your tank at the same time. Stuns and focus fire make these packs much easier.
-
Shrieking Banshees: Can silence players. Casters and healers should remain at range instead of standing inside the pack.
-
Flesh Golems: Use Knock Away, reducing threat and potentially throwing the tank into nearby enemies.
-
Ghouls and Ragged Ghouls: Appear in tightly packed groups and deal heavy melee damage. Avoid pulling two groups unless the party has cooldowns ready.
Until you’re familiar with the dungeon, take it slow - kill packs 1 by 1, pulling them backward, and don’t try to rush the completion.
Ruins of Lordaeron Boss Guide
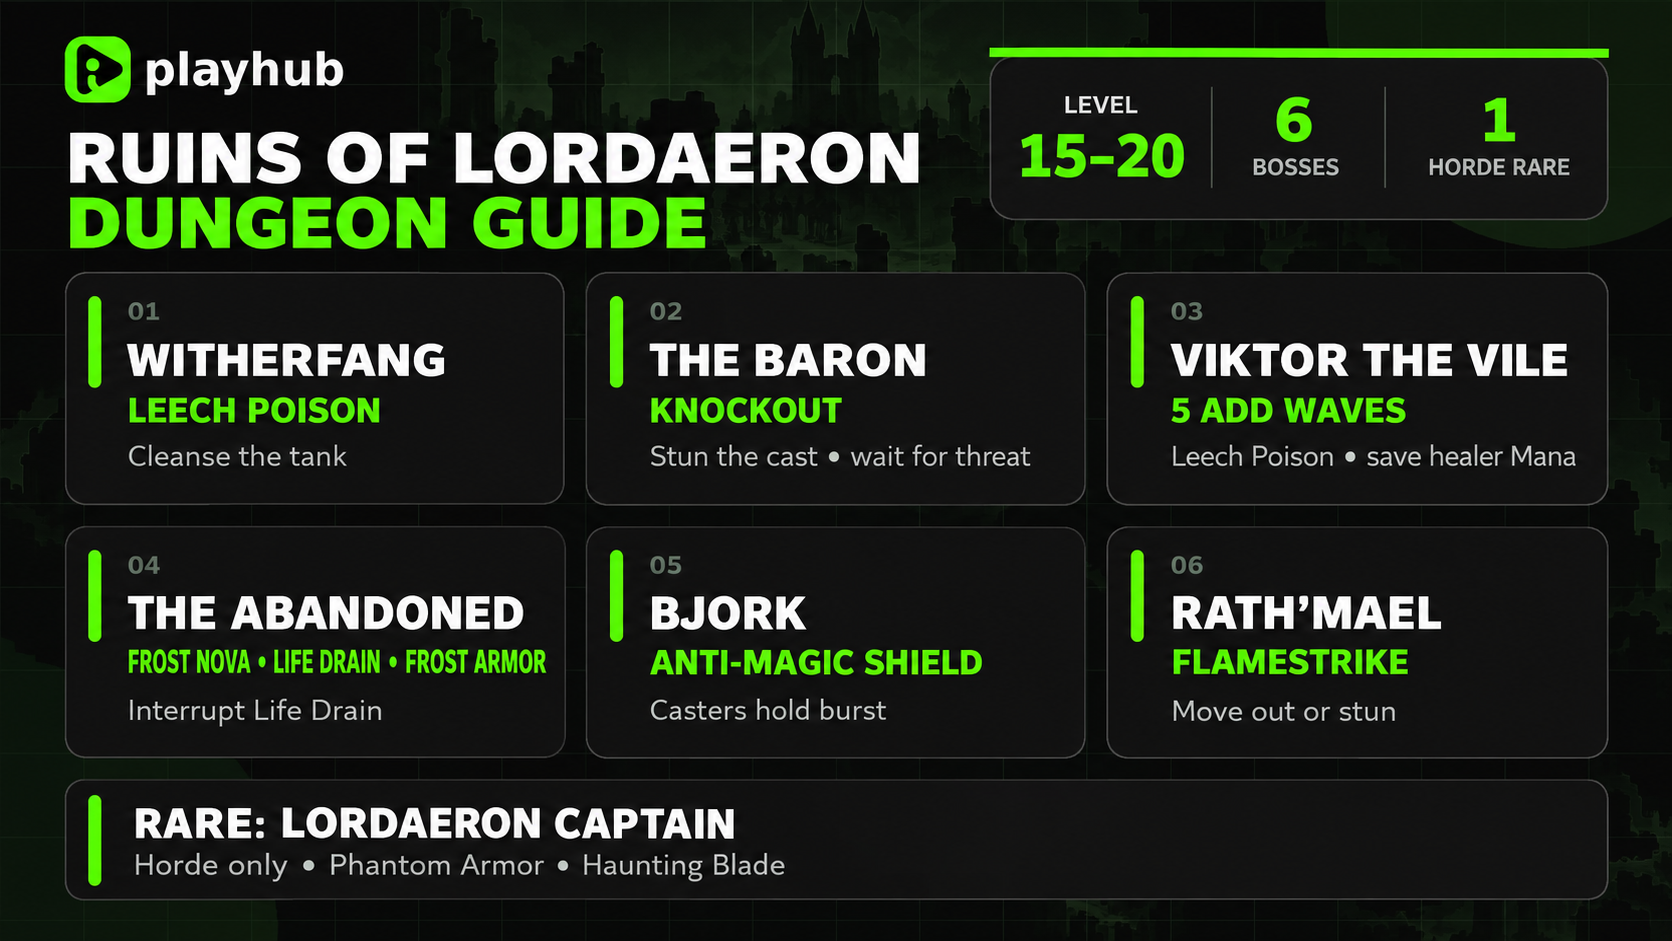
Witherfang
Witherfang patrols King’s Alley with two smaller spiders. Clear the nearby spider patrols first, let the tank establish threat, and get the spiders down quickly. Witherfang will periodically place poison on the tank - cleanse it to make the fight rather trivial.
The Baron
The Baron hits considerably harder than Witherfang and severely punishes tanks who enter the fight with uncapped health. Clear the hallway before engaging him and keep melee players behind the boss to avoid his frontal attacks. His Knockout ability is a dangerous one - he deals instant damage and disables the target, causing a threat reset. Damage dealers should stop for a moment after Knockout, otherwise they’ll risk getting one-shot.
Stuns can prevent a Knockout cast, so don’t forget to use them. As mentioned before, the Baron also drops the Abominable Head that begins the Horde’s Unending Torment chain.
Viktor the Vile
To summon Viktor, interact with the Grim Campfire inside the fireplace of a ruined house in Lordamere Overlook. The event sends five waves of undead at the group before Viktor graces the group with his presence. The waves are harder than the actual boss. If the healer is running low, hold the final enemy of a wave under crowd control and take a few seconds to recover. The whole fight is a resource check.
Once the event ends, let the tank pick Viktor up properly. His melee attacks are heavy enough that an early threat pull can kill a cloth wearer before the tank gets control back, plus he poisons his target from time to time.
The Abandoned
The Abandoned is the most mechanically complicated boss in Ruins of Lordaeron, he actually feels like something from a later WoW era. Approaching the red-eyed statue in Market Street starts a three-wave event, after which the boss appears. The Abandoned has a deep bag of moves:
-
Frost Nova: Roots nearby players in place.
-
Life Drain: Drains health from the target and heals the boss. Interrupt or stun this cast.
-
Frost Armor: Chills physical attackers, slowing their movement.
Life Drain is the priority interrupt. Fail to interrupt it, and it gives the boss back health and extends a fight that is already very awkward for melee characters.
Bjork
Bjork is one of the simpler bosses. Clear the surrounding corridor, point him away from the party, and let the tank settle him into position before using major cooldowns. He casts Anti-Magic Shield on himself periodically, but otherwise he doesn’t do much. He can also knock back your tank, so make sure there’s clear space behind the tank at all times.
Rath’mael
Rath’mael stands in the central graveyard area and is actually visible from afar from several parts of the dungeon, but reaching him requires circling through the surrounding streets. Clear the entire graveyard before pulling him; fighting in an open area with several surviving packs is asking for trouble.
He casts Flamestrike, creating a damaging puddle on the tank’s location - you should move as soon as the cast begins or interrupt it with a stun. Since the Flamestrike lands where the tank was standing when the cast started, the tank should take a few steps away and not drag Rath’mael through the entire party. Rath’mael also damages players around himself - melee players must tank it or briefly move away from. Keep the group spread enough that Flamestrike movement remains clear.
Lordaeron Captain
The Lordaeron Captain is a rare encounter that can appear in the western part of the dungeon after all six regular bosses have been defeated. He is friendly to Alliance characters, which means only Horde groups can actually kill and loot him. The Captain is worth checking for because of his two drops: Phantom Armor mail body armor and Haunting Blade, a healing two-handed sword.
Ruins of Lordaeron Loot Table
Ruins of Lordaeron has a nicely varied early loot pool; every party member should find something useful for them in here. Cloth and mail users have the most boss drops, but there are also leather pieces and several unusually designed weapon options:
|
Boss |
Rewards and Item Types |
|---|---|
|
Witherfang |
Witherbite Bracers - Leather wrist armor; Atrophic Girdle - Mail waist armor; Segmented Spider Leg - Strength/Agility staff |
|
The Baron |
Leftover Abomination Skin - Cloth body armor; Abomination Bones - Mail body armor; Meathook Slicer - One-handed Agility dagger |
|
Viktor the Vile |
Bloodied Chestwraps - Leather body armor; Vilewalkers - Mail foot armor; Vileblood Scimitar - One-handed Strength/Agility sword |
|
The Abandoned |
Rotmender’s Leggings - Cloth leg armor; Grip of Fear - Mail hand armor; Scepter of the Abandoned - One-handed Strength/Spell Power mace |
|
Bjork |
Tuskwrap Belt - Cloth waist armor; Bonerust Leggings - Mail leg armor; Corpse Chopper - Two-handed Strength axe |
|
Rath’mael |
Rotmender’s Treads - Cloth foot armor; Mirror of Rath’mael - Strength/Intellect shield; Coldspire Staff - Intellect staff |
|
Lordaeron Captain |
Phantom Armor - Mail body armor; Haunting Blade - Healing-oriented two-handed sword |
I feel like the new gear we can get there is so Forever coded - Scepter of the Abandoned supports both Strength and spell-oriented users, Mirror of Rath’mael works for Strength and Intellect shield classes, and Haunting Blade is a very unusual healing-focused two-handed sword. This hybrid nature is sewn throughout the Forever’s racials, talents and gear to make builds feel more exciting and diverse.
For physical damage dealers, Vileblood Scimitar, Meathook Slicer, and Corpse Chopper are the obvious weapon upgrades. Casters should pay attention to Coldspire Staff, which looks great at this stage of the game.
Check out other helpful WoW Forever articles: