Paradox Junction Main Quest Guide TL;DR
-
Unlock Pack-a-Punch by grabbing the Truck Keys, reaching Round 7, moving the oil truck, and clearing the Temporal Storm.
-
Build the Blundergat by collecting the Sealant, Barrel, Stock, and Hammer across both past and future timelines.
-
Upgrade the Blundergat into the Sundergat by killing three special tornado enemies near the center workbench.
-
Find an RC-XD controller, complete the drone section, and pick up the Chalk from the newly opened garage.
-
Use the Chalk and Swing Seat in the Yellow House Backyard to trigger the Twins scene and continue the quest.
-
Light the fireplace, complete the Music Box steps, and escort it to the Yellow House.
You can buy ranked-ready Call of Duty accounts on Playhub and get straight into the fray. You can also get accounts with prestige rewards and the rarest camos, all delivered safely and quickly.
Step 1: Unlock Pack-a-Punch
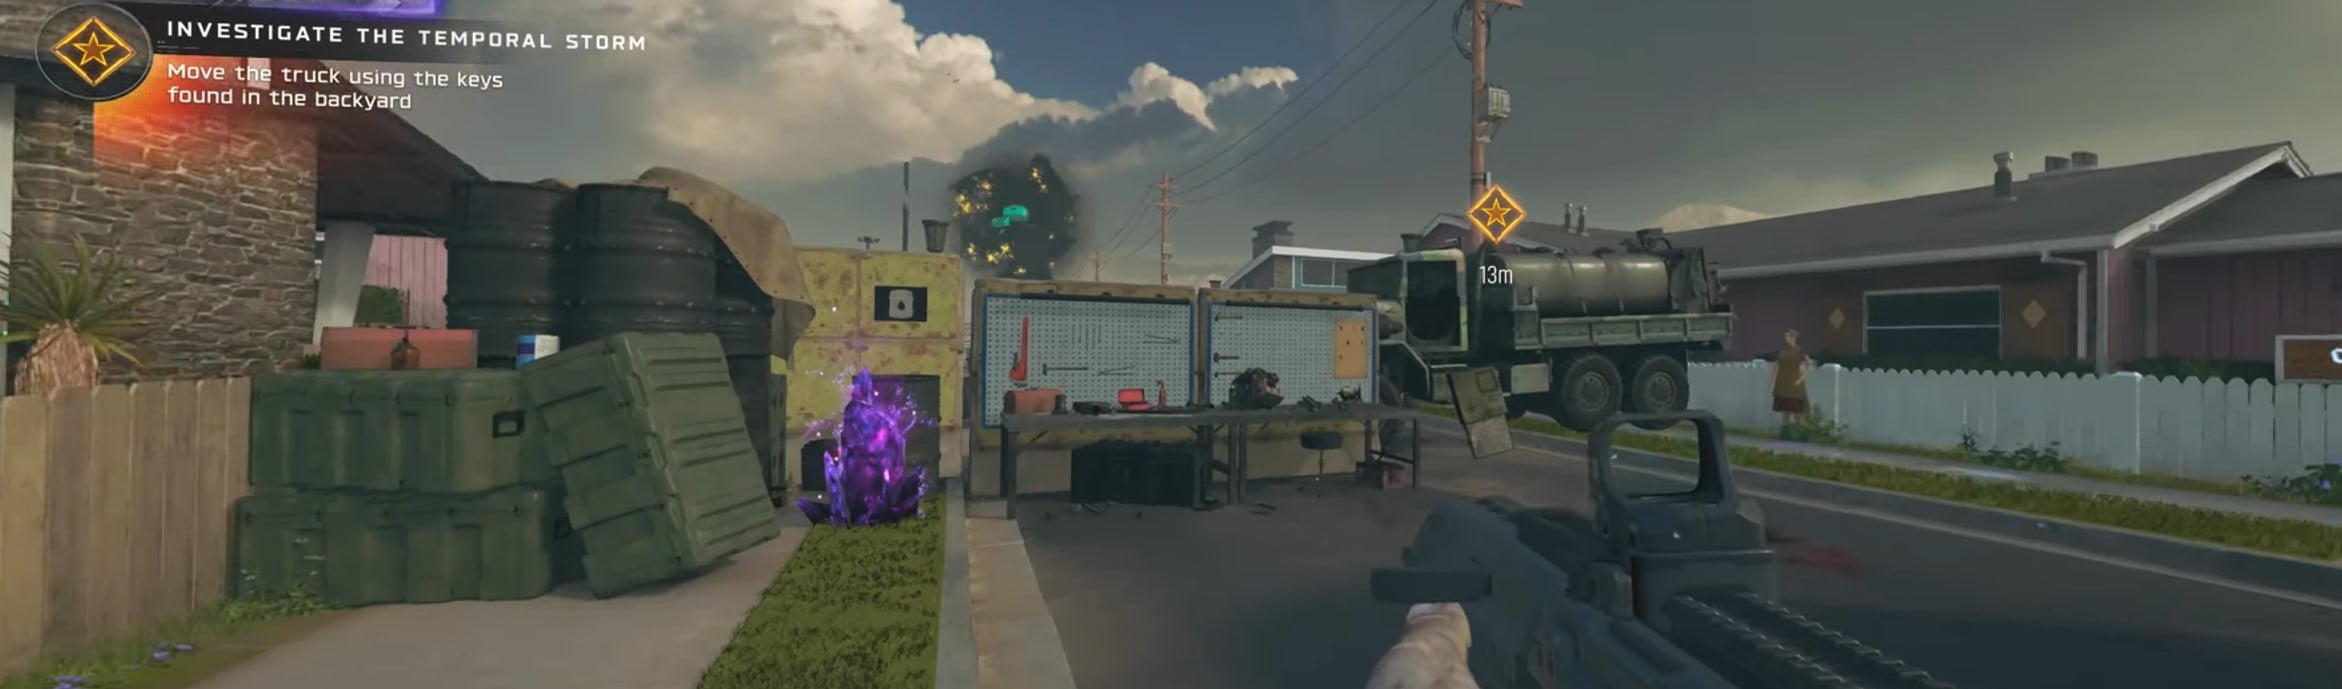
We start our Nuketown exploring by grabbing the Truck Keys from the zombie corpse on the eastern side of the map.
-
Keep pushing rounds until Round 7 - it’ll send you back to the past, then use the keys to move the oil truck and open the route forward.
-
After that, head south to the Temporal Storm and shoot all four storm points.
Step 2: Build the Blundergat
I’m glad to see Blundgergat back after all these years, but we’ll have to assemble it first.
-
You’ll need to grab the Sealant in the past on the second floor of the Yellow House. It’s hidden behind the books in the lowest part of the bookshelf, which is right near the window.
-
For the Barrel, go to the destroyed future version of Nuketown and feed zombies into the yellow wall cysts, which you can find everywhere on the map, until one drops the part. If the first cyst does not give it to you, just find another and try again.
-
For the Stock, search the future for the corrupted wall that gives off the distinct sound. Once you find the correct one, jump to the past, throw a Semtex at that wall, then go back to the future and collect the Stock from the now broken opening.
-
For the Hammer, pick up the SO3 vial from the desk upstairs in the nuked Yellow House, then fill it in the Green House sink. Take that acid back into the past and use it on mannequin heads, which are scattered all around the map. When that is done, return to the future and check those mannequin spots again. One of them will now hold the Hammer. What I’d recommend doing is going back in time, and acid just 3-4 mannequins at the time, since you never know which one will have the hammer. After you have the parts, head to the truck in the middle of town and assemble the Blundergat at the workbench inside.
Step 3: Upgrade the Blundergat into the Sundergat
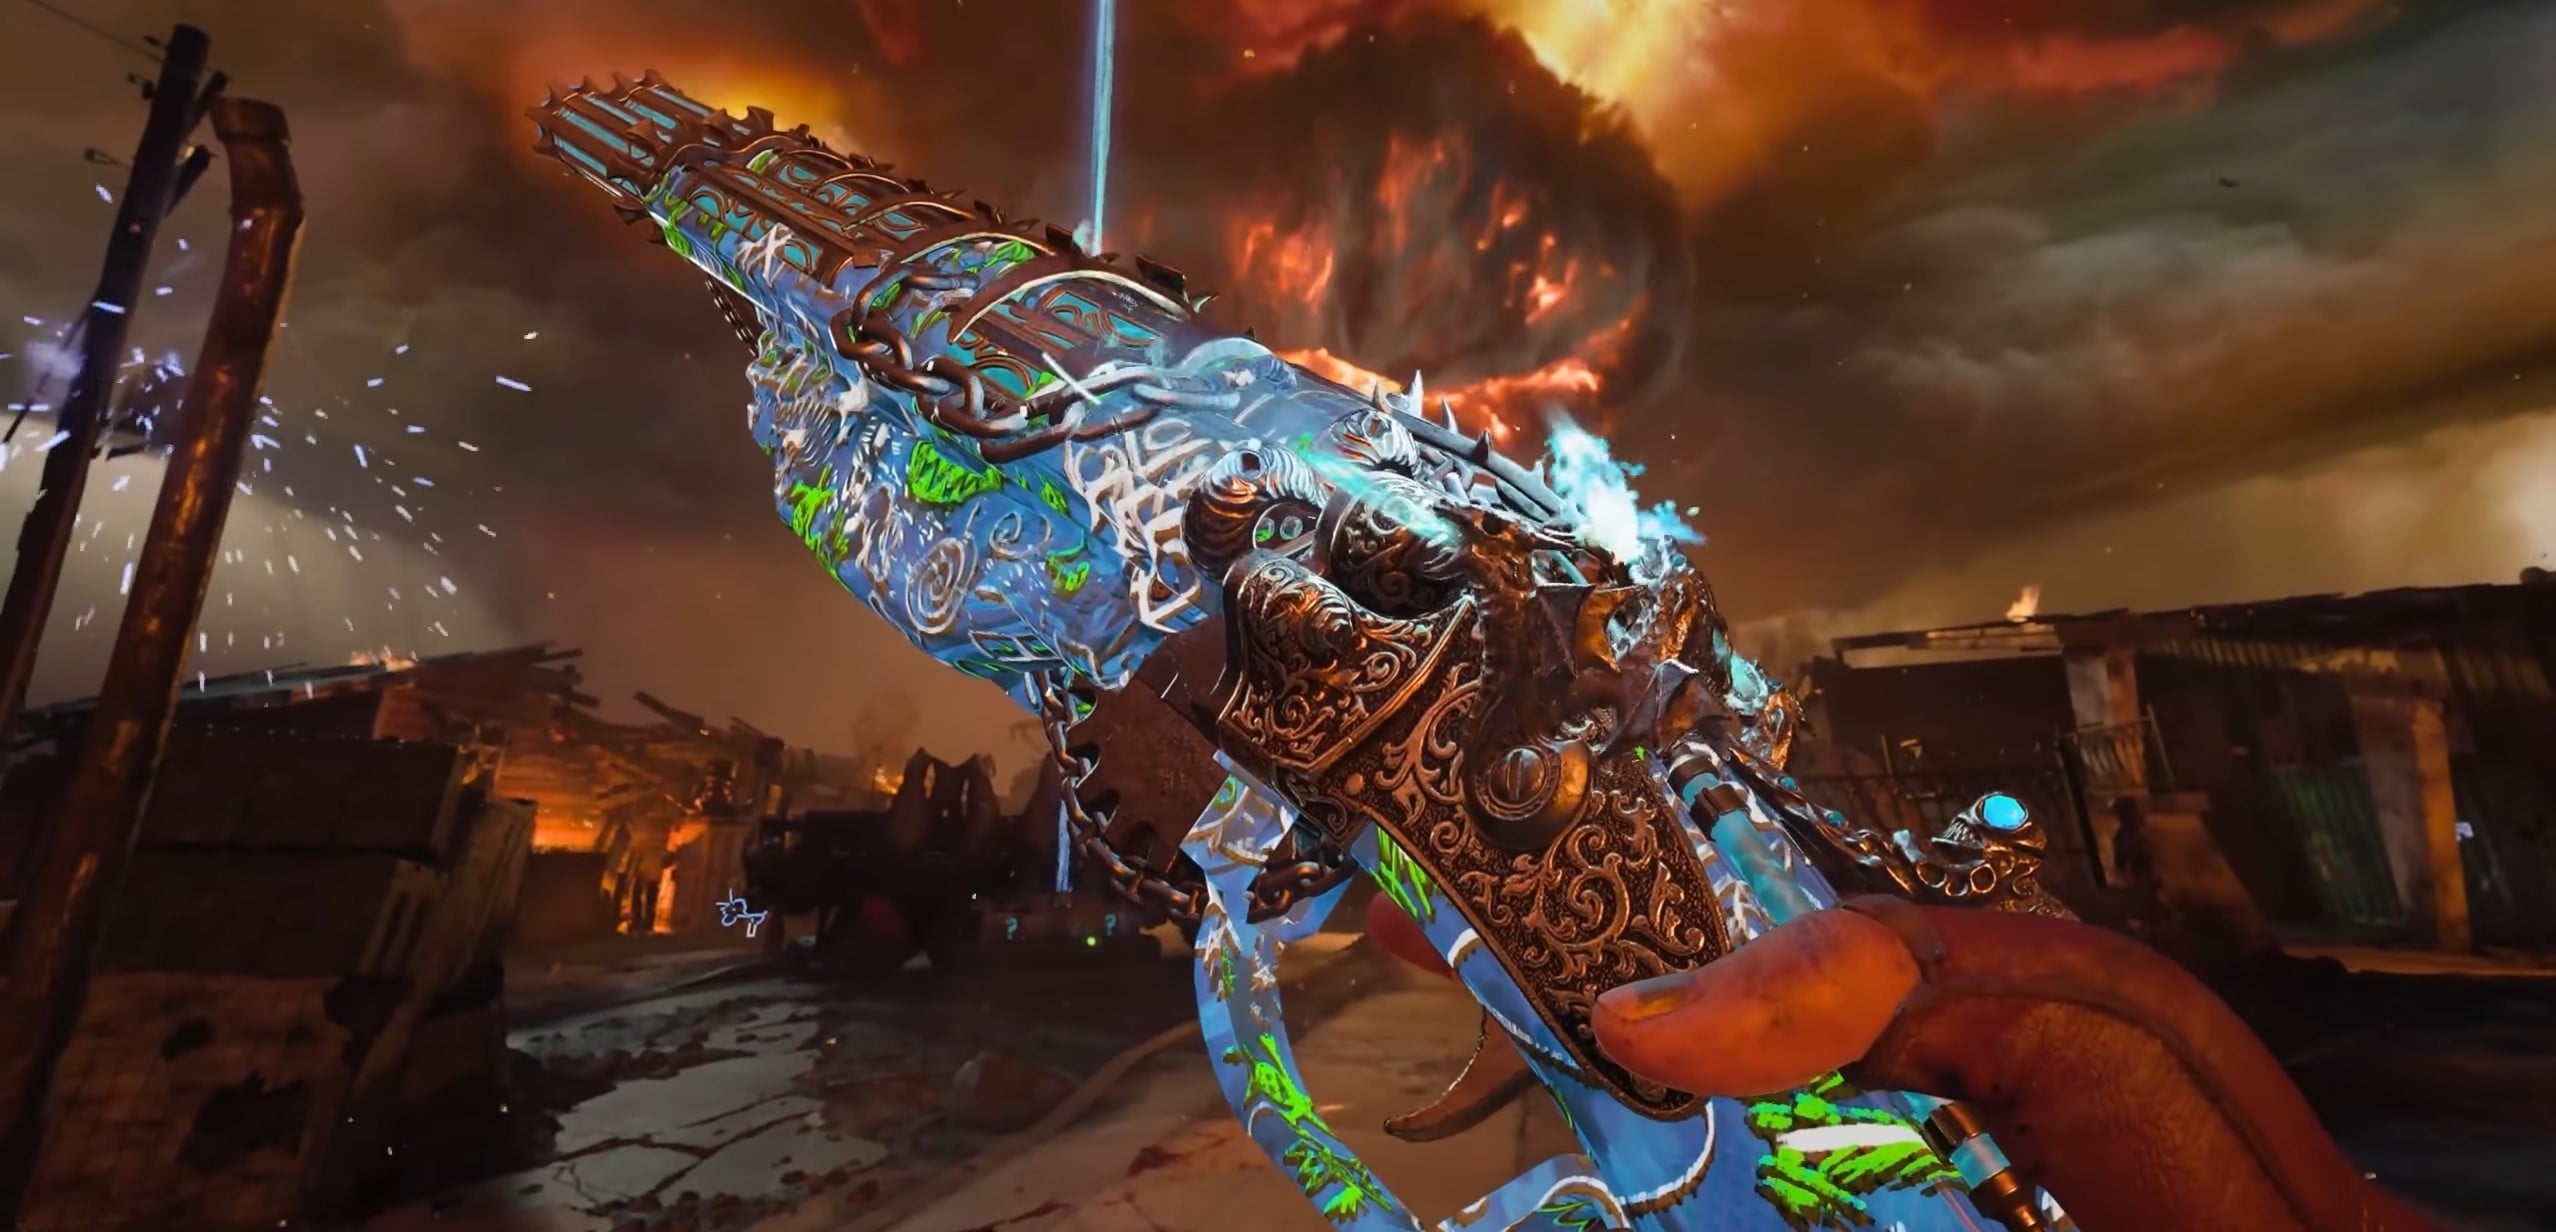
Stay in the future and keep progressing rounds until the fire tornado with a zombie trapped in it shows up, it’s either in the Backyards or on Trinity Ave. All you need to do is walk up to the tornado to release said zombie, which will start glowing blue. Kite it to the center of the map, where there’s a Blundergat upgrade station. Kill it with the Blundergat near the workbench so the essence gets by the bench.
You need to repeat that process two more times. Keep in mind that you’ll have one tornado spawn per round, so you’ll have to progress a bit. On the third cycle, the enemy becomes a Mimic, but the rule stays the same: get it to the truck and finish it with the Blundergat. Then go back to the past, open the workbench by pressing your melee button, place the Blundergat inside, and return to the future to pick up the Sundergat.
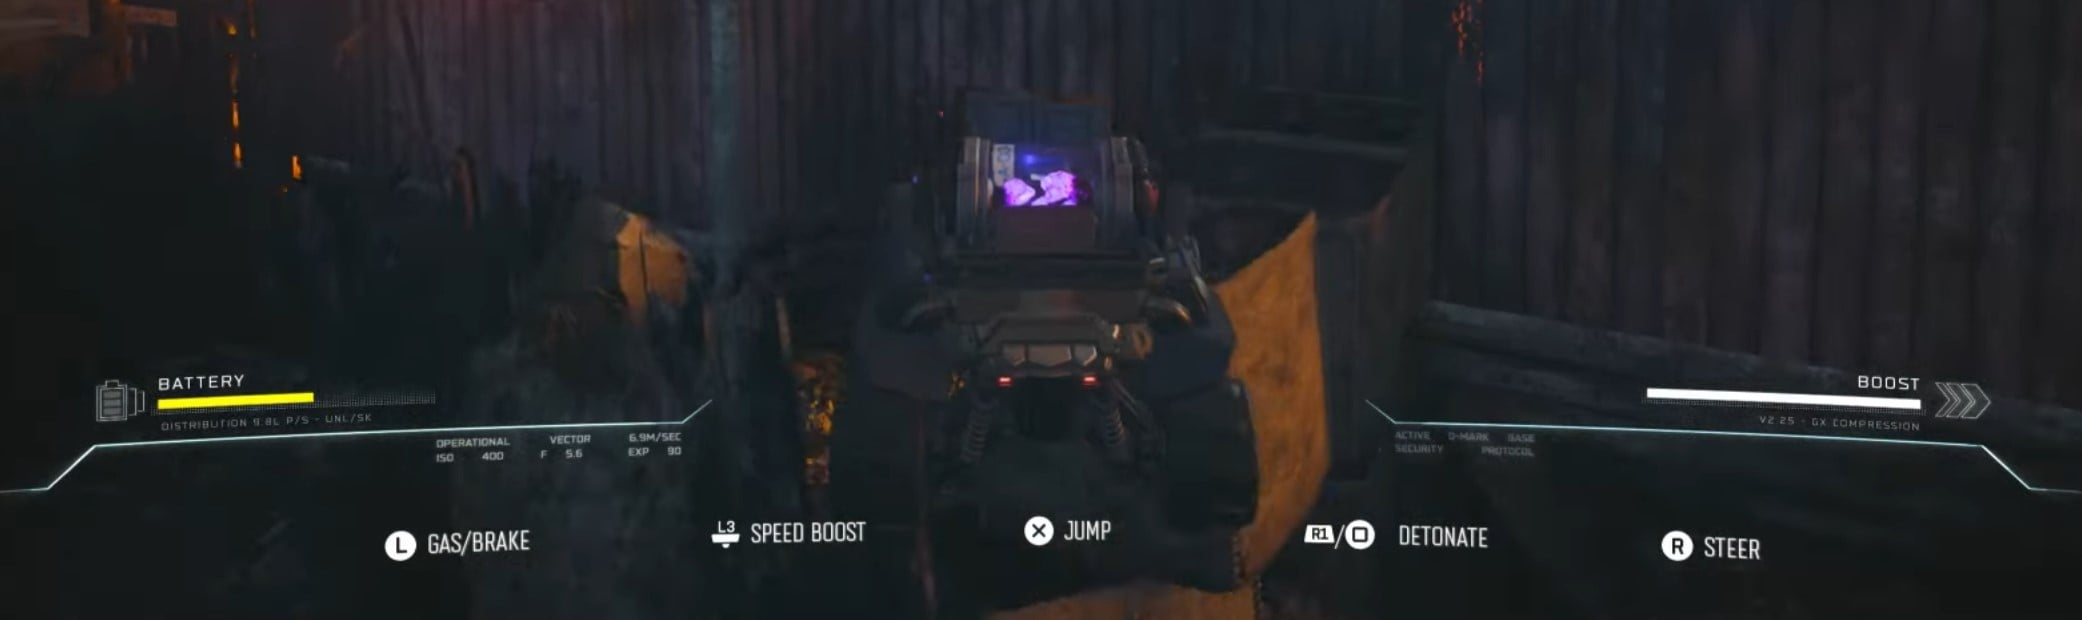
Step 4: Find the RC-XD and get the Chalk
Next, we’ll need to get the Chalk, and for that, we’ll have to pilot an RC-XD drone. The RC-XD controller can spawn in three places:
-
Behind the Green House near the perk machine
-
On the shelves in the Yellow House garage
-
On the crate to the right of Pack-a-Punch
Once you find it, activate it and pilot it through the route the game sets up for you. Use the ramps, then boost over the debris towards the garage, and reach the right of Pack-a-Punch. Blow up the red gas tank with the RC-XD, then go into the newly opened garage and wait a moment for the Chalk to appear on the floor. Your attempt to do so is timed, so if you fail, try to get another controller at one of the three spawn points I’ve listed above.
Step 5: Activate the Swing Set
Go to the past Yellow House Backyard and shoot the swing to knock loose the Swing Seat. Pick it up, switch back to the future, and head to the nuked version of that same backyard. Attach the Swing Seat to the swing set and place the Chalk there as well. That triggers a scene with the Twins and makes the red box in the nearby garage usable, open it.
Step 6: Light the Fireplace with Strange Woods
After the Twins scene, there are several steps to take, which IMO make no sense but are required for you to progress:
-
Go to the Yellow House garage and open the red toolbox to get the Plant Seeds.
-
Take them into the past and plant them near the southern Pack-a-Punch area by the hedge.
-
Once the tree starts growing, kill nearby zombies with the Blundergat so it can absorb their souls.
-
When the tree is fully grown, return to the future and throw a Combat Axe at the grown tree three times to collect three pieces of Strange Firewood.
-
Bring those to the Yellow House fireplace, place them inside, and throw a Molotov to light the fire.
Step 7: Activate and escort the Music Box
Head to Trinity Avenue in the future, just to the right of Der Wunderfizz, and stand on the large X on the ground. After shifting back to the past, a hopscotch board appears there. Start the minigame at the white orb and jump from 1 through 12 in order, then come back down in reverse while avoiding the black spot. Finish that, and the Music Box will appear.
Now shoot the Music Box with the Sundergat to activate it, then kill zombies near it with the Sundergat so the Box can absorb souls and move. From there, escort it all the way to the Yellow House fireplace. Your screen should flash white, which confirms the successful completion.
Step 8: Get the Goggles and Headset
After the Music Box reaches the fireplace, the quest keeps going. Your next job is to collect two more items and place them into the toy box on Trinity Way. Start by going near Pack-a-Punch and looking for the speaker pole outside the map. Shoot the top of it, and a pair of goggles will fall down. To actually collect them, you need to use your Wisp perk near the drop so it pulls the goggles into the playable area. Once that happens, pick them up.
Next, find the Headset. It can spawn in one of three places:
-
In the middle of the map, near the truck, inside the trash cans
-
Upstairs inside the Green House
-
In the backyard of the Yellow House near the perk machine
Once you have both items, head to the toy box on Trinity Way and place the goggles and headset inside.
Step 10: Move the Ball onto the White X
Back in the nuked version of Nuketown, you now need to find a glowing ball. It can spawn in one of these three places:
-
On the roof of the Yellow House
-
On top of the boxes near Pack-a-Punch
-
On the roof of the Trinity Way house near the garage, you opened earlier
Shoot the ball with the Sundergat to make it glow. After that, use a regular bullet weapon to slowly move it across the map toward the backyard of the Green House. Your goal is to get it onto the white X on the ground. Once the ball is in place, teleport back to the normal version and interact with it to start the next trial.
Step 11: Complete the Ball Trial
This step works like a small minigame. Once it starts, you need to melee the ball diagonally every time it bounces. Keep repeating that until the timer runs out. If you do it correctly, another glowing object will spawn. Just like the Music Box, this object needs to be escorted by getting kills with the Sundergat near it. Keep feeding it until it reaches the toy box.
Step 12: Turn the Piano Teacher
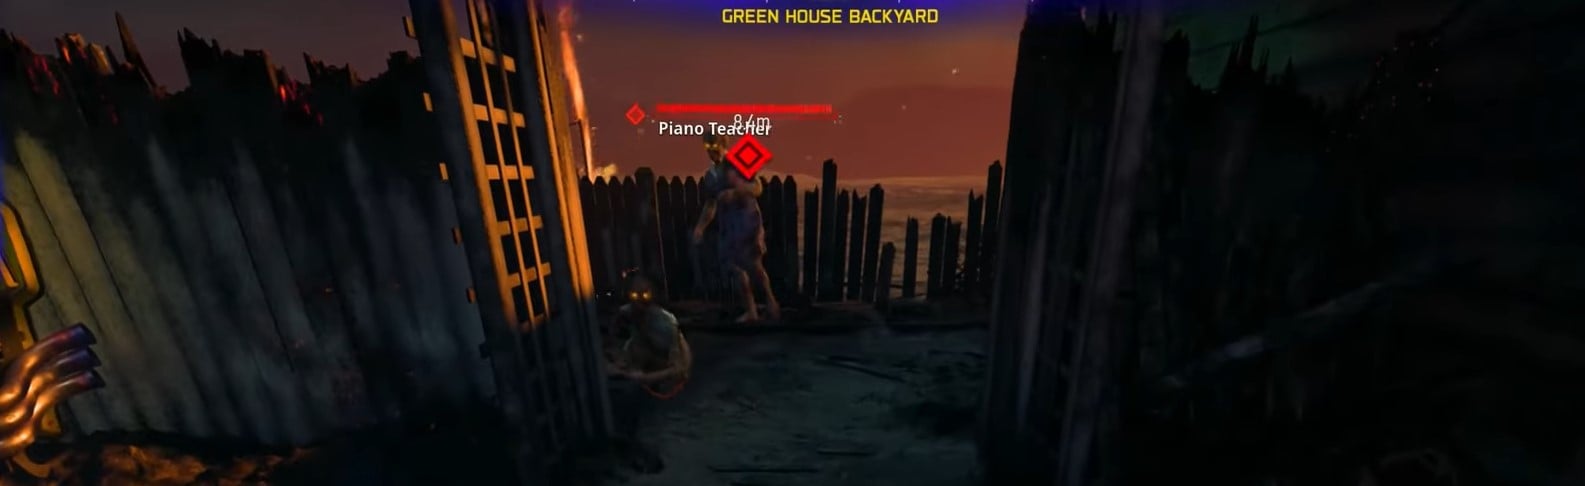
Go back to the nuked version of Nuketown and wait behind the Green House until the Piano Teacher appears. You need to turn her, and the easiest way to do that is with a Psych Grenade. Once she is turned, she will run over to the piano. As soon as that happens, quickly use the teleporter and come back. If done correctly, she will interact with the piano, reveal the keys, and then disappear. That opens the next puzzle.
Step 13: Solve the Flashing Symbol Puzzle
After the Piano Teacher step, eight flashing symbols will appear around the map in the nuked version of Nuketown. Each symbol flashes a certain number of times, then pauses. You need to activate them in order, starting from the one that flashes once and ending with the one that flashes eight times.
The symbol locations are:
-
On the bus in the middle of the map
-
On the fence in the middle of the map
-
On the nuke shelter near the Green House
-
On the Trinity Way house near the toy box
-
On the garage door near Pack-a-Punch
-
On the rock near Pack-a-Punch
-
On the wall near the moving truck
-
On the fence in the Yellow House backyard
Watch each symbol carefully, then interact with them in the correct order from one flash to eight flashes.
Step 14: Enter the Piano Code
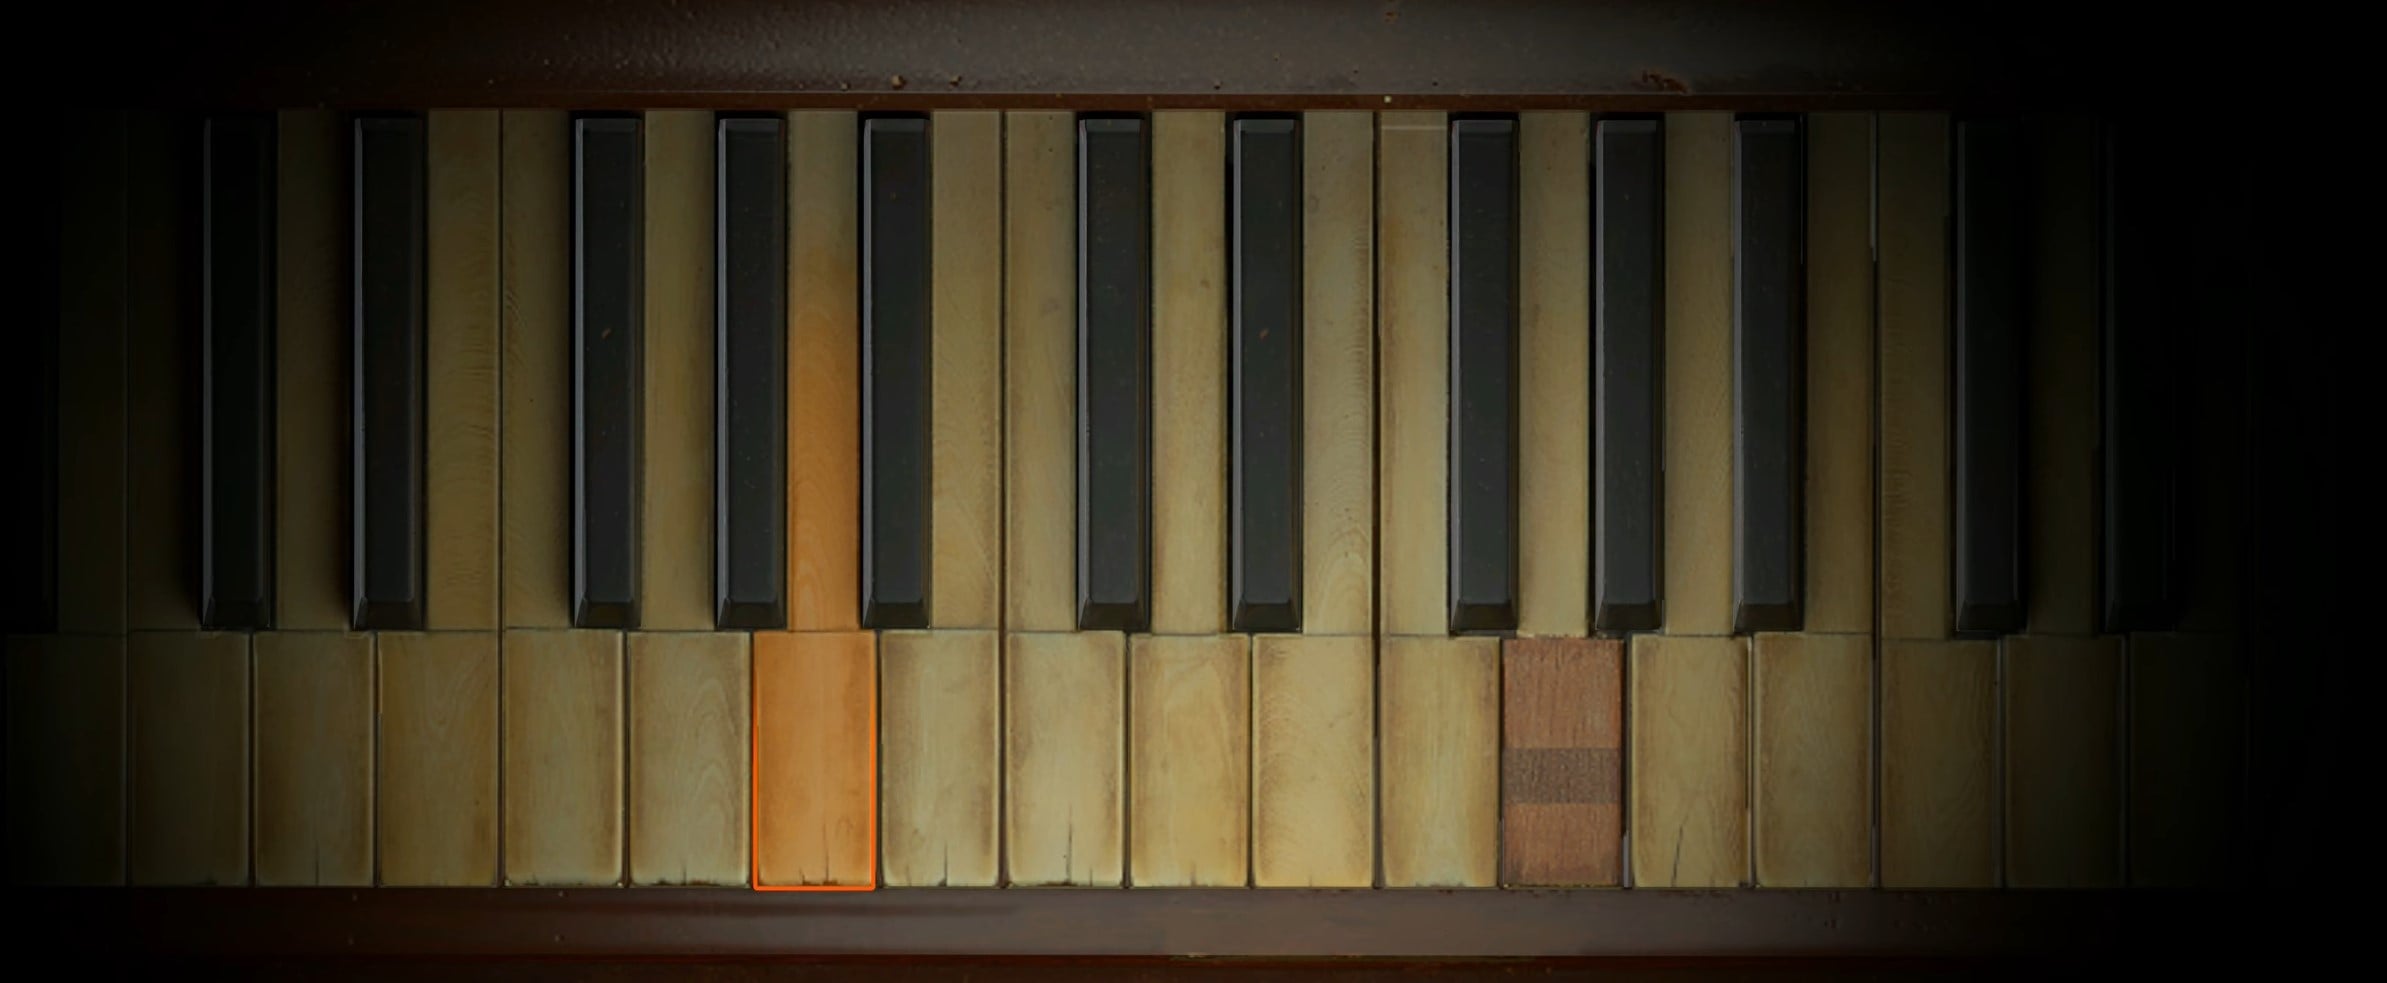
After solving the flashing symbol puzzle, teleport back to the normal version of Nuketown and interact with the piano.
You will get a full-screen piano puzzle with eight keys. Numbering the keys from left to right as 1 through 8, enter them in this order:
-
8
-
6
-
7
-
5
-
6
-
5
-
3
-
5
If entered correctly, the quest will move into the next combat section.
Step 15: Shoot the Floating Zombies
Go back to the nuked version of Nuketown and look outside the map. You will now see floating zombies in the air. Shoot three of them.
Each one sends an orb toward the center of the map. After that, teleport back to the normal version and enter the circle in the middle.
Step 16: Complete the Air Zombie Trial
Interact with the object in the center of the circle to begin the next trial. Zombies will start getting launched into the air one by one. Your job is to kill each zombie before it hits the ground. Keep doing that until the step completes. Once finished, another glowing object will appear. Escort it the same way as the others by getting Sundergat kills near it until it reaches the piano.
Step 17: Set the Clock and Follow the Twins
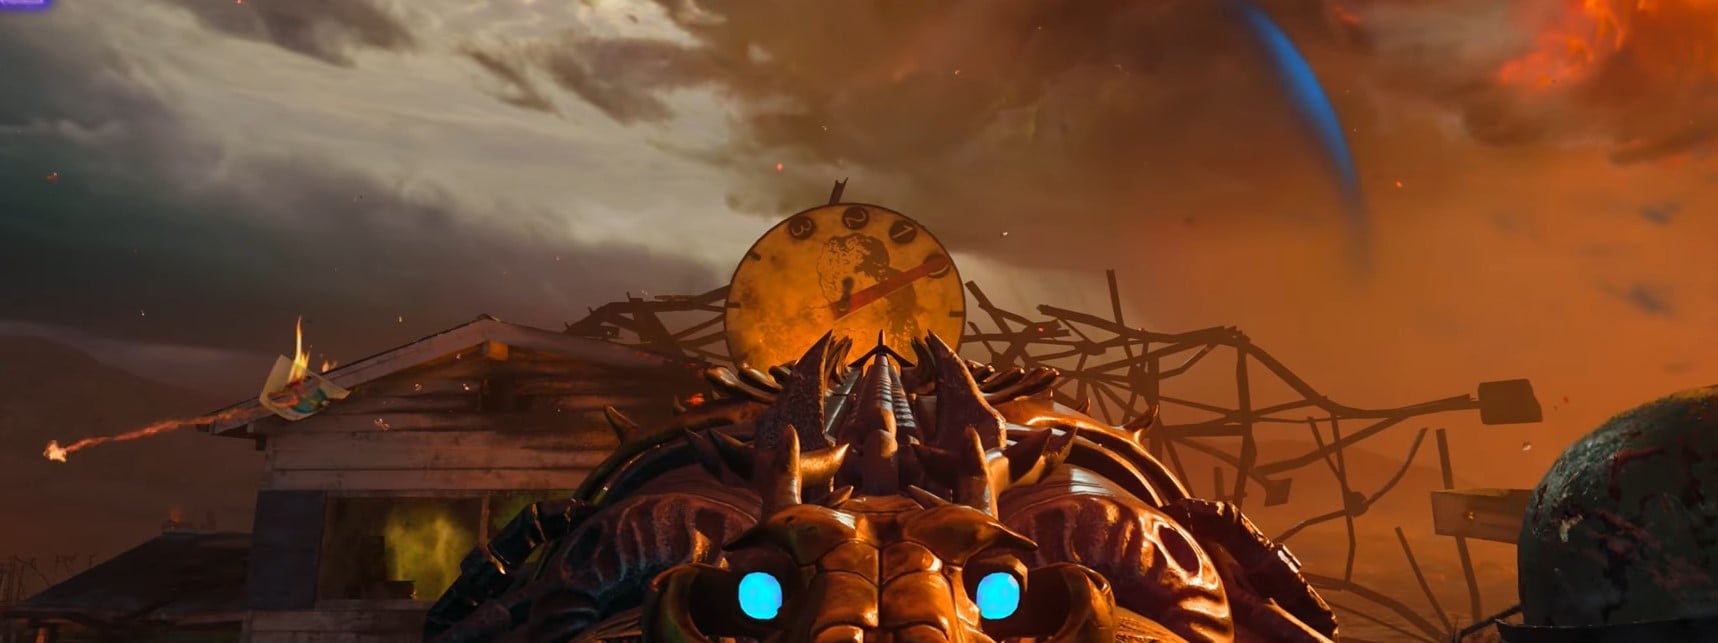
Now head back into the nuked version of Nuketown and find the clock on top of the house. Shoot it until both the hour hand and minute hand are set to 0. While teleporting, shoot the clock again. This will cause the ghosts of the Twins to appear in four different locations. Follow them through each spot until they finally reach the swing set. Once they get there, you will be given the option to enter the boss fight.
Step 18: Boss Fight

When the fight starts, you need to kill zombies near the spores to reveal three artifacts. These are located on Trinity Way, behind the Yellow House, and behind the Green House. Once an artifact turns blue, defend it by stopping zombies from entering the ring. After all three are defended, the boss becomes vulnerable. Shoot the glowing weak points on its body to deal damage.
The second phase follows a similar pattern, but this time each artifact has a glowing yellow orb above it. Shoot that orb to spawn zombies underneath, then kill them all. Do this at each artifact location. After that, defend the blue rings again. Once all three are protected, the boss becomes vulnerable to another damage phase. Shoot the glowing spots again.
In the final phase, the fire zombie from the earlier Sundergat upgrade step returns in the center of the map. You need to guide it to each artifact location while keeping other zombies off it. When the fire zombie gets close enough to an artifact bubble, kill it with the Sundergat. That reveals its soul and activates the artifact again. Repeat this for all three locations.
After that, you will have one last defense phase where you protect the blue rings from incoming zombies. Once that ends, the boss becomes vulnerable for the final time. Hit the glowing weak points until it dies.
When the boss explodes, the Paradox Junction Main Quest is complete.
Paradox Junction Rewards
Finishing the Paradox Junction Main Quest gives you a new Blundergat Wonder Weapon skin, a Calling Card, and 10,000 XP. If you manage to clear it before Directed Mode arrives, you’ll also get a unique Calling Card variant.
At the moment of writing this guide, that’s all of the known steps for completing the main quest. Bookmark this page to know more as soon as more information is discovered.
Check out our CoD BO7 guides:
Astra Malorum Quest Guide
Zombies Weapons Tier List
Ashes of the Damn Quest Guide
