
The Venomous Abyss Raid Guide TL;DR
-
The Venomous Abyss is an eight-boss raid introduced in Midnight Patch 12.1 and is located inside the Vaults of Atal'Utek on the Coiled Isle.
-
After Nek'zali, the raid splits into two wings. Both wings must be cleared before the Twin Fangs become available.
-
Tier tokens drop from bosses 2 through 6. Ula'tek drops a Curio that can be exchanged for any tier slot.
-
The final two bosses drop the best loot, reaching item level 344 on Mythic.
-
Defeating Ula'tek on Heroic awards Ahead of the Curve while the tier is current. Mythic Ula'tek is tied to Cutting Edge, the Venom's End title, and the Primeval Skyfriend mount.
BoEs, consumables, and day-to-day expenses are set to drain your gold super fast. You can skip the gold grind and cover expenses entirely - just buy WoW gold on Playhub. Best prices and secure delivery guaranteed.
The Venomous Abyss Release Schedule
The Venomous Abyss’s portal opened with Midnight Season 2 during the week of August 18, 2026. Blizzard released Normal, Heroic, Mythic, and the first Raid Finder wing all together. I think it’s a great thing for progression-oriented guilds - you can begin Mythic progression right away without waiting for a separate Mythic release sometime down the line. LFR wings will release on a weekly basis; here’s how it will look:
|
Date |
Content Available |
|---|---|
|
Week of August 18 |
Normal, Heroic, Mythic, and Raid Finder Wing 1 |
|
Week of August 25 |
Story Mode and Raid Finder Wing 2 |
|
Week of September 1 |
Raid Finder Wing 3 |
|
Week of September 8 |
Raid Finder Wing 4 |
The minimum entry level for Raid Finder is 90, and you’ll be required to get item level 273. You can find the full info in Blizzard's official Venomous Abyss announcement.
The Venomous Abyss Raid Location
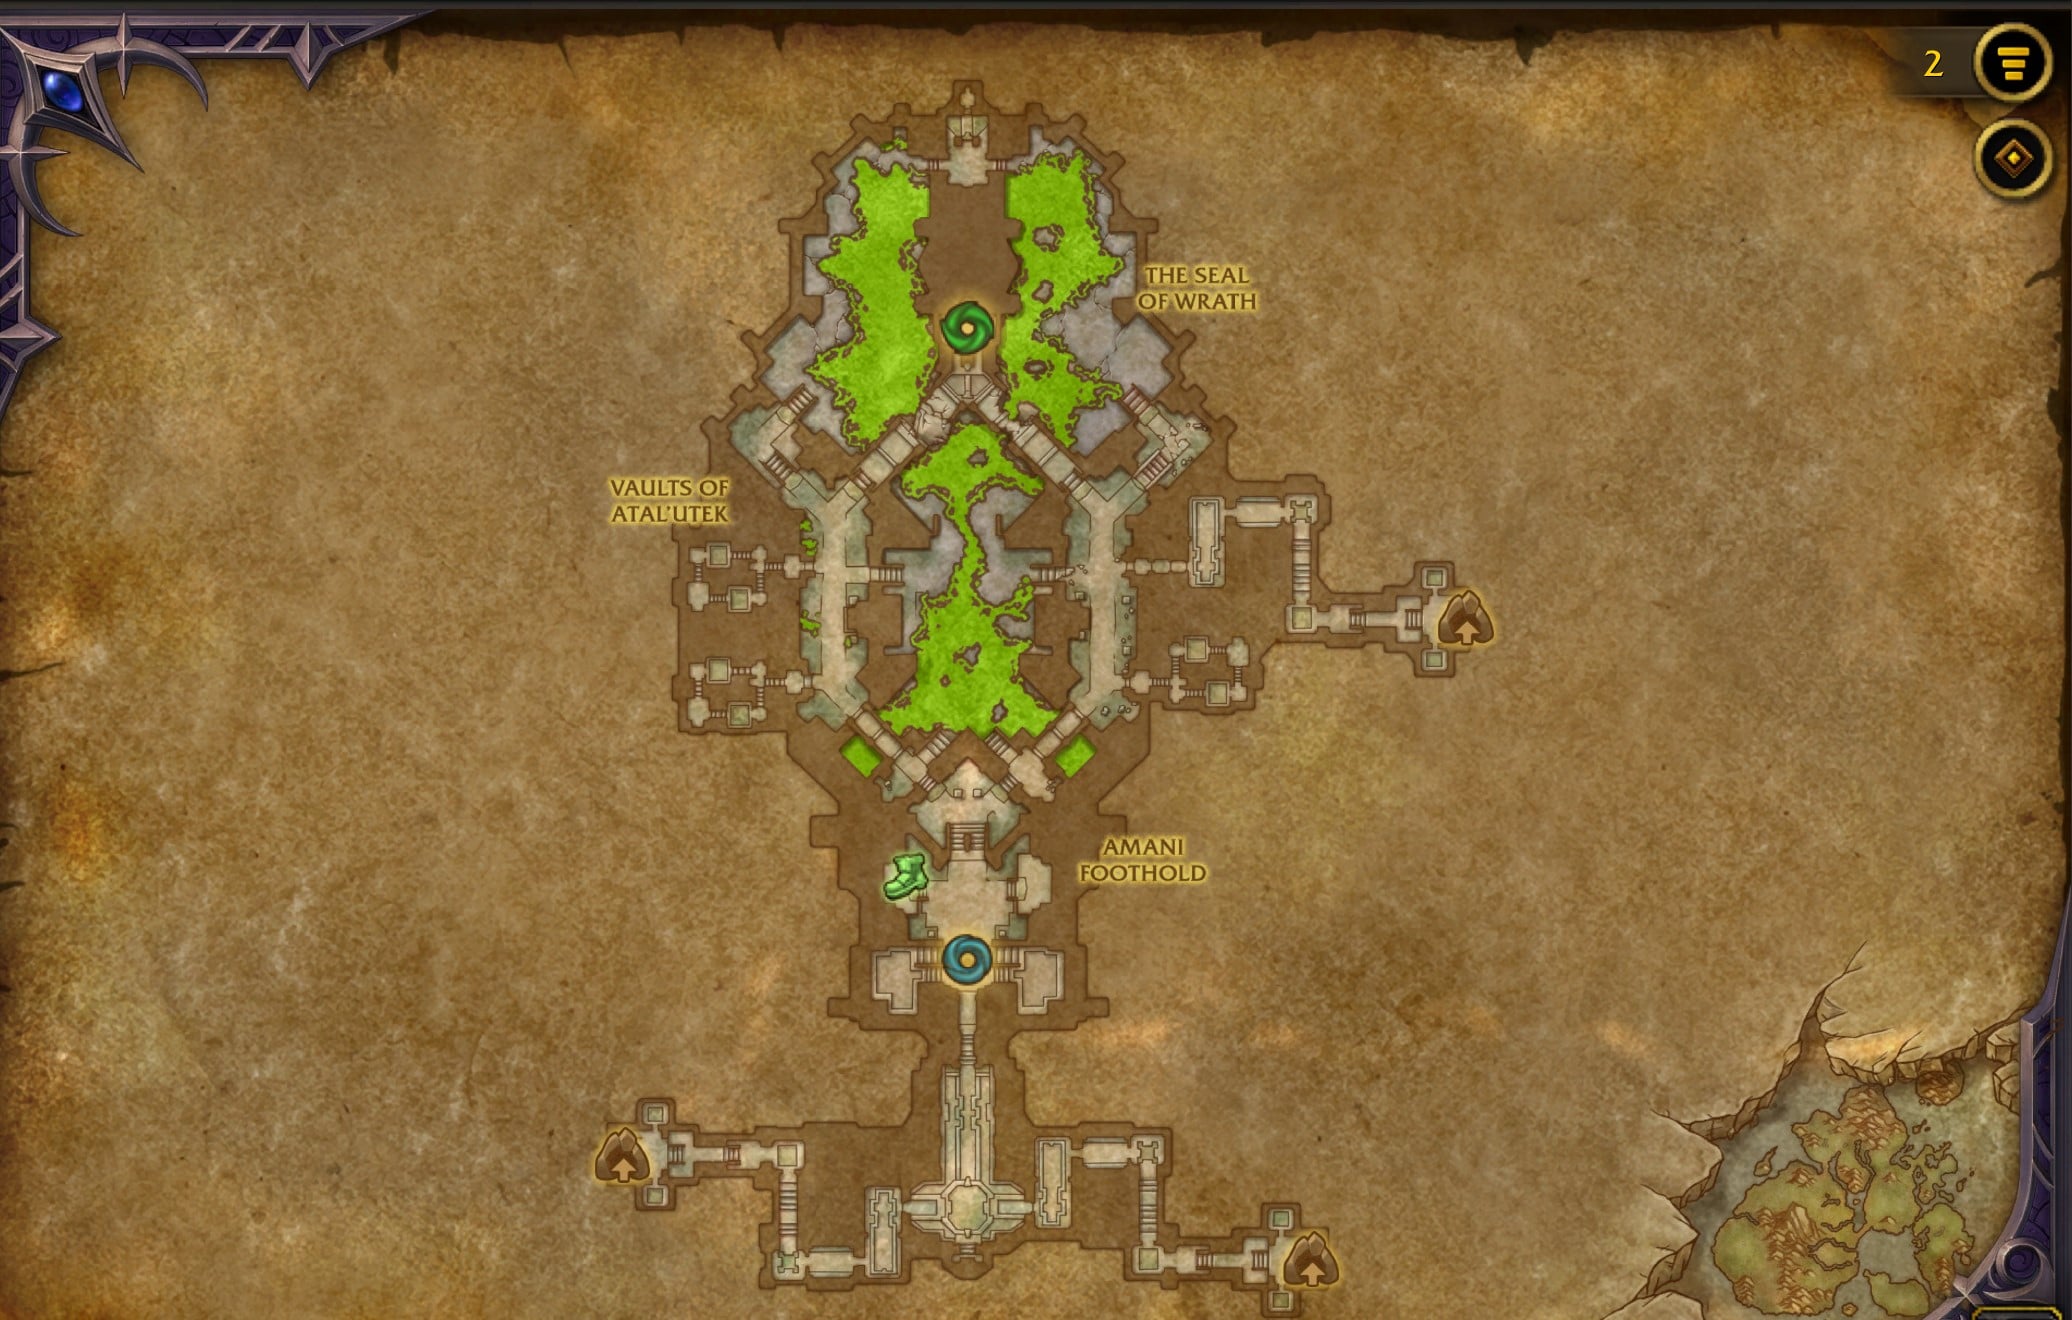
The raid entrance is in the northern part of the Vaults of Atal'Utek on the Coiled Isle. The main entrance coordinate is:
/way #2509 47.2 21.7 The Venomous Abyss Raid Entrance
There are three ways into the surrounding Vaults of Atal'Utek, once inside the vaults, head north to reach the raid portal. :
-
/way #2512 43.3 44.2 Gate of the Serpent Eye Entrance
-
/way #2512 45.4 65.9 Gate of the Eastern Fang Entrance
-
/way #2512 31.8 64.9 Gate of the Western Fang Entrance
The Venomous Abyss Bosses
The raid starts with Nek'zali the Soulcoiler. After she dies, the route splits into two wings. One contains the Entombed Sentinels and Vashnik the Malignant, and the other lets you face the Lost Explorers and Sszorak. Both wings must be completed before the raid can continue to the Twin Fangs, the Coiled Altar, and Ula'tek. Now let’s get to the tactics.
Nek'zali the Soulcoiler Strategy
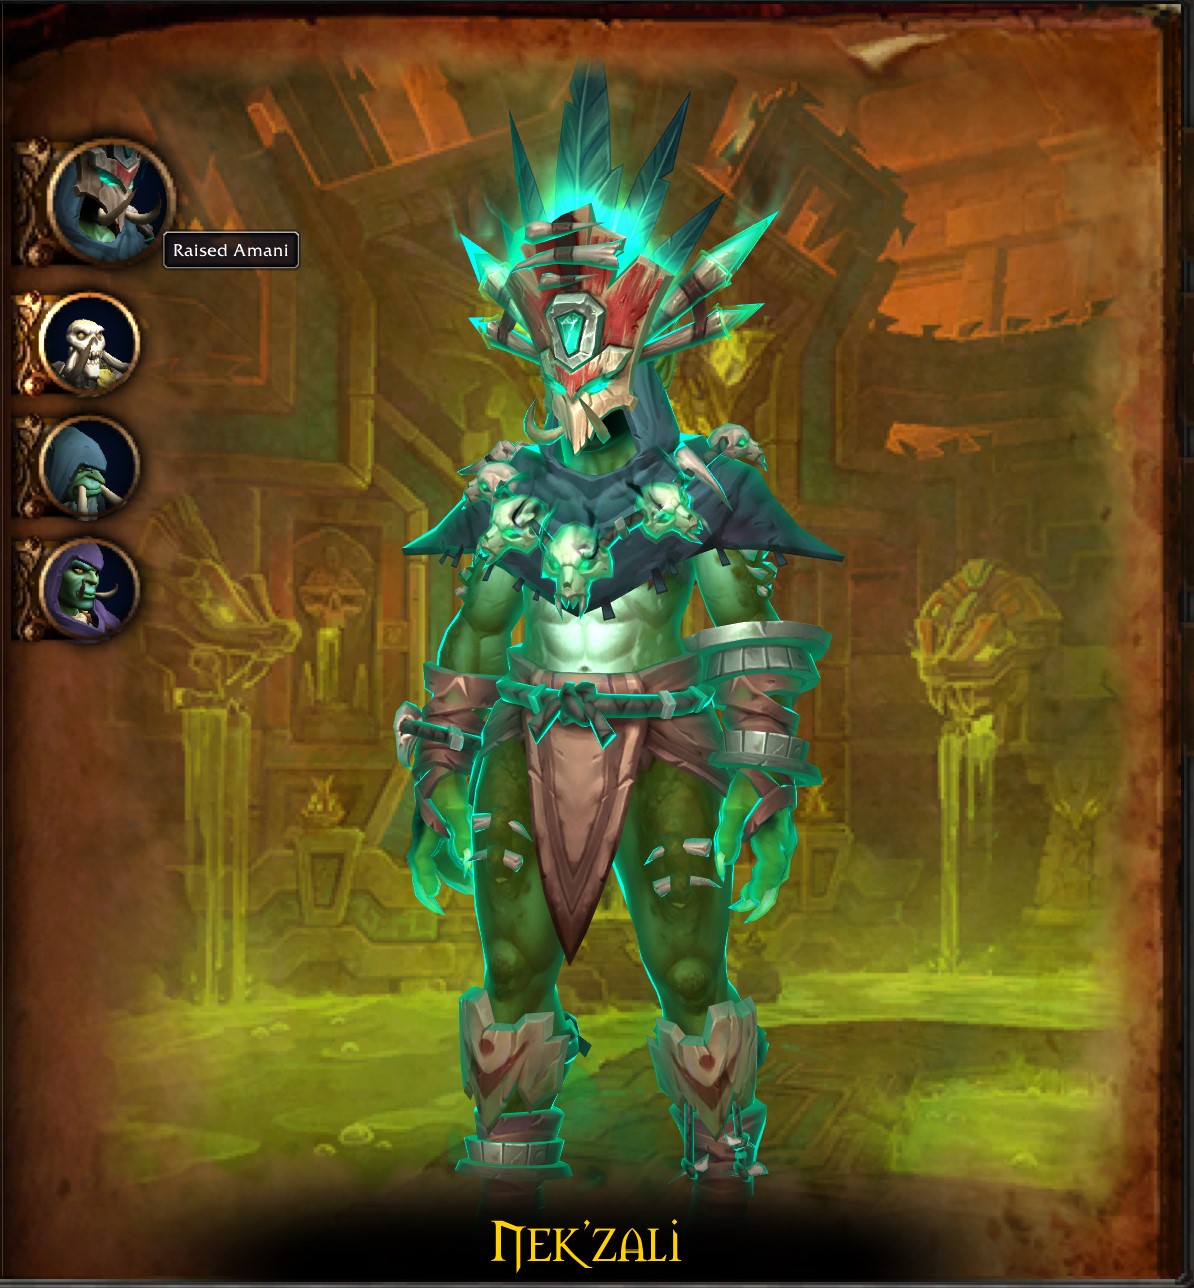
Nek'zali is the opening encounter, and the fight is mostly about adds control. Restless Amani spawn from glowing coffins and walk toward the Soulcoil Well. They begin with magic absorb shields, so magic DPS should burst down those shields right away. Once exposed, the adds can be cleaved with the boss. Failing to do so is a death sentence - every add that reaches the Well gives Nek'zali extra Energy and brings the raid closer to an early intermission.
Essence Rend is another important mechanic that pulls selected players toward the center before applying a dispellable debuff. Targets should run to the outer edge, and healers should wait until they arrive before dispelling. The dispel leaves a Latent Cultist behind as a permanent puddle you don’t want to step in, so manage the arena space efficiently.
There’s another wipeable ability, the Possession Barrage - when targeted by it, the tank should move away from the raid, with everyone creating a clear line between him and the boss. The farther the ghosts travel, the lower the raid damage. Tanks should swap at roughly five or six stacks of Hollowing Strikes.
At 100 Energy, Nek'zali summons two Echoes of Jawae. Kill them one at a time. Hungering Pyre creates a group soak around the active tank and destroys nearby add corpses, so position the Echo on a corpse pile before the cast goes off. When Nek'zali returns, use Bloodlust and kill her before the next 100-Energy cast.
Heroic and Mythic Changes
- On Heroic, dead Amani leave Vessels of Awakening. Hungering Pyre clears the main corpse pile, and selected ranged players will be required to use Slithering Flame to burn strays. Heroic also adds Ritual Burn during Soulcoil Ignition, dealing heavier raid damage.
- Mythic introduces Grasping Depths. The raid is pulled toward the Well until a Drowned Echo dies. Groups sent inside must defeat the Echo while dodging Swirling Spirit beams, then rotate with other players because Soul Exhaustion prevents immediate re-entry. Plan three teams with four DPS and one healer each pre-fight.
Entombed Sentinels Strategy
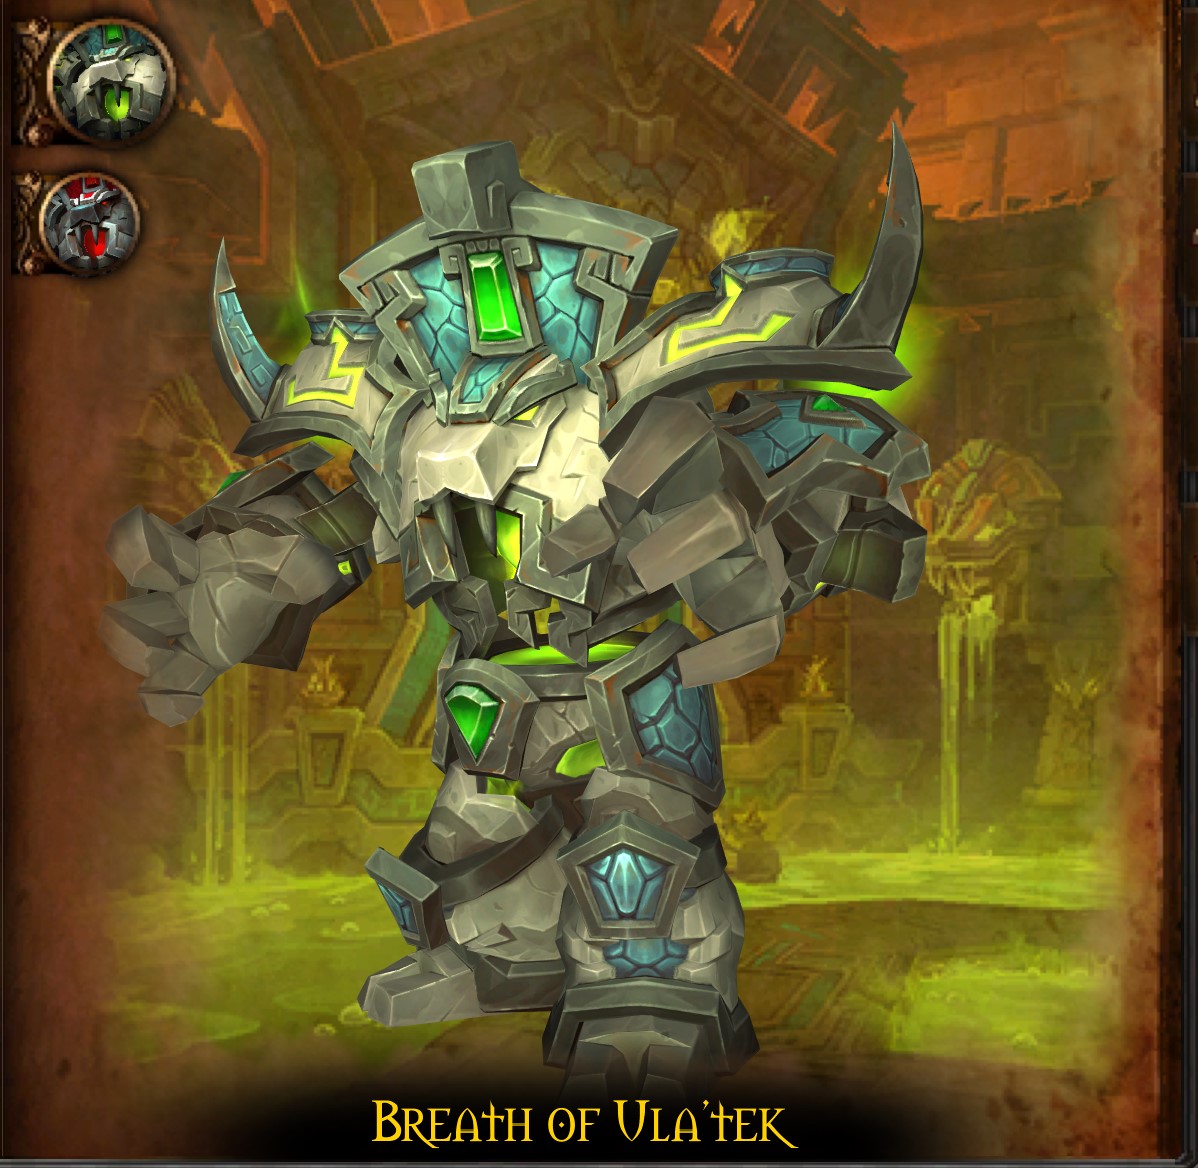
The Entombed Sentinels are fought by two separate raid groups. Keep the Blood of Ula'tek and Breath of Ula'tek at least 40 units apart. If they get too close, Ula'tek's Dominance passive reduces their damage taken by 99 percent. Split tanks, healers, and DPS evenly, then try to keep both health bars down at roughly the same speed because Vitriolic Stasis raises the lower boss to match the higher one during each intermission.
The Breath side must step on Toxic Droplets before they erupt and quickly kill the Venom Coagulation add. Empowering Slam grows stronger each time it hits the same tank, so defensive cooldowns become more and more important the closer the boss approaches his 100 Energy.
The Blood side soaks Unstable Miasma. Blighted Blood should be dispelled quickly, and Clinging Murk and any resulting Blood Venom pools should be carried the edges. During the intermission, both Sentinels move to the center and cast Helical Toxins. Every player receives a value of one, two, or three. Touch another player so the combined value equals exactly four. Make sure to pair one with three and two with two. Afterward, each raid group returns to its original side while the tanks swap Sentinels, allowing mark stacks to expire.
Heroic and Mythic Changes
- On Heroic, destroyed Toxic Droplets send Living Venom back toward the Breath. Move away from the return paths. Blood mechanics also create more permanent floor puddles, and combining toxin stacks above four during Helical Toxins becomes lethal.
- Mythic adds Shifting Protovenom to selected players. Two affected players must touch each other to neutralize it. Contact with an unaffected player triggers an eruption and knockback, so marked players need a clear meeting point assigned and everyone else should stay out of their path.
The Lost Explorers Strategy
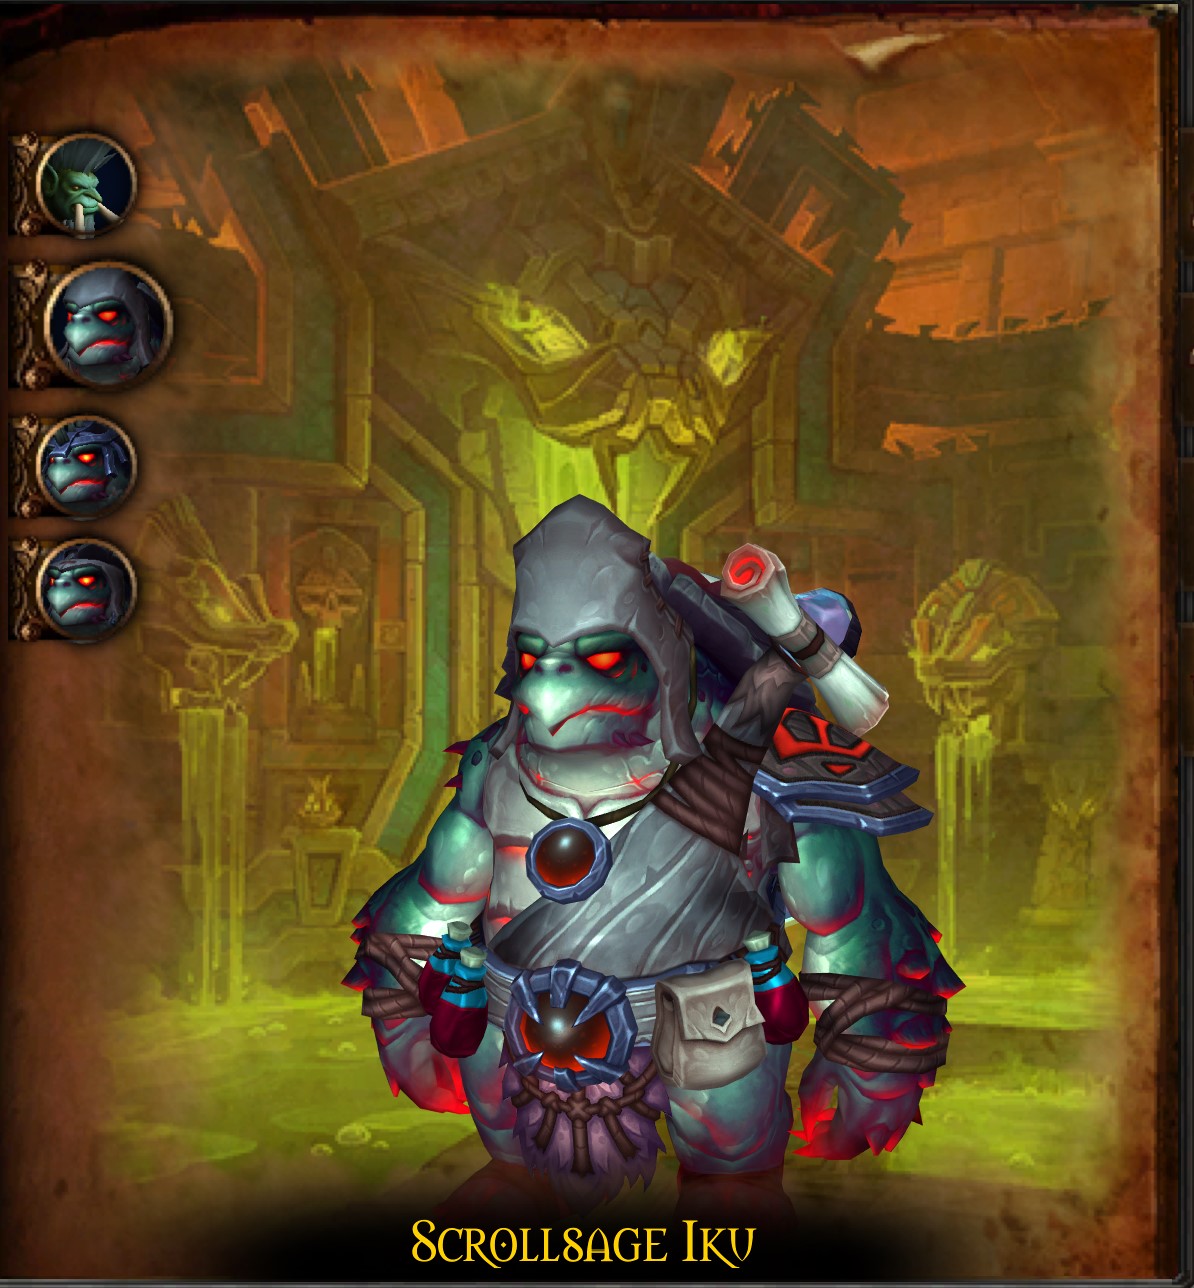
The Lost Explorers is a three-boss ninja turtle council fight featuring Trader Gebbo, First Mate Nama, and Scrollsage Iku. They do not share health, and stacking all three within 30 yards activates United Defense, reducing their damage taken by 99 percent. You’ll have to keep Nama moving between the other two bosses so the raid can maintain two-target cleave without bringing the full council together.
Gebbo throws crates around the arena. Players must walk over them to find a fish, take the Splinters bleed, and deliver the fish with the Extra Action Button when Mor'zahi reaches roughly 90 to 95 Energy. The fish decides which boss uses an ultimate. The best order is usually Gebbo first, Nama second, and Iku third. Missing the delivery causes Empowered Ascension and ends the pull.
As for cycling abilities, bait Nama's Shell Spin toward the edge, interrupt Iku's Icebound Flames, and move away from the raid when Iku teleports for Blink Nova. Tanks swap after Shredding Shards and keep Nama positioned for cleave. Each ultimate has a different solution:
-
Gebbo: Drop Explosive Surprise bombs at the edge and away from Bouncy Mushrooms. Use the mushrooms to jump over the incoming Blast Wave.
-
Nama: Place one Mighty Thud target in melee and two at separate ranged spots. Assign alternating soak teams and never overlap the circles.
-
Iku: Spread Frostfire Volley pools around the edge. Players can remove a pool by touching the opposite element, but each removal deals raid-wide damage.
Heroic and Mythic Changes
-
On Heroic, United Defense reduces all three bosses’ damage taken by 99% whenever they come within 30 yards, so keep only two bosses stacked. Assign three groups for Mighty Thud because an unsoaked marker damages the entire raid. Drop Explosive Surprise at the arena edge, since it leaves Spreading Flames behind. During Frostfire Volley, spread the initial circles and immediately clear Burning Flames or Piercing Frost by stepping into a patch of the opposite element. Failing to clear the debuff before the next volley triggers Elemental Explosion and wipes the raid.
-
On Mythic, Relic Rupture makes every broken crate damage the entire raid, plus the unbroken crates explode after 25 seconds. Assign a crate order and spread the raid damage intelligently.
Vashnik the Malignant Strategy
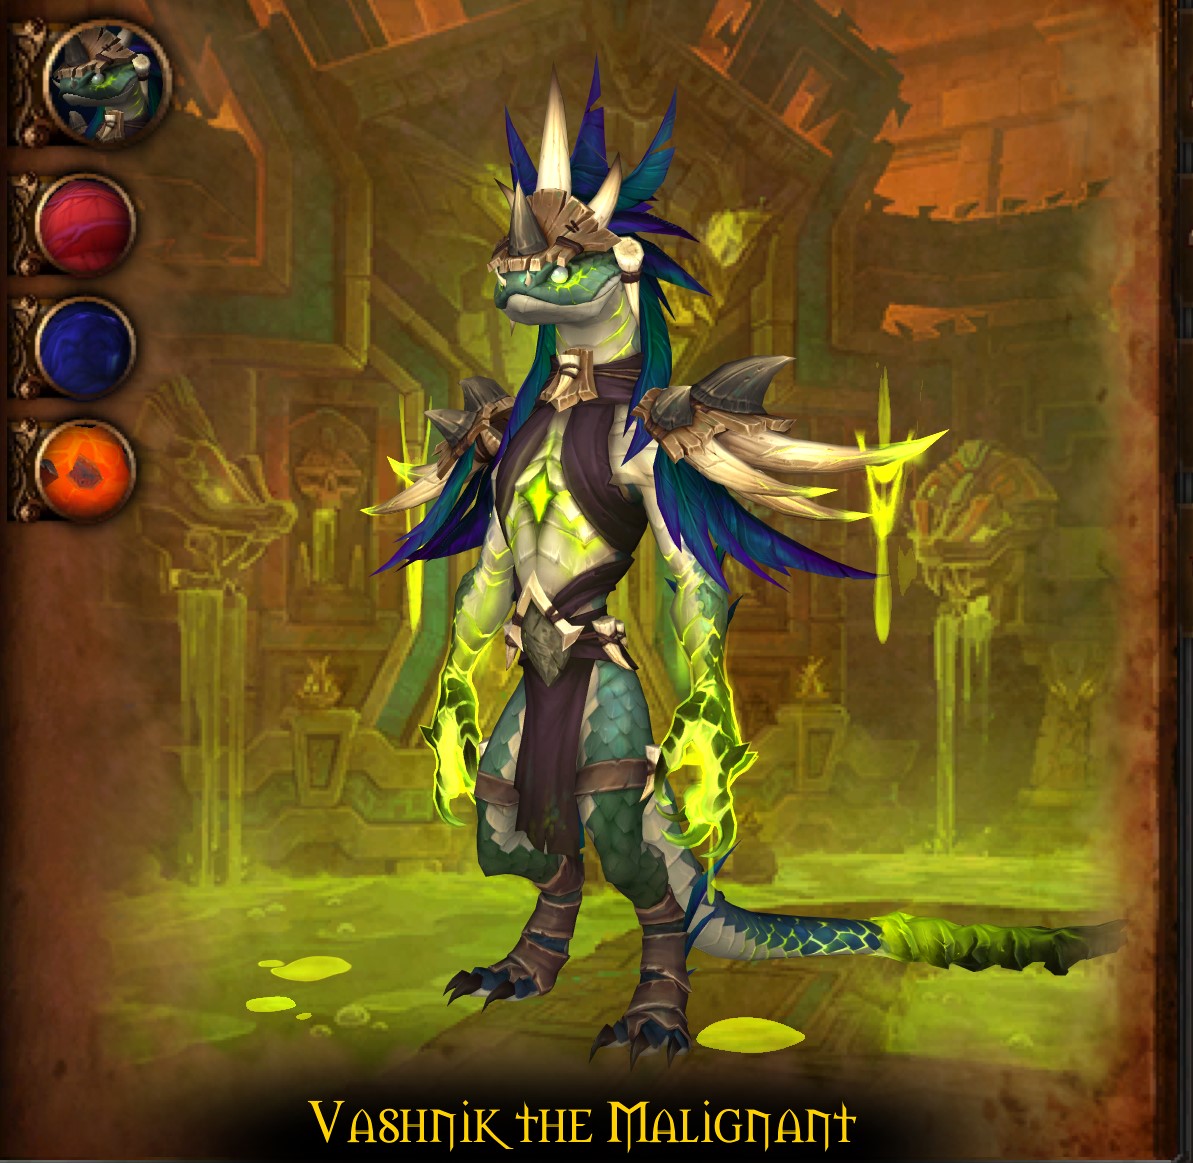
Vashnik uses three venom fountains: Flame, Blood, and Shadow. During Imbibe, the boss empowers the two nearest fountains, gains matching buffs, and summons associated adds. Tanks should move Vashnik around the room so the same fountain is not selected more than twice in a row. A sequence used the most on PTR is Shadow plus Flame, Flame plus Blood, then Blood plus Shadow.
Every add moves toward the Malignant Cavity in the middle. If one reaches it, Malignant Burst hits the raid. Burning Venoms are the first burst-down priority because they deal constant raid damage. Clotting Venom comes next and repeatedly splits into smaller adds. Shrouded Venoms are last and can be slowed or controlled while the dangerous targets die. The active infection depends on the empowered fountains:
-
Exploding Infection: Run far from the raid before the explosion.
-
Siphoning Infection: Other players stand inside the circle so the target can leech health and remove the absorb.
-
Stygian Infection: Keep moving to place the trail away from allies while healers clear the absorb.
Plague Froth targets players with four directional Plague Waves. Aim every line away from the group. Tanks swap after each Dripping Fangs and keep the boss between the correct fountains for the next Imbibe.
Heroic and Mythic Changes
-
Heroic adds Catalytic Bile soaks around the arena. At least one player must stand in each zone. Burning Venoms also leave a dangerous damage-over-time effect when they die, so you’ll have to stagger their deaths to let the healers top you up.
-
On Mythic, Imbibe summons Malignant Tumors with 99 percent damage reduction. Aim Plague Wave through each Tumor to remove Hardened Tumor, then kill it before it reaches the middle of the arena. Malignant Burst also leaves a long stacking damage-over-time effect, which means a single missed add can poison the rest of the pull.
Sszorak Strategy
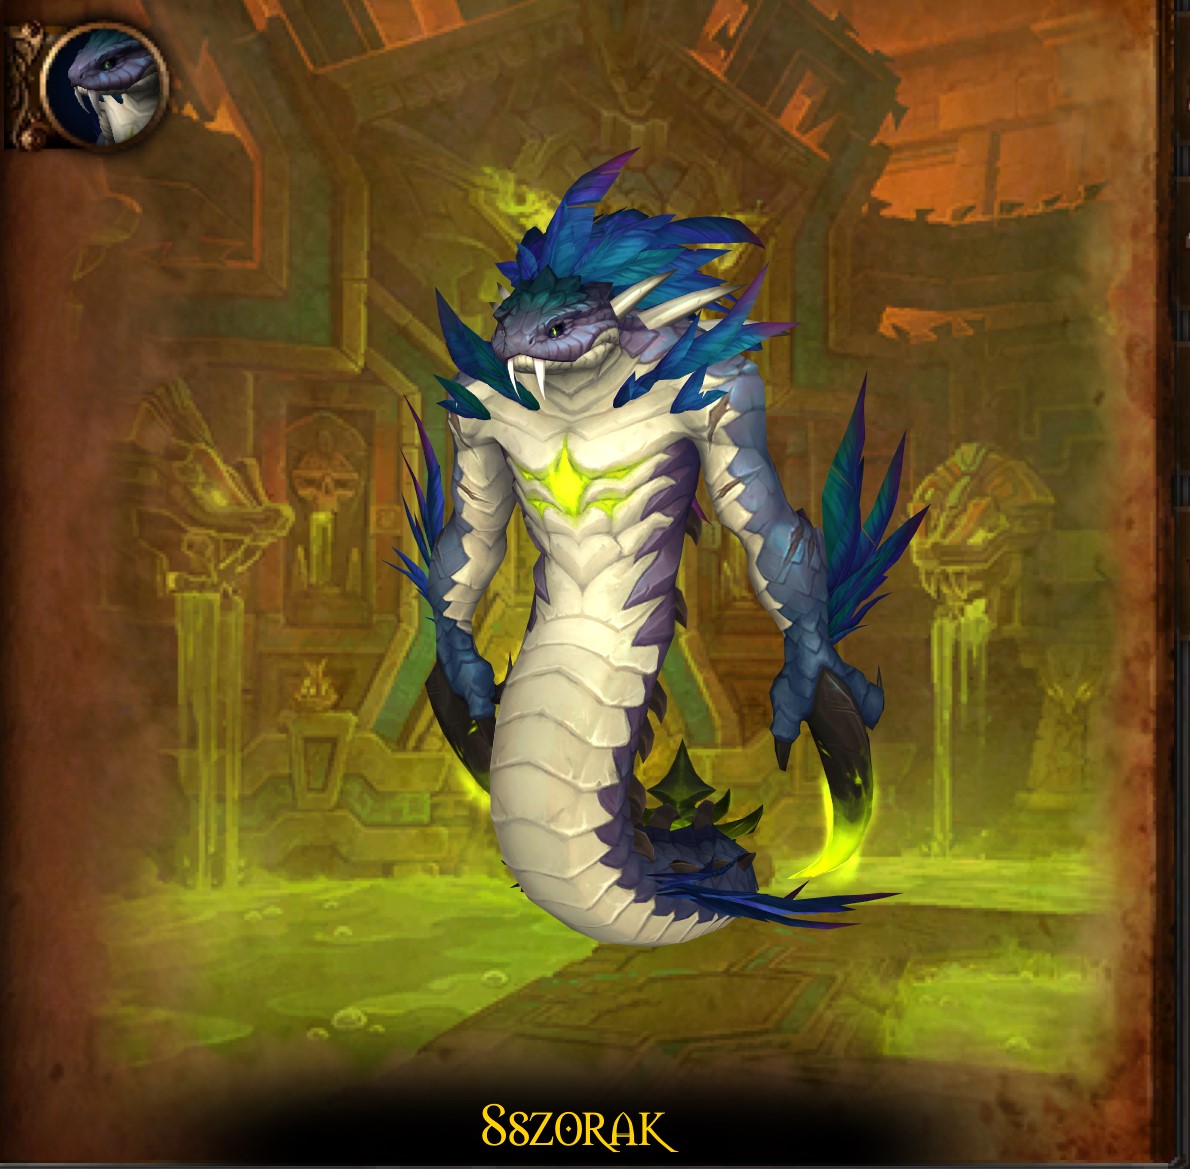
Sszorak’s fight is built around your team utilizing changing wind direction and planned knockbacks. At the start of each main phase, inspect the wind tunnels around the arena. Their motes show the order in which they will activate during the intermission. Place markers opposite those tunnels and drop each Venomous Surge at a separate marker, creating Viscous Cysts in the positions the raid will need later.
Apex Predator is a five-hit tank sequence containing two Ravages, two Mutilates, and one Tempest in a random order. Ravage is a defensive frontal that must be faced away from the raid. Mutilate splits damage with the group. Tempest sends tornadoes from the boss and gives the tanks a breather to manage swaps. Tanks should swap after the first Ravage or Mutilate and around six stacks of Corroding Venom.
Raging Crosswinds pushes players in opposite directions. Find a partner with the opposite arrow and face them so the two knockbacks collide in the air. During Howling Maelstrom, the wind tunnels activate in sequence. Let the wind push the raid into the correctly placed Viscous Cyst, which knocks everyone back toward the middle. Repeat for each tunnel. Sszorak takes 30 percent increased damage during this intermission, so align damage cooldowns when possible.
Heroic and Mythic Changes
-
Heroic requires two Mutilate soak groups because each hit applies a 500 percent damage-taken increase against another Mutilate. Caustic Claws also leaves pools during Venomous Surge. Position them so that the intermission winds remove the pools from the platform.
-
Mythic adds Serpent's Fury. The marked player must join a stack of at least 14 players before Sszorak reaches 100 Rage. This triggers To the Slaughter, a charge soak that applies Virulence. Everyone hit must then spread so their visible beams do not touch another player. Raging Crosswinds can also point in four directions, making partner assignments much stricter.
The Twin Fangs Strategy
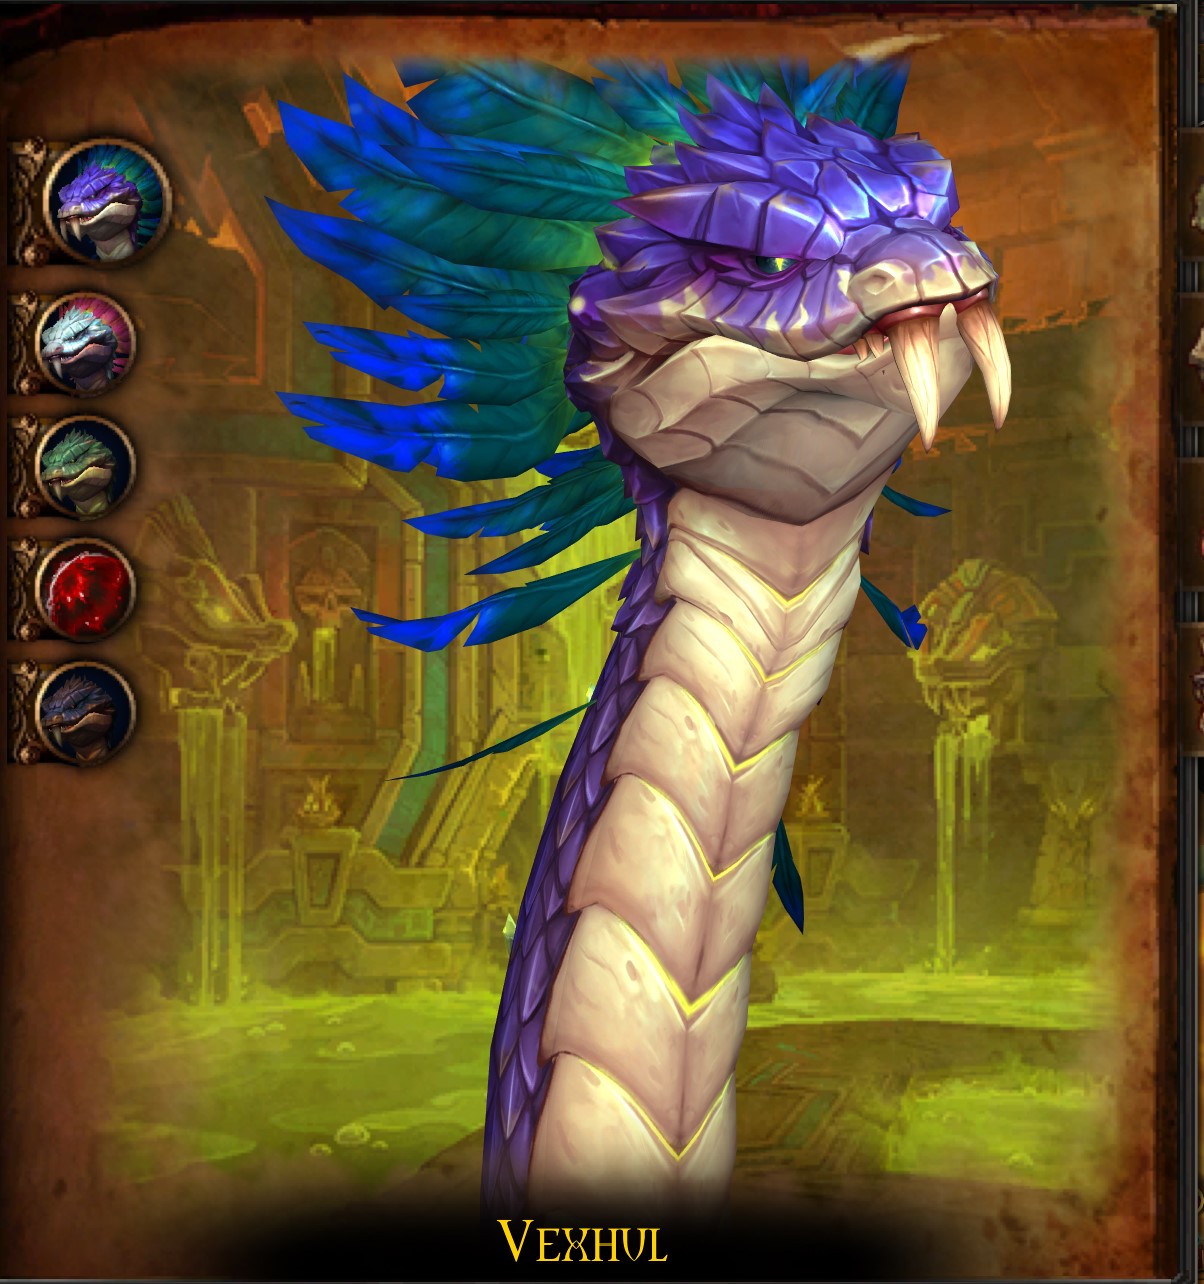
Vexhul and Ithraz do not share health and should die at roughly the same time. I think the easiest way to understand the fight is knowing that most of their mechanics apply permanent Eternal Venom stacks. On Heroic, reaching 10 stacks kills the player, so the raid must decide who collects new stacks and who clears them through Ravenous Feast.
Vexhul's Caustic Deluge pushes the active tank while creating Caustic Globules. Players with low Eternal Venom should soak the formed globules one at a time. Venomous Emergence summons three high-priority adds in the middle. Kill them immediately and avoid Corrosive Spit beams. Stir the Depths sends waves across the platform, and every avoidable hit adds another venom stack.
Ithraz uses Stone Breaker on the tank. Three soak zones appear in order, and the targeted tank must stand in all three before the bosses are swapped. Coiling Ichor targets should drop permanent pools compactly around the outer edge. Ravenous Feast performs three split soaks, removing one Eternal Venom stack from every player hit.
After two main-phase cycles, both bosses submerge. Follow the safe side of Vexhul's rotating Vile Flood beam while dodging Sanguine Storm impacts. The room becomes increasingly cramped, and the encounter enrages after three main phases, so careful early pool placement buys valuable space later.
Heroic and Mythic Changes
-
Heroic requires three Ravenous Feast teams because each player can safely take only one of the three hits. Coiling Ichor pools also slow players during the intermission, which makes a sloppy edge layout especially dangerous.
-
On Mythic, Caustic Globules can gain Barbed Bulwark and must be interrupted before anyone soaks them. Rouse the Brood adds need assigned interrupts, while every Ravenous Feast creates a Tainted Blood soak that must be taken within eight seconds. A death while carrying Eternal Venom creates even more globules, which is exactly the kind of generosity nobody asked for.
The Coiled Altar Strategy
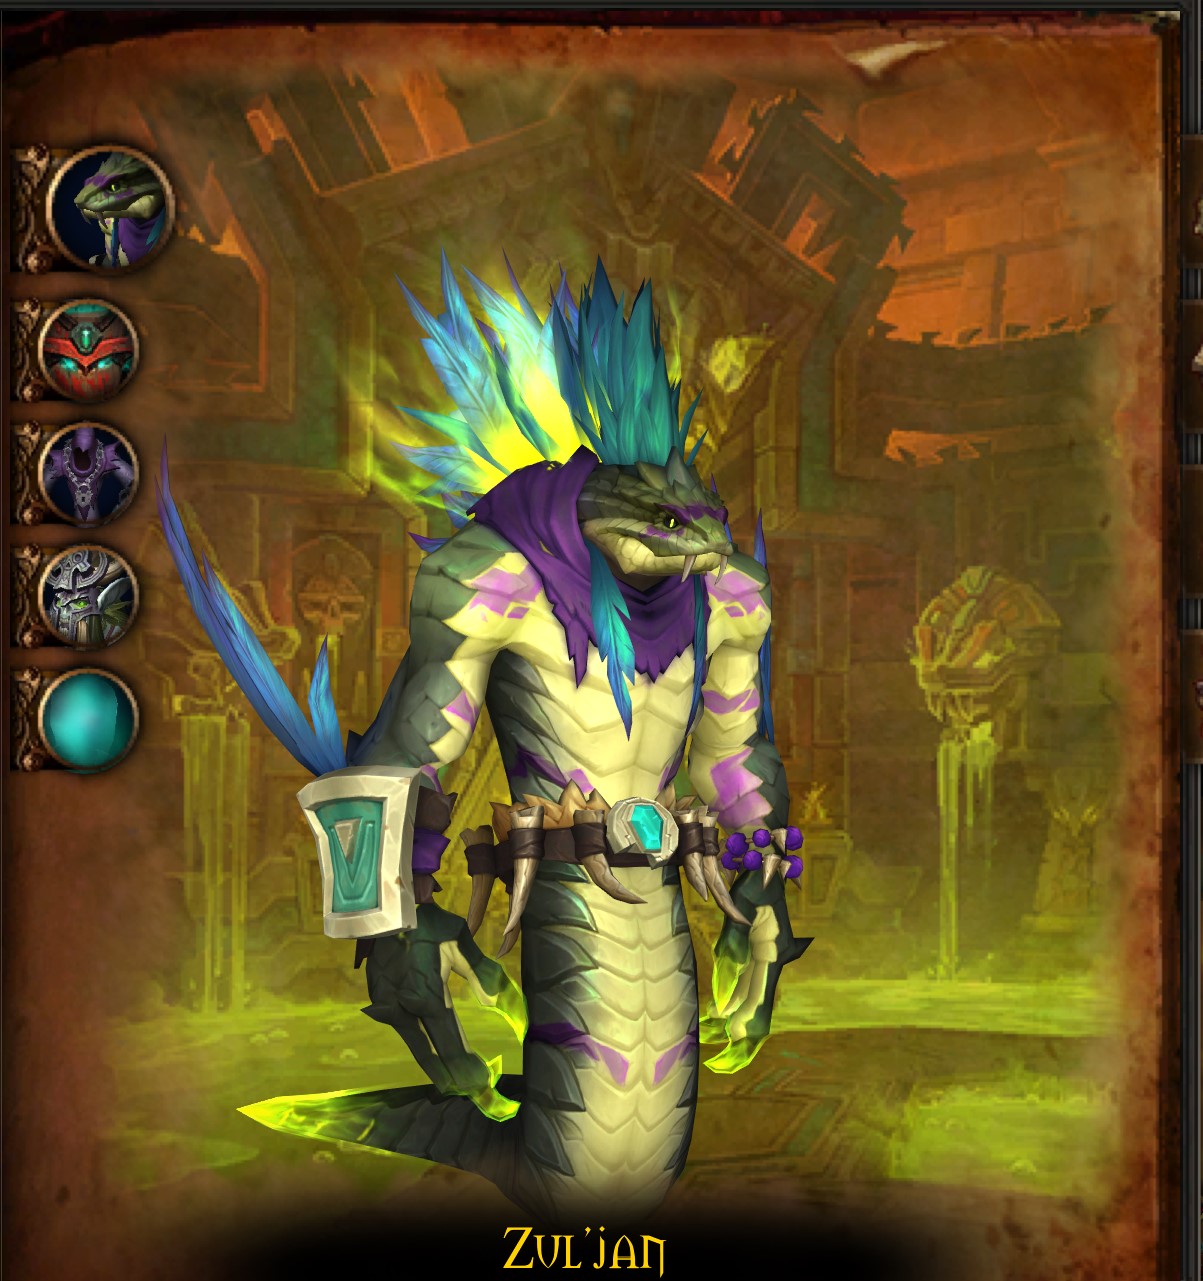
The Coiled Altar has three phases. The raid fights Zul'jan first, Hex Lord Malacrass second, and both of them together in the final phase.
Phase One: Toxic Deluge leaves Coalesced Venom orbs around the arena. Assigned mobile players should collect them and drop them in one planned stack. Tanks then aim Sever through the pile to destroy the orbs and swap after every cast. Each destroyed orb deals raid damage, so do not clear more than the healers can cover.
Guillotine must hit at least five players. Move the soak outside Widow's Kiss, then recover before the detonation. Dispel Venomfang quickly and keep movement lanes clear of roaming Axegrinder weapons. Any venom left alive when Zul'jan reaches zero explodes during the transition.
Phase Two: Dreadmarch mind-controls selected players and makes them walk toward the edge. Break their shields quickly, using crowd control if necessary. Each freed player spawns a Manifestation of Dread that only moves while its fixated target looks away. Gather the ghosts at a planned location, face them to hold them still, then have the tank aim Soul Sever through the group to destroy them.
Gloombomb targets should spread before exploding. Anyone hit becomes Gravebound and must collect three Soul Fragments. When Malacrass gains Veil of Twilight, break the shield and interrupt Eternal Nightfall before the cast finishes.
Intermission and Phase Three: After Malacrass falls, Soulbinding brings Zul'jan back and makes him take 100 percent increased damage. Use Bloodlust, potions, and major cooldowns here. Intercept Fragments of Malacrass before they reach Zul'jan, but make sure to stagger the soaks because each one deals raid-wide damage.
In Phase Three, both bosses are active with mechanics from the first two phases. They do not share health, and the survivor enrages when the other dies. Stack them for cleave and keep their health even.
Heroic and Mythic Changes
- Heroic requires forming two alternating Guillotine groups. Manifestations that reach their fixated players reapply Dreadmarch, and Spiritcackle summons an add that must be interrupted and killed.
- Mythic makes orb control much stricter. Virulent Cysts create extra venom, Mutations damage nearby allies, Guillotine's vulnerability becomes permanent, and Axegrinder weapons no longer despawn. In Phase Two, only the fixated player can see their Manifestation. Gloombomb must also hit the shielded Soulcoiler to make it vulnerable. This encounter becomes an assignment check long before it becomes a pure DPS check.
Ula'tek Strategy
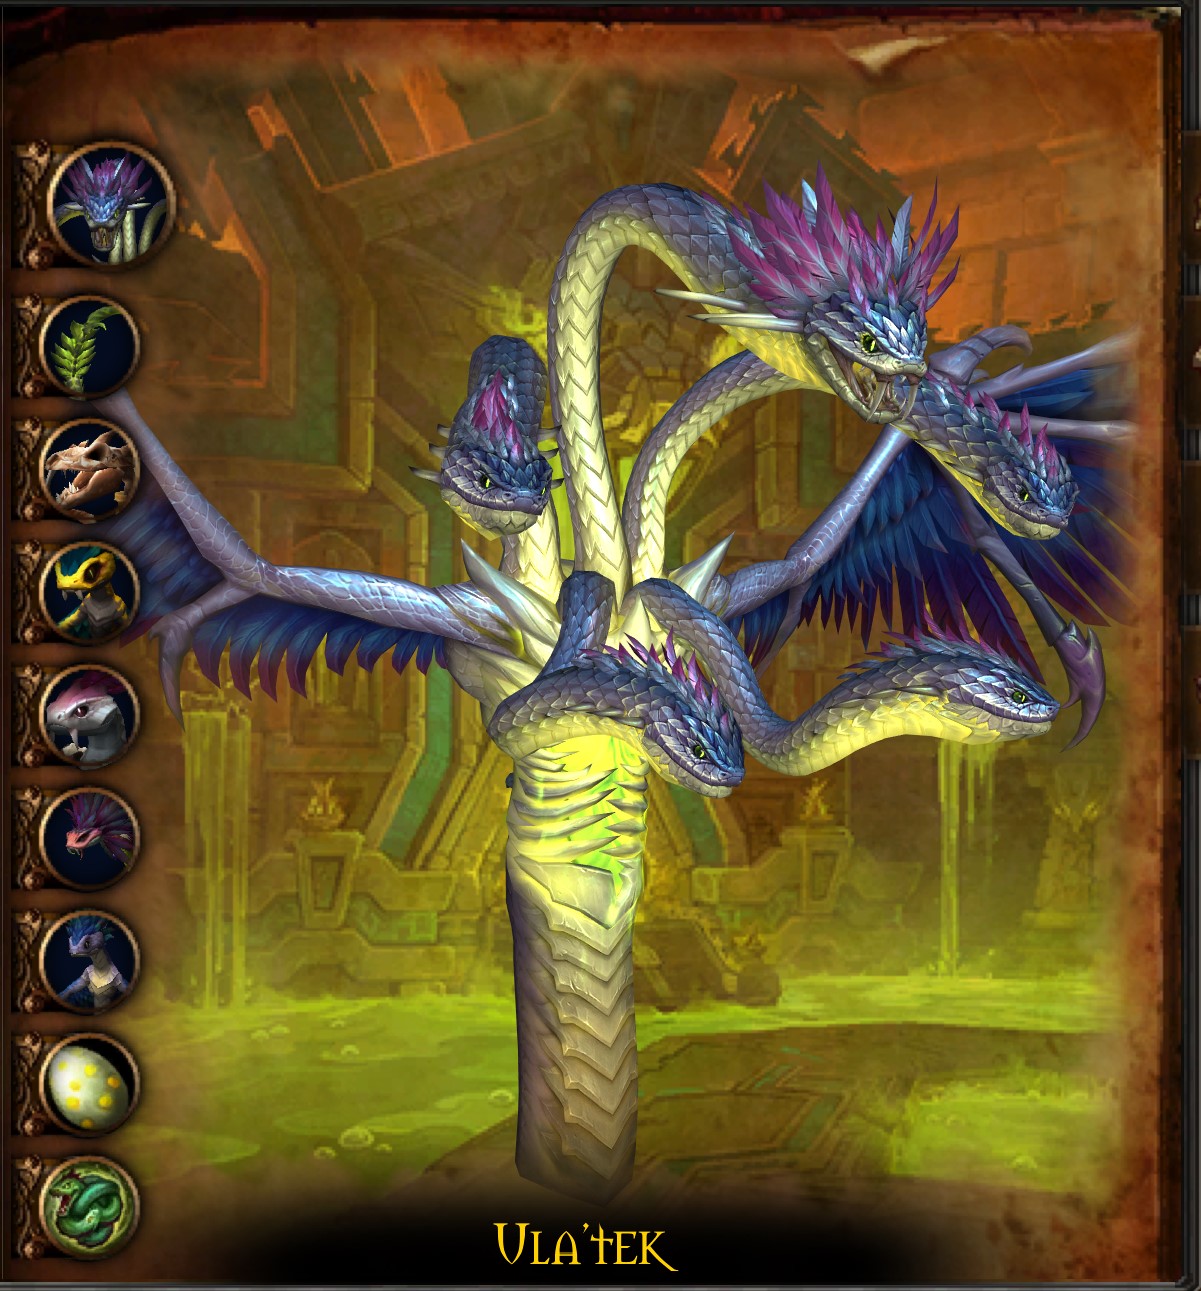
Ula'tek is a three-stage final encounter with an intermission before the last stage. The fight revolves around Caustic Waves, egg control, Spectral Coils soaks, constant adds, and a platform that offers less safe space as the fight continues.
Stage One: Caustic Waves travel across the platform and instantly hatch any Blightscale Spawn they touch. Dodge the waves and use assigned egg carriers to keep unhatched eggs out of their path. Every Viper that hatches applies Putrid Membrane to the whole raid, so uncontrolled eggs turn into a permanent healing problem.
Spectral Coils deals raid-wide damage that is reduced by the number of players standing inside its impact. Stack for the soak, but keep the route clear for Mephitic Thrash and other knockbacks. Tanks must stay in melee because Unchecked Rage and Rattler Slam damage the entire raid when Ula'tek has no target nearby.
During Rage of the Shackled, dodge Falling Debris and use healing cooldowns. Ula'tek exposes her Venomous Heart for 20 seconds, and the Heart takes 200 percent increased damage. Save burst for this window.
Stage Two: Doomscale Wardens are the first priority. Warden's Protection prevents players from interacting safely with nearby eggs, while Malice deals heavy raid damage and should be interrupted. Wardens also accelerate nearby eggs with Writhing Gestation.
Once the area is safe, assigned players can move Doomscale Eggs. Picking one up starts a 20-second hatch timer. Breaking gestation correctly produces a Weakened Doomscale that takes 100 percent increased damage and cannot cast Dread Roar. Kill weakened Doomscales quickly, keep their frontal attacks away from the raid, and control the Blightscale adds before they mature.
The Shattering and Stage Three: The intermission repeats Spectral Coils while Necrotic Vapors steadily increase raid damage. Stay grouped for the required soaks and prepare cooldowns for the rising damage.
In Stage Three, Circling Prey destroys sections of the platform and forces the raid into shrinking safe areas. Call of the Serpent continues to spawn adds, Caustic Waves remain active, and Serpent's Bite requires nearby players to remove the venom before the target becomes a Calcified Corpse. The helper receives Volatile Purge and must move away before it explodes. Use Bloodlust in this final stage and prioritize any add that is close to empowering or hatching.
Heroic and Mythic Changes
- Heroic adds Soul Constrictor after a Spectral Coils soak, preventing the same players from reducing the next hit. Alternate soak groups. Blightscale Rawlings gain Poisonous Bite, Vipers gain Petrifying Sting, Doomscale Eggs trigger Mass Gestation, and removing Grasping Fangs applies Blight Vein to the raid.
- Mythic adds Toxic Womb and Toxic Incubation in Stage Three. Players must intercept venom aimed at the Blightscale Wretch so it does not gain Mother's Boon, but every interception creates Caustic Waves and applies Toxic Burn. Weakened Doomscales also gain Revenge when a partner dies, so balance their health. Rawlings and Shriekers eventually gain Boiling Venom, and Serpent's Bite removals create additional waves.
The Venomous Abyss Loot Item Levels

As always, later bosses drop stronger gear. The final two encounters jump all the way to item level 344 on Mythic, which is equivalent to Myth 9 gear. Here’s the full item-level progression:
|
Boss Group |
Raid Finder |
Normal |
Heroic |
Mythic |
|---|---|---|---|---|
|
Nek'zali |
279 |
292 |
305 |
318 |
|
Entombed Sentinels and Lost Explorers |
282 |
295 |
308 |
321 |
|
Vashnik, Sszorak, and Twin Fangs |
285 |
298 |
311 |
324 |
|
Coiled Altar and Ula'tek |
289 |
302 |
315 |
344 |
Raid Great Vault slots unlock after defeating two, four, and six bosses. The item levels offered by the Great Vault are 292 from Raid Finder, 305 from Normal, 318 from Heroic, and 334 from Mythic. Very Rare drops and Mythic items from the final two bosses can reach item level 344.
The Venomous Abyss Tier Set Tokens
Bosses 2 through 6 drop armor-class tier tokens. Ula'tek drops the Slumbering Coil Curio, which any class can exchange for a tier piece of its choice at Kirana near the Silvermoon Catalyst.
|
Boss |
Tier Slot |
|---|---|
|
Entombed Sentinels |
Hands |
|
The Lost Explorers |
Shoulders |
|
Vashnik the Malignant |
Chest |
|
Sszorak |
Legs |
|
The Twin Fangs |
Helm |
|
Ula'tek |
Any slot through Slumbering Coil Curio |
Kirana is located at /way #2393 40.2 64.7. For complete boss loot tables and token names, see the Venomous Abyss rewards overview.
The Venomous Abyss Mounts and Rewards
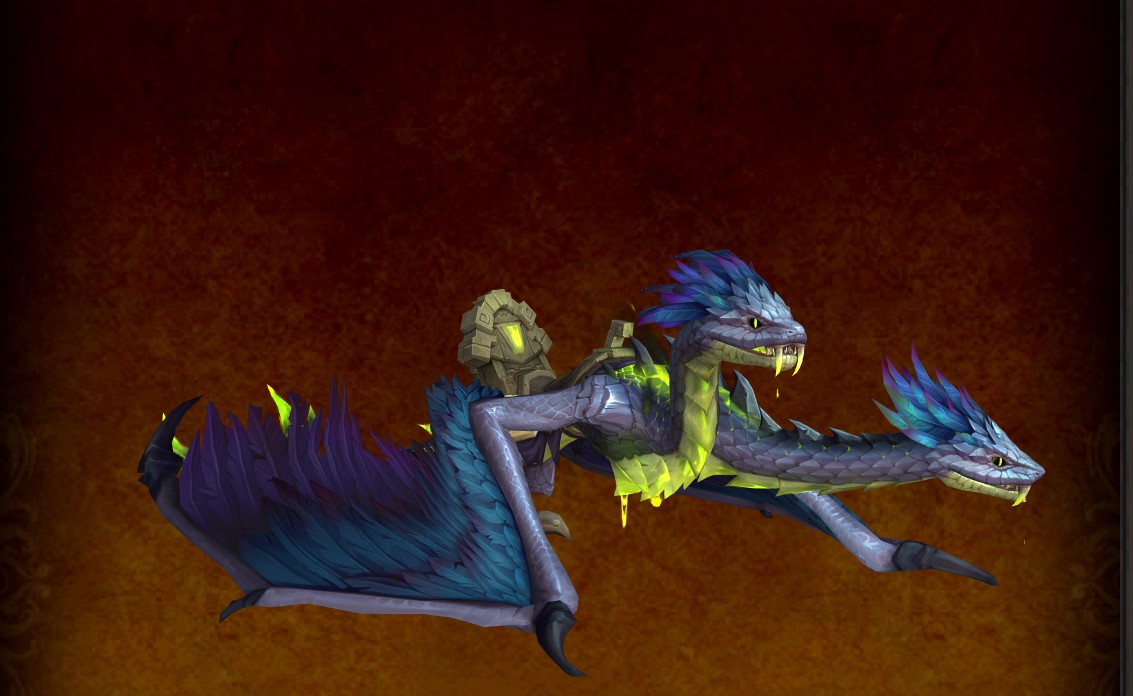
The new raid includes several long-term collector rewards:
-
Primeval Skyfriend: Drops from Ula'tek on Mythic difficulty.
-
Crimson Venomfang: Reward for completing Glory of the Venomous Raider.
-
Ula'took: Companion pet tied to the No Egg Scramble achievement.
-
Ahead of the Curve achievement: Ula'tek: Awarded for defeating Ula'tek on Heroic or higher before the next raid tier.
-
Cutting Edge: Ula'tek: Awarded for defeating Ula'tek on Mythic before the next raid tier.
-
Venom's End: Title from the Mythic Ula'tek achievement.
-
Housing decor: Every boss has a chance to drop raid-themed decorations, while Ula'tek awards difficulty-based Vanquisher trophies.
I think the rewards list is pretty boring, being the same as dozens of previous raids. As expected, the two final bosses carry the most valuable rewards. The Coiled Altar can drop two Very Rare axes, while Ula'tek drops Venomcursed armor, a Curio token, and two Very Rare daggers with unique effects.
Check out more useful WoW articles: