
ARC Raiders Outpost Guide TL;DR
-
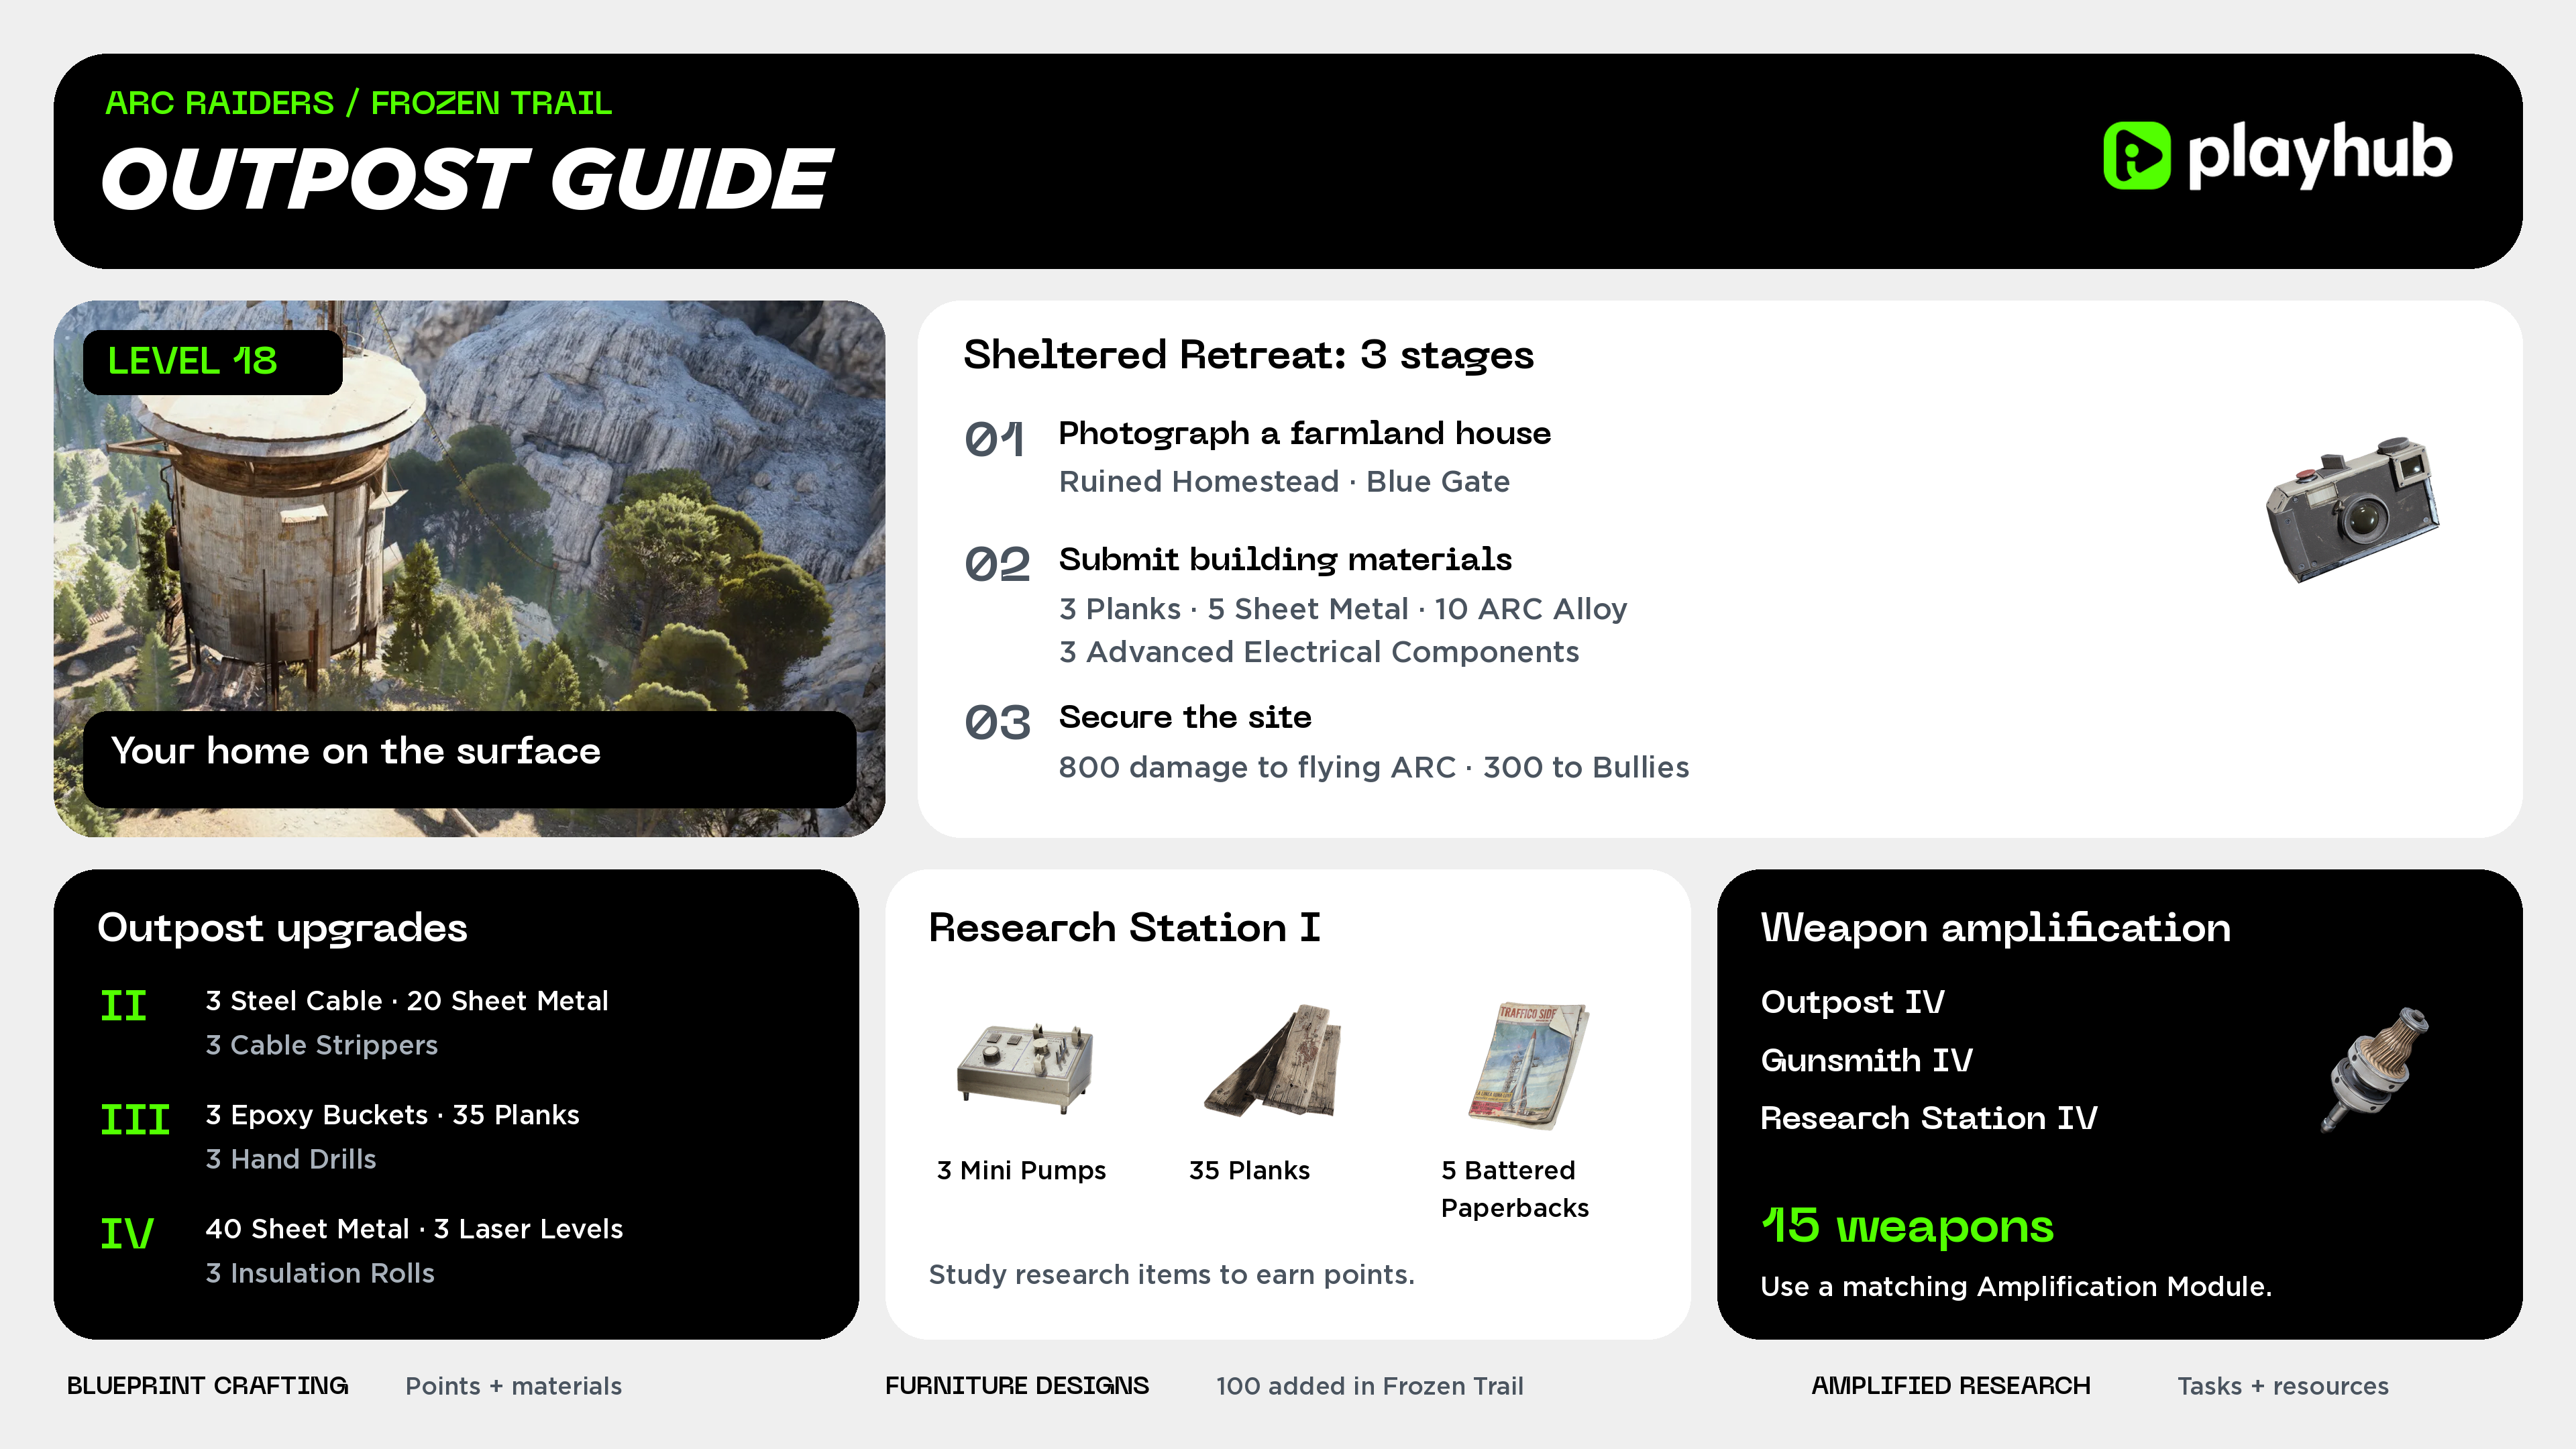
Reach level 18 and complete the three-stage Sheltered Retreat project through the Outpost tab.
-
Photograph a farmland house at Ruined Homestead on Blue Gate, submit building materials, then deal 800 damage to flying ARC and 300 to Bullies.
-
Build Research Station I with 3 Mini Pumps, 35 Planks, and 5 Battered Paperbacks after unlocking the Outpost.
-
The Outpost and Research Station each have four levels. Your Outpost must match the station level you want to build.
-
For weapon amplification, work toward Gunsmith IV and Research Station IV. Furniture uses separate Designs, with 100 added in Frozen Trail.
Target-farming weapon Blueprints could take you upwards of hundreds of hours. To save lots of time, you can always buy ARC Raiders Blueprints on Playhub. Quick and safe delivery guaranteed.
What Is the Outpost in ARC Raiders?
The Outpost is your customizable surface base, introduced with Frozen Trail on October 8, 2026. You get a virtual space upside, in which you can expand its rooms, place furniture, and use the Research Station to get some very useful unlocks. The base gives you a reason to keep items that previously looked like easy recycling or selling candidates, as well as giving you more items to look for in your raids.
Embark’s Frozen Trail 2.0 patch notes confirm that completing the Outpost project opens access to the research station. That access is the starting point: you still need to install the station and pay for its upgrades, and there are a lot. The goal of adding the Outpost was clearly to occupy the player base with something to farm for long-term so that the player count doesn’t go down as quickly as it did after the previous updates.
How to Unlock the Outpost: Sheltered Retreat
Sheltered Retreat becomes available at level 18 through the Outpost tab. It has three stages, beginning with a photography objective and ending with ARC damage missions. I think that’s a cool progression thematically - you scout out a fitting place, then build it out, then clear out some ARCs. Make sure to accept the active objective before heading Topside, and check the tab again after each stage so you can claim completion and move forward.
|
Stage |
Requirement |
|---|---|
|
Research Topside Living Conditions |
Photograph any farmland house around Ruined Homestead on Blue Gate |
|
Gather Building Materials |
Submit 3 Planks, 5 Sheet Metal, 10 ARC Alloy, and 3 Advanced Electrical Components |
|
Safeguard the Building Site |
Deal 800 damage to flying ARC enemies and 300 damage to Bullies |
For the first stage, take a camera to Ruined Homestead in southern Blue Gate. Equip it and photograph one of the farmland houses, then extract and complete the stage through the Outpost tab. A Basic Camera is enough; you can buy one from Shani or craft it at Workbench I with 8 Plastic Parts and 1 Wires. If you already received a camera from a quest, just use that instead of buying another. I got lucky and spawned right next to the objective, so that step definitely feels like the most trivial one.
For the construction stage, you’ll have to find the four materials in the table. Industrial areas are useful places to search for Planks and Sheet Metal, and Electrical areas can provide Advanced Electrical Components. Celeste also sells Planks and Sheet Metal for 3 Assorted Seeds each. Buying all three Planks and five Sheet Metal would therefore cost 24 Seeds, which is a convenient shortcut if you have seeds.
The last stage makes you fight some ARCs by tracking damage dealt, but it’s really not that much, and you don’t even have to finish the ARCs off. You can just use some grenades and get it done very quickly.
All Outpost Upgrade Materials
Unlocking the base gives you Outpost I, with three further levels to build. Each expansion has a different material requirement, and your next Research Station upgrade depends on reaching the corresponding Outpost level - that makes the building materials part of your combat progression, even if you aren’t interested in the whole decorating thing.
|
Outpost level |
Required materials |
|---|---|
|
II |
3 Steel Cable, 20 Sheet Metal, 3 Cable Strippers |
|
III |
3 Epoxy Bucket, 35 Planks, 3 Hand Drill |
|
IV |
40 Sheet Metal, 3 Laser Level, 3 Insulation Roll |
Across these three upgrades, you need 60 Sheet Metal and 35 Planks, alongside the specialist items. Keep looking for loose loot as well as containers: construction supplies can be easy to miss when you only check searchable boxes. Pendola Pass is useful for the newer building materials, but I’d choose each destination around the specific item I’m missing rather than keep searching the same area for everything.
Research Station Upgrade Costs
Once the Outpost is unlocked, open the Workshop and install the Research Station in the additional slot. It has its own material costs, separate from the room expansions above, but you need to get the same level Outpost to unlock a new Research tier - Outpost II permits Research Station II, Outpost III permits Station III, and so on. Before queueing, compare both upgrade panels so you know which requirement is actually blocking you from progressing.
|
Research Station level |
Required materials |
|---|---|
|
I |
3 Mini Pump, 35 Planks, 5 Battered Paperback |
|
II |
3 Calculator, 3 Raider Logbook, 5 Skulker Targeter |
|
III |
3 Differential Microphone, 3 Exodus Technical Handbook, 6 Bully Fragmenter |
|
IV |
3 Thermal Shaker, 3 ARC Data Module, 1 Frigate Inductor |
The Workshop requirements on the ARC Raiders Wiki list these station costs and the matching Outpost requirement. The later upgrades need parts from Skulkers, Bullies, and the Frigate, so your shopping list eventually moves beyond general scavenging towards some serious grinding. The payout is worth it, though; I’ll cover it a bit later in the Amplifications section.
How Outpost Research Works
Research is the most impactful mechanic the Outpost has. No longer do you need to hope for random drops - Research lets you craft blueprints, craft furniture designs, and research perks for amplified weapons. All three use Research Points, which you get by studying research category items brought home from Topside - they have a microscope icon on them. Studying consumes the item, so check whether you actually need it for a station upgrade before handing it over.
For blueprints, open Blueprint Crafting and check what your station can make. Each recipe needs Research Points and materials, with more options becoming available as you upgrade the station. For example, the Grappling Hook Blueprint costs 2,000 Research Points and 10 Rope at station level I. You have so many options there, and it comes down to what you actually like to use in your game. Personally, I’d start with weapons I regularly bring into raids, then work toward the less essential recipes.
Amplified Research opens at Research Station level IV and works differently to anything else we had to play with previously. You activate a project, complete its raid objectives, then submit the required Research Points and ARC parts. Finishing it unlocks an amplification perk, and then you can apply that perk to a compatible weapon, which costs additional materials.
Outpost Weapon Amplification
Weapon amplification is the ultimate reason to keep expanding your Outpost. You need Gunsmith IV and Research Station IV, and Outpost IV is required to reach these station levels. Amplification introduces a fifth weapon quality level and branching upgrades that can change how a gun behaves. Frozen Trail introduced the system for just 15 weapons:
-
Anvil
-
Aphelion
-
Bettina
-
Burletta
-
Canto
-
Equalizer
-
Hairpin
-
Hullcracker
-
Il Toro
-
Jupiter
-
Kettle
-
Osprey
-
Rascal
-
Rattler
Choosing the right amps gives you access to completely busted options such as a fully automatic Burletta or a scoped Renegade. The risk of losing them is high, too, since they need a lot of investment to get, so using them or not is definitely a tough choice you’ll have to make.
The Gunsmith IV upgrade requires 3 Radial Press, 3 Magnetic Accelerator, and 1 Emperor Modulator. I think it’s obvious that each Ampd weapon is a huge grind and a risk, but at this point most players have lots of resources, so the fun of using a crazy gun if only for a couple matches seems worth it.
Furniture Designs and Outpost Decoration
Furniture Designs work similarly to blueprints: learning the Design lets you craft the furniture using the required materials. Frozen Trail added 100 Designs, earned across Topside loot, Outpost upgrades, the Reward Pass, and paid DLC. The distribution looks like this:
|
Furniture Design source |
Designs added in Frozen Trail |
|---|---|
|
Topside loot |
73 |
|
Outpost upgrades |
22 |
|
Frozen Trail Pass |
4 |
|
DLC exclusive |
1 |
Decoration is managed through the Outpost’s menus and room views. You can’t freely walk around it or invite friends inside in the current version, but that might be reserved for the future, as devs hinted at. What I think makes the system worth it is that your outpost works as additional storage - you can stash your items there and withdraw if needed. You get upwards of 500+ additional space in your outpost hut if you count all storage slots you can place, so that’s a gamechanger for hoarders such as myself.
Check out other helpful ARC Raiders articles: