
GTA 6 Controls and Settings TL;DR
-
Use the Classic minimap if you want navigation visible while exploring on foot. Default fades the HUD when it isn’t needed for better immersion; Compass gives you a simpler directional display.
-
Adjust aiming assistance to make the most use of your controller aim. GTA 6 leans toward free aiming with adjustable assistance if you’re using the default setup, so if you want to have more help with hitting your shots, you have to choose the right settings.
-
Set your preferred default movement speed - you can either jog around or RP walk everywhere.
Buying a game account is the best budget way of getting the game. You can get great deals on GTA 6 accounts on Playhub and get it delivered quickly from trusted sellers.
Best GTA 6 Settings to Change First
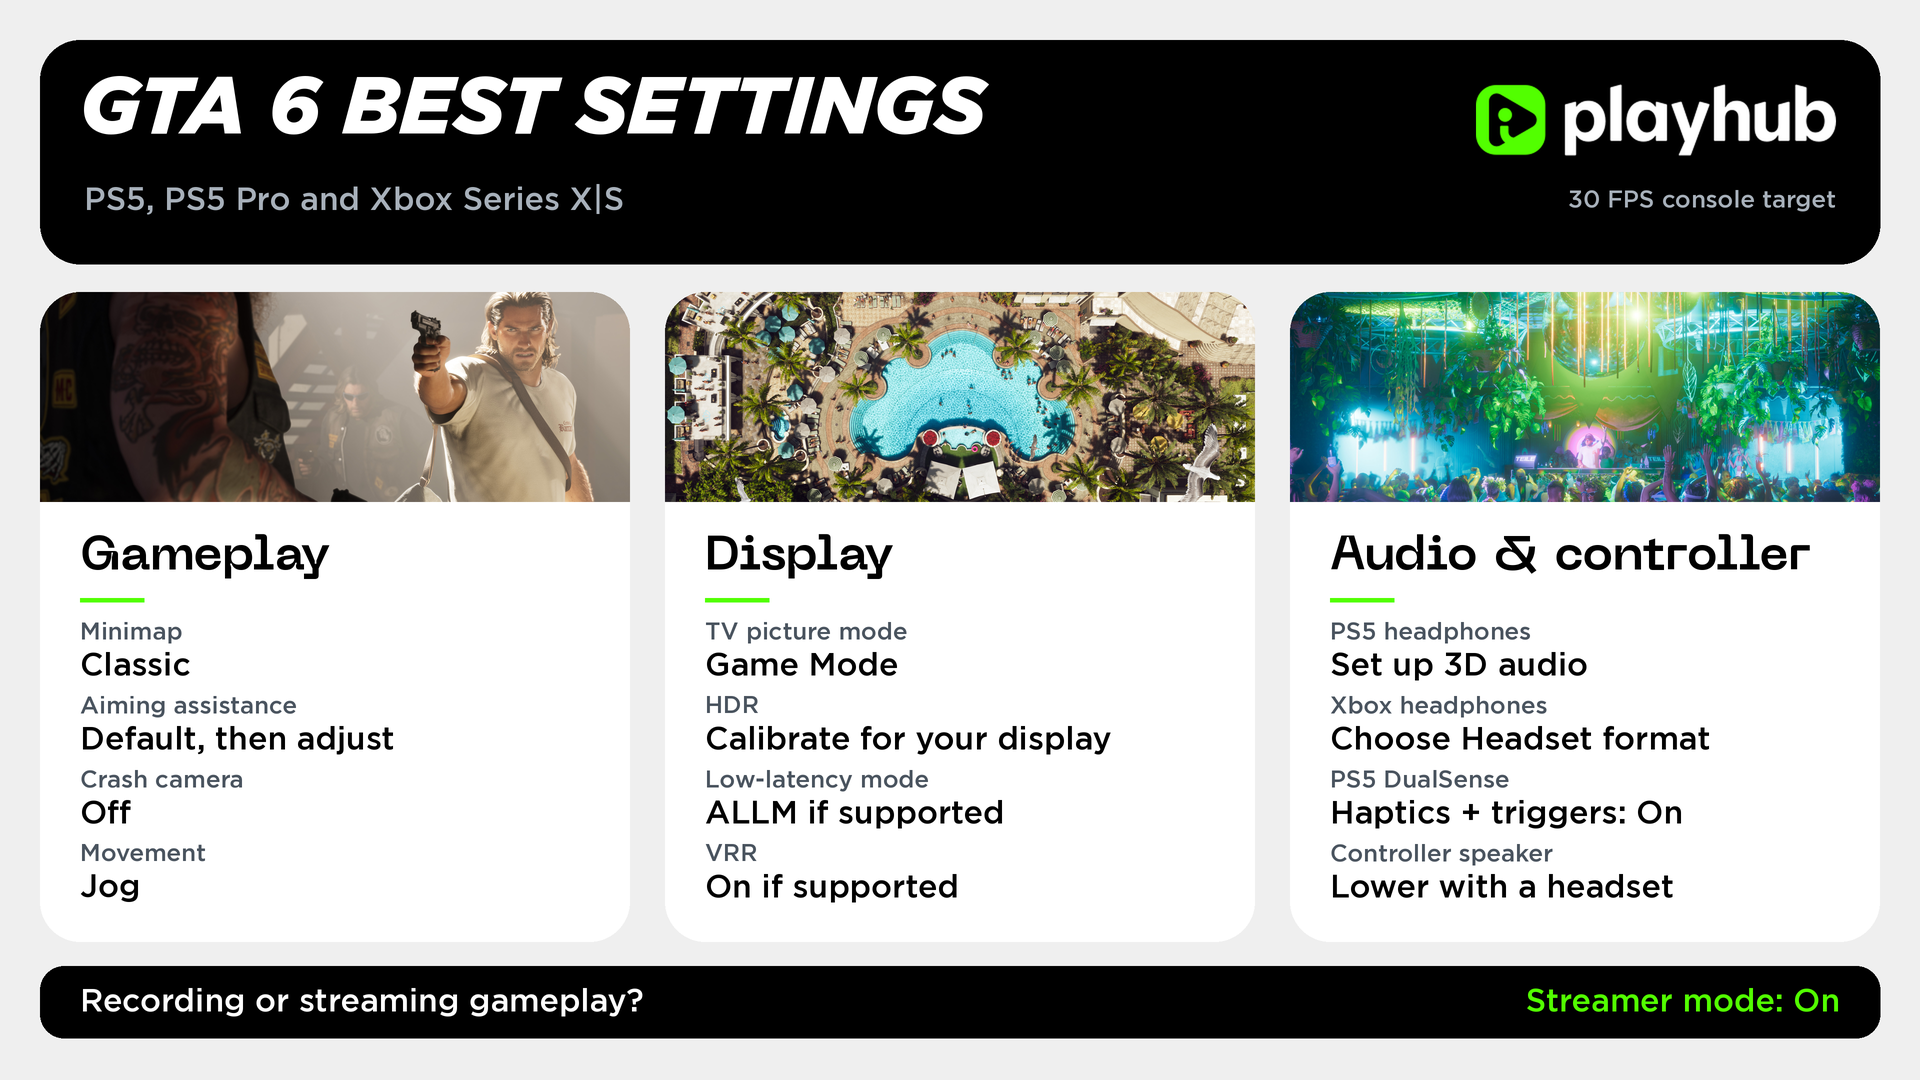
My recommended starting setup keeps navigation visible and reduces weird camera interruptions. I think that the cinematic crash camera is extremely weird and definitely worth keeping off, but kill cams can look sick sometimes and are somewhat worth keeping on. You can keep both cinematic effects if that’s part of what you enjoy.
|
Setting |
Best Option |
|---|---|
|
Minimap display |
Classic |
|
Aiming assistance |
Start at default, then adjust |
|
Cinematic crash camera |
Off |
|
Default movement speed |
Jog for general exploration |
|
Streamer mode |
On when broadcasting or recording for publication |
Best GTA 6 Aiming Settings
I think that the best way to enjoy the game is to start with the default assistance and change it according to what goes wrong in a fight. GTA 6’s aiming has a lighter assisted feel, with the amount of “stickiness” adjustable in the options.
If you can get the reticle onto someone but struggle to keep it there as they move, more assistance is worth trying. If it interferes with the target you intended to shoot and feels jumpy, reduce it. Change it by small amounts at a time so you can find the sweet spot. Also give yourself time to learn the weapon. Holding the trigger through a rifle’s recoil and missing doesn’t necessarily mean your aiming settings need changing.
GTA 6 HUD and Minimap Settings
Classic is the easiest minimap choice while you’re learning the map. The three display approaches give you different amounts of information:
|
HUD option |
What it does |
|---|---|
|
Default |
Lets the HUD fade when it isn’t needed. |
|
Classic |
Keeps the minimap visible. |
|
Compass |
Replaces the minimap with a directional compass. |
With the fading HUD, Down on the D-pad brings information back into view. A waypoint also keeps navigation available while you follow the route. Classic saves you that extra check when you’re unfamiliar with the streets; Compass makes more sense once you’re comfortable finding your way around.
Best GTA 6 Display Settings on PS5 and Xbox
GTA 6 targets 30 frames per second on consoles. PS5 Pro improves image clarity through PSSR and adds ray-traced shadows exclusive to that console. Those are the differences outlined in Rockstar’s console performance details.
The settings below are console and TV settings, so configure them outside GTA 6.
|
Option |
PS5 Best Setting |
Xbox Series X|S Best Setting |
|---|---|---|
|
Output resolution |
Automatic. |
Automatic. |
|
HDR |
On When Supported. |
On When Supported. |
|
HDR calibration |
Run Adjust HDR. |
Run Calibrate HDR for Games. |
|
Low-latency mode |
Enable ALLM with a compatible TV. |
Enable ALLM with a compatible TV. |
|
VRR |
Automatic on a compatible display. |
Enable variable refresh rate on a compatible display. |
|
TV picture mode |
Game Mode. |
Game Mode. |
On PS5, open Settings → Screen and Video → Video Output. Automatic resolution selects the highest supported output. HDR’s On When Supported option also avoids forcing HDR conversion onto content designed for SDR. Follow the calibration screens for your display instead of copying someone else’s brightness values.
On Xbox, open Settings → General → TV & display options. A cable, HDMI port, or receiver between the console and TV can limit the available output. You can leave 120 Hz output enabled for compatible games, but it doesn’t work in GTA 6, since the game is only 30. VRR’s benefits also depend on the display you use and its supported frame-rate range.
GTA 6 DualSense Settings
PS5 supports GTA 6’s haptic feedback, adaptive triggers, and controller-speaker effects, making full use of DualSense’s features. Keep those features enabled initially if you want the immersive controller feedback, then reduce anything that becomes uncomfortable during longer sessions. Personally, I love adaptive triggers and haptic feedback, but speaker effects are completely useless for me, since I play with my headset on most of the time.
Open Settings → Accessories → Controller (General) to adjust Vibration Intensity, Trigger Effect Intensity, and the controller speaker’s volume. Reducing trigger resistance is a reasonable comfort choice if repeated presses tire your fingers. Lower the speaker volume if it’s distracting or competing with your headset.
Best GTA 6 Audio Settings
Set up your actual listening equipment first. On PS5, GTA 6 supports Tempest 3D Audio. For headphones, open Settings → Sound → 3D Audio (Headphones) and create a personalized profile or compare the available presets. Pick the one that makes sound direction easiest for you to judge.
On Xbox, go to Settings → General → Volume & audio output and check Headset format. Windows Sonic is a spatial-audio option; Dolby Atmos and DTS options depend on your setup and licensing.
Keep dialogue understandable when adjusting the mix. Radio is a huge part of GTA, but missing conversation because music overwhelms it gets old quickly. Compare settings during a scene with speech, traffic, and music.
When Should You Use Streamer Mode?
If you’re a content creator, you should enable Streamer Mode whenever you record footage. What it mainly does is disable copyrighted music, which is a must for avoiding copyright trouble when radio tracks would otherwise be captured in your recording. For a normal private session, leave it off if you want the regular soundtrack to be present at all times.
Check out other GTA 6 articles:
