
WoW Midnight Labyrinths Guide TL;DR
-
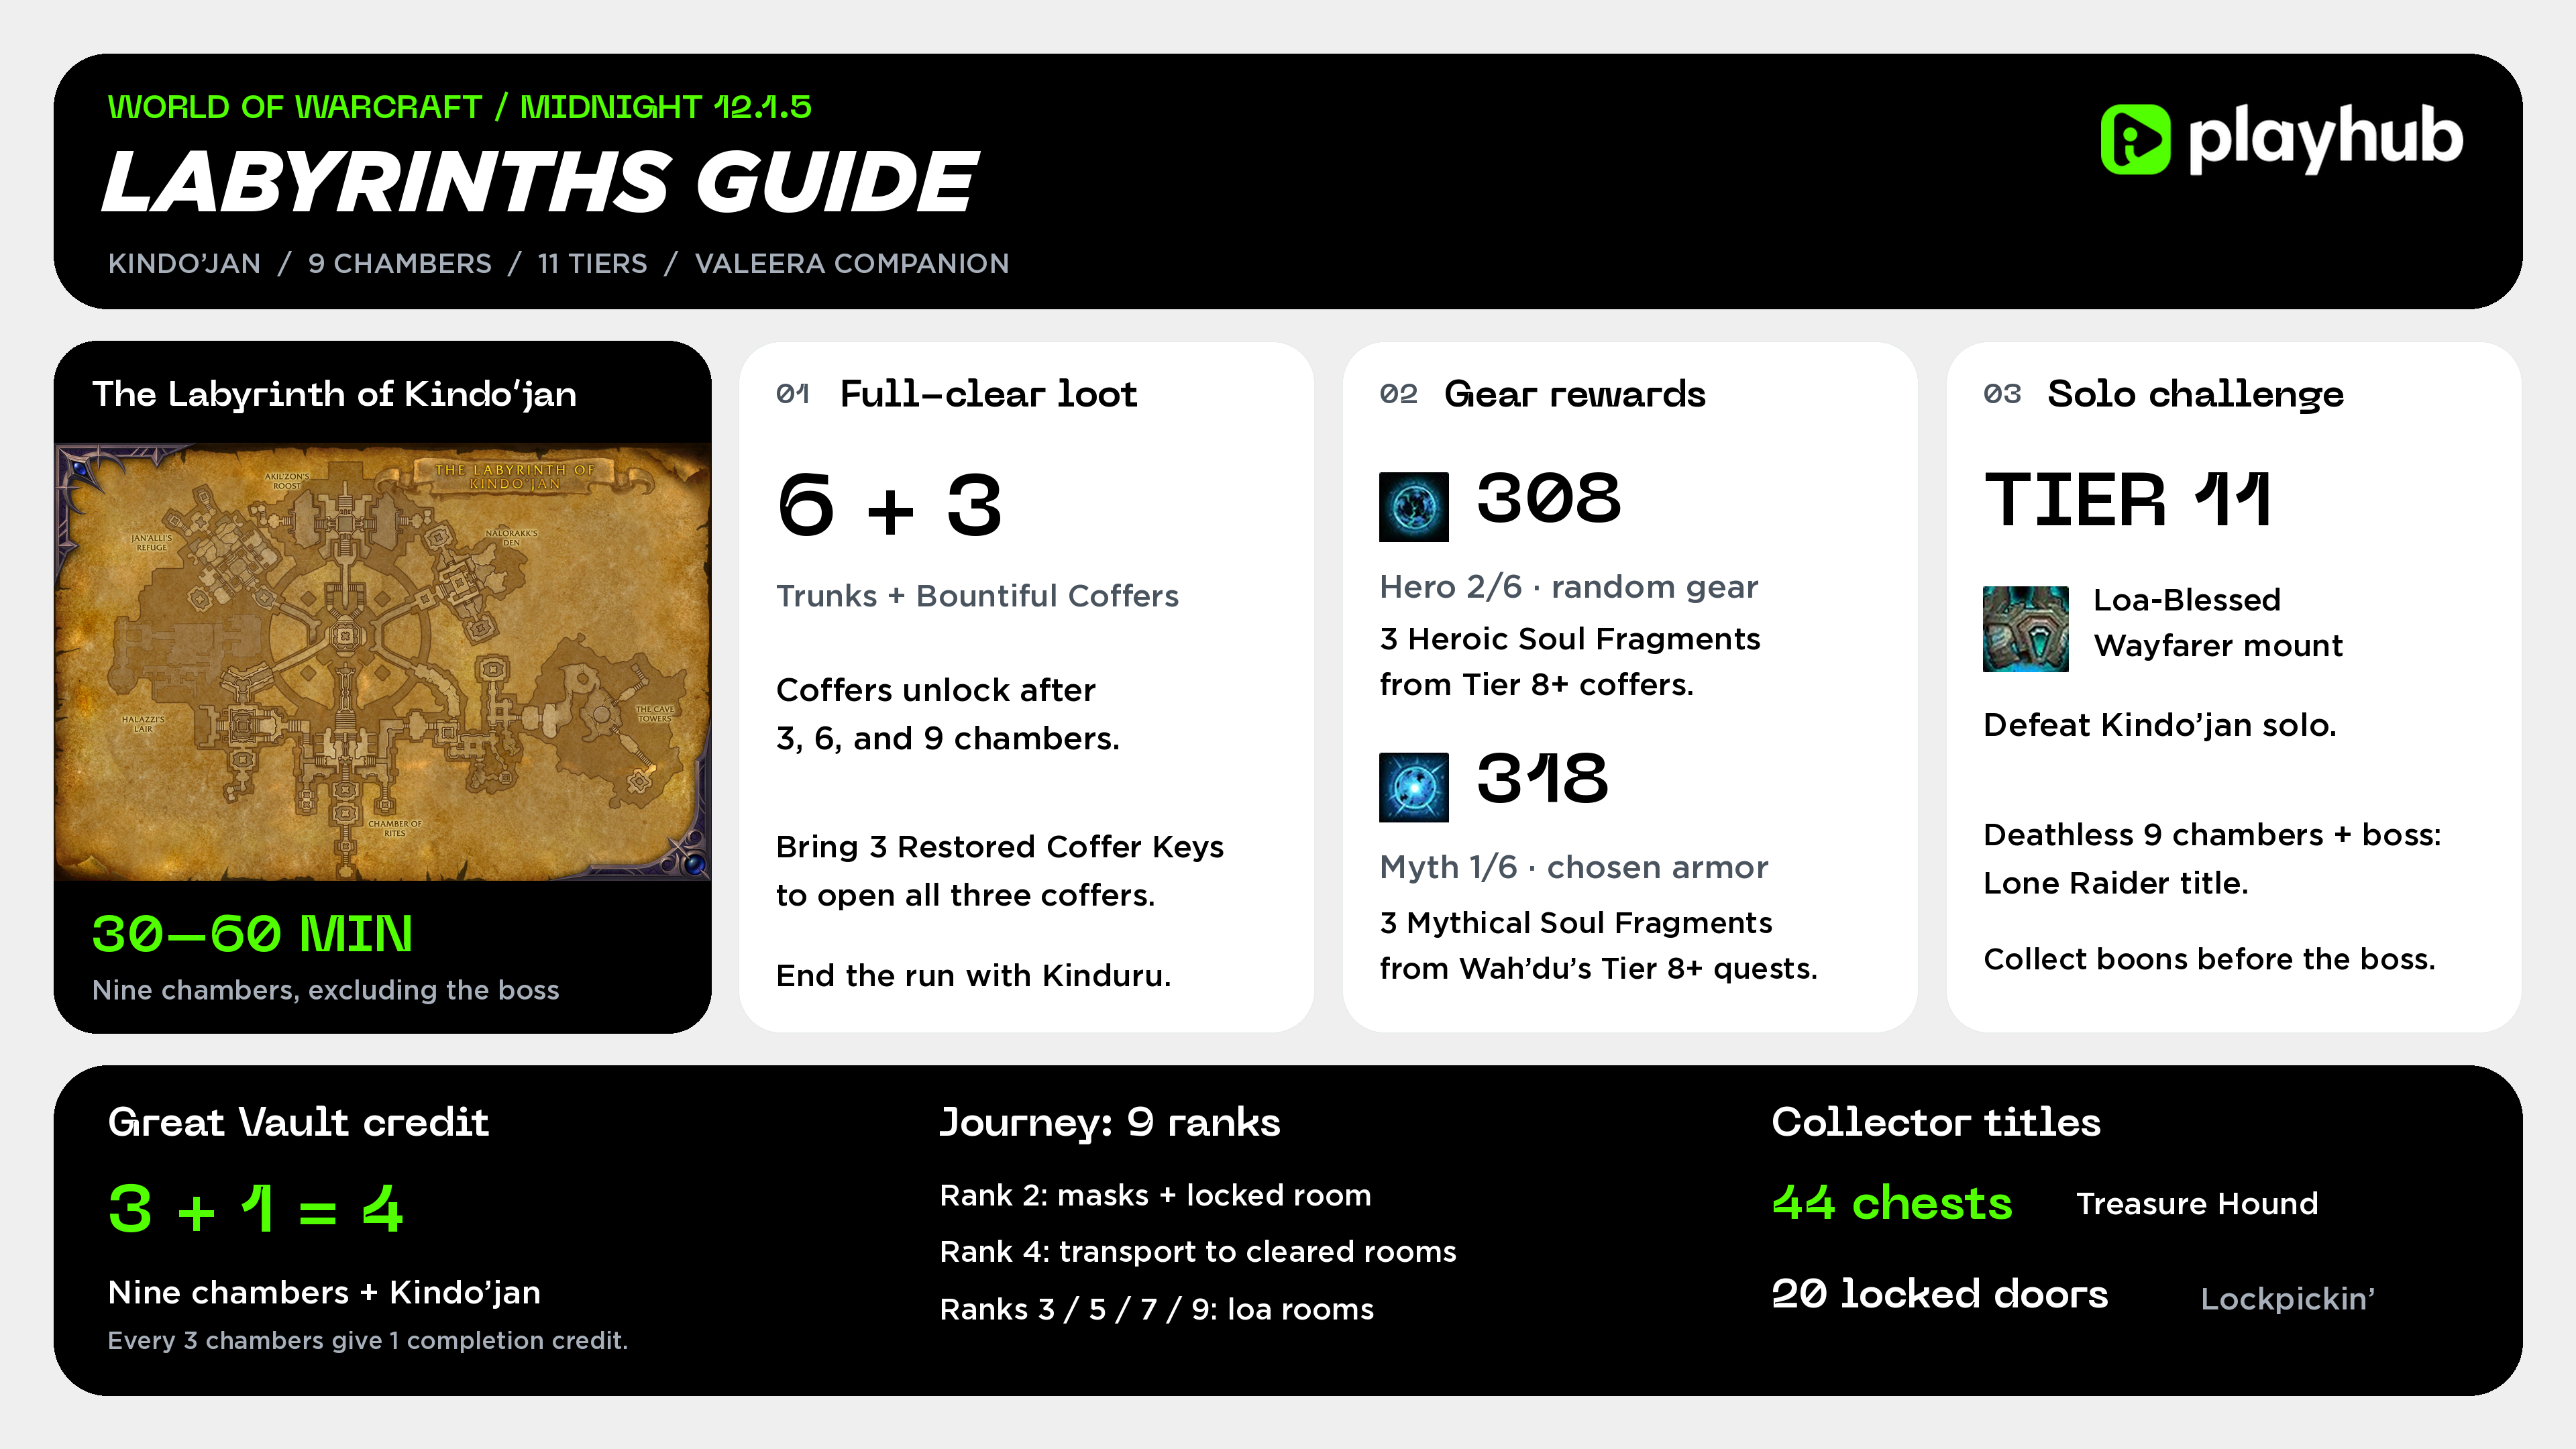
The Labyrinth of Kindo’jan has nine chambers and 11 difficulty tiers, with Valeera as your companion.
-
A nine-chamber clear awards six Heavy Trunks and three Bountiful Coffers. Bring three Restored Coffer Keys to open all the coffers and get max loot.
-
Combine three Heroic Soul Fragments for random Hero 2/6 gear, or three Mythical Soul Fragments for your choice of Myth 1/6 armor.
-
Every three chambers count as one Delve completion for the Great Vault. Nine chambers give three credits, and the final boss adds another.
-
Defeat Kindo’jan solo on Tier 11 for the Loa-Blessed Wayfarer mount; a deathless nine-chamber clear plus the boss earns the Lone Raider title.
BoEs, consumables, and day-to-day expenses are set to drain your gold super fast. You can skip the gold grind and cover expenses entirely - just buy WoW gold on Playhub with competitive prices and fast delivery.
What Are Labyrinths in WoW Midnight?
Labyrinths expand the Delve format into a longer adventure with multiple chambers, more secrets, and its own progression track. The first to actually come to the game is the Labyrinth of Kindo’jan, an ancient Amani complex. Valeera accompanies you, and the distinctive property of the mode is that you can earn rewards from a partial clear even without finishing anything.
Labyrinth Location and How to Unlock It
The entrance is in southeastern Eversong Woods, north of Amani Pass near the Zul’Aman border, the waypoint is /way #2395 63.05 72.30. Your first visit forces you to complete an introductory questline, so expect to learn the chamber system before starting a normal run. The unlock carries over to your Warband once you finish that introduction.
-
Pick up The Labyrinth from Kul’amara the Fierce at Tokka’s Landing on the Coiled Isle. The campaign’s The Long Way Around also leads into this story sequence.
-
Meet Valeera at the entrance and accept Dangers Untold and Hardships Unnumbered.
-
Complete the Chamber of Rites, then speak with Kinduru, the spirit guide, to continue through two more introductory chambers.
-
The tutorial ends after three chambers. Leave, finish the quest turn-ins, and return for a full Labyrinth run.
Blizzard’s 12.1.5 content preview covers the entrance and starting quests. After the questline, Kinduru becomes your full-time guide and helps you end ordinary runs and claim the rewards for the chambers you completed.
How Labyrinth Chambers and Routes Work
Each run starts in the Chamber of Rites. From there, you choose between the Reliquary and the Catacombs, then move toward the Central Chamber and the rest of the complex. You can open just one new chamber at a time and must finish its goal before unlocking another. Objectives and enemy combinations vary between visits, so each run feels fresh, but it can get a bit confusing as to what exactly you’re asked to do. There are some tips to follow that work in regular Delves just as well:
-
Complete the chamber objectives first and remember that killing every remaining enemy is optional unless the objective requires it, so you can just skip lots of mobs and save yourself some time.
-
Collect nearby treasures and temporary buffs as you explore to make your time easier.
-
Check which sealed rooms your Journey rank lets you enter.
For your first Kindo’jan attempt, clear all nine chambers on Tier 8 or higher to open the Speaker’s Chamber through Akil’zon’s Roost. Once that door has been unlocked, subsequent boss attempts can use a shorter route to the Roost. A full clear is still useful when you want maximum chamber rewards, but most of the time just cutting some travel time is extremely good.
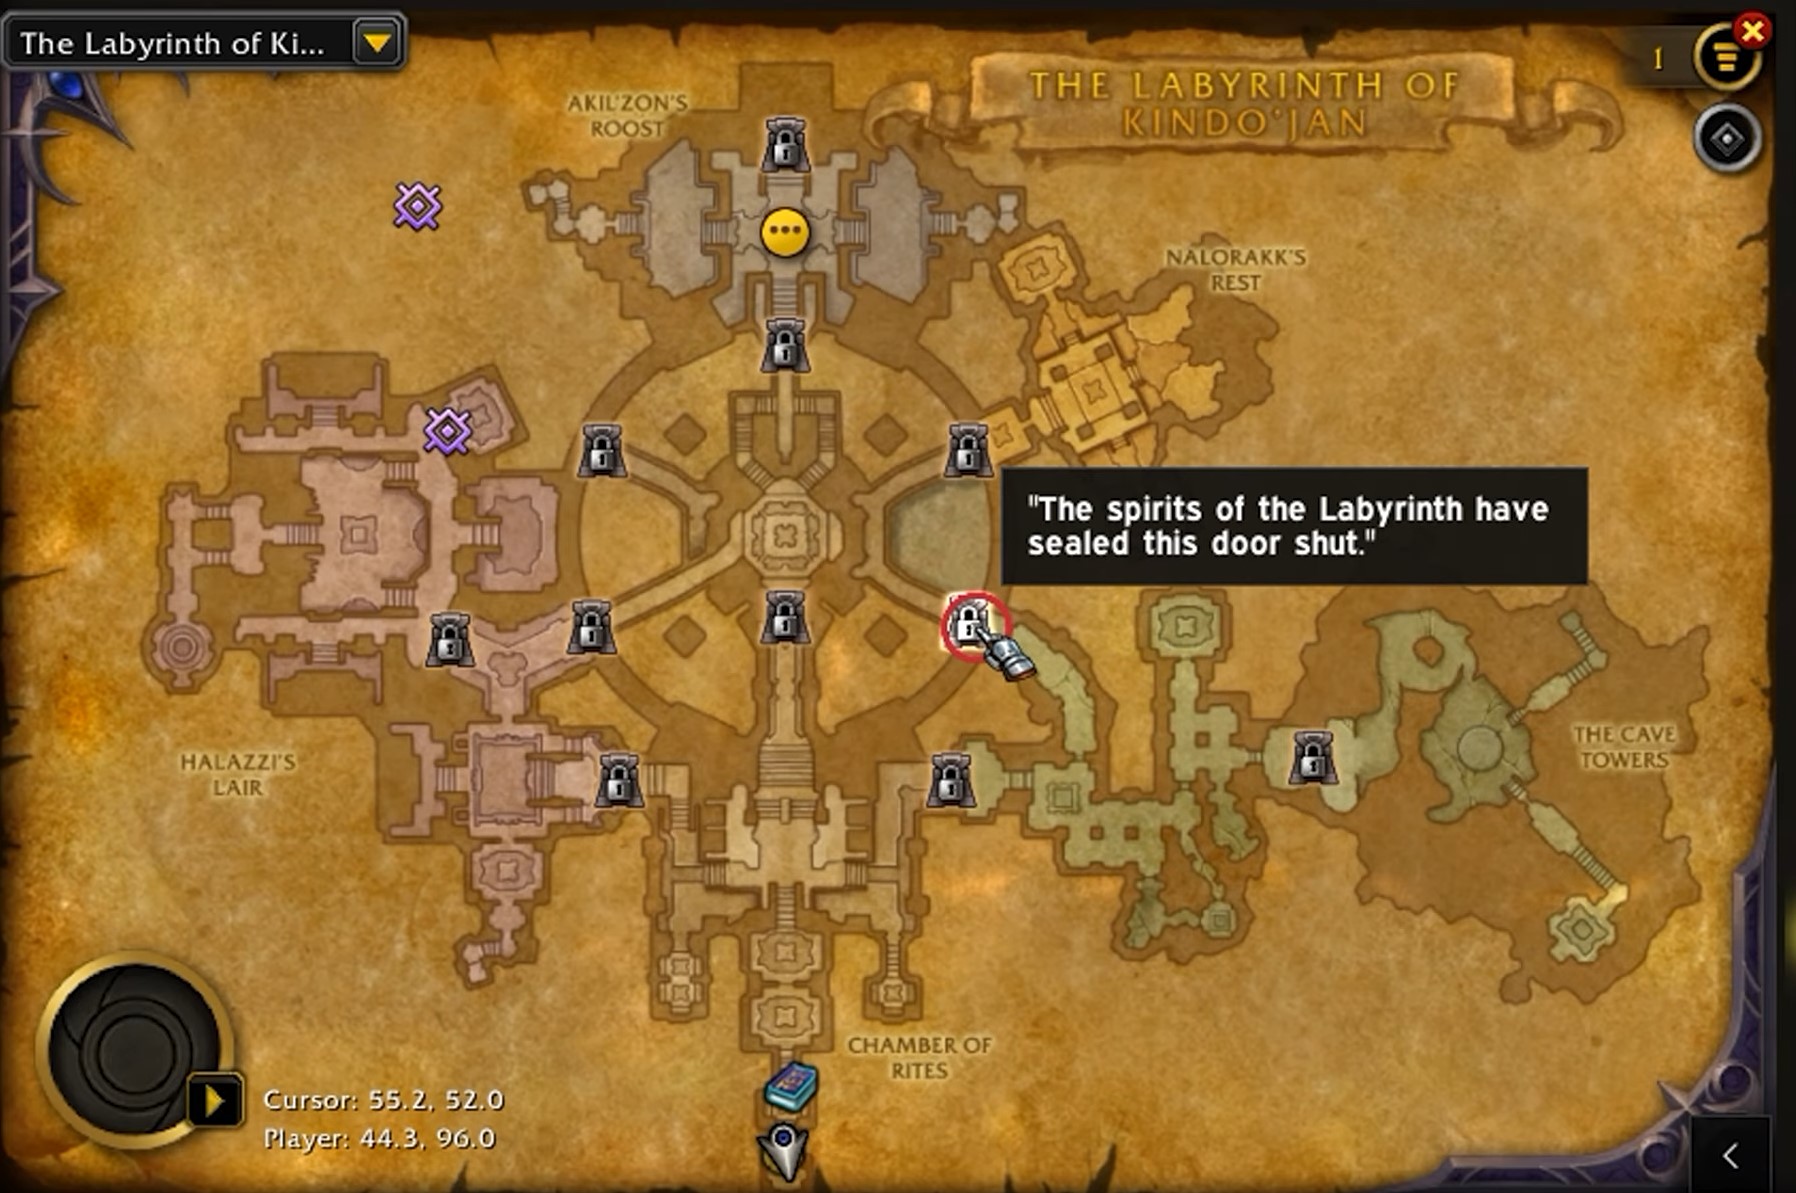
A run will take 30–60 minutes for all nine chambers without the final boss, based on PTR gameplay. If you exhaust your lives, the run ends and you receive the rewards earned so far.
Labyrinth Difficulty Tiers
Kindo’jan’s Labyrinth has 11 tiers, matching the regular Delves. Tier 8 is an important checkpoint because it enables the Soul Fragment reward paths and the final boss. Tier 11 is where the solo mount and harder achievements are rewarded. If you’re wondering if you’re ready to take on the Lab, these are the item-level recommendations for choosing your difficulty:
|
Tier |
Recommended item level |
|---|---|
|
1 |
170 |
|
2 |
187 |
|
3 |
200 |
|
4 |
259 |
|
5 |
268 |
|
6 |
275 |
|
7 |
281 |
|
8 |
290 |
|
9 |
296 |
|
10 |
303 |
|
11 |
309 |
Labyrinth tier achievements all count toward your seasonal Delve access: completing three chambers at a tier earns its progression achievement. If you already unlocked higher tiers through regular Delves, you don’t need to repeat the entire ladder here.
Chamber Rewards and Great Vault Credit
In Lab, your treasure room grows with every completed chamber. Bountiful Coffers arrive at the three-, six-, and nine-chamber checkpoints, and the amount of Heavy Trunks increases between them. The Labyrinth is always bountiful, and opening its coffers still consumes Restored Coffer Keys:
|
Chambers cleared |
Heavy Trunks |
Bountiful Coffers |
|---|---|---|
|
1 |
1 |
0 |
|
2 |
2 |
0 |
|
3 |
2 |
1 |
|
4 |
3 |
1 |
|
5 |
4 |
1 |
|
6 |
4 |
2 |
|
7 |
5 |
2 |
|
8 |
6 |
2 |
|
9 |
6 |
3 |
Every three chambers also count as one Delve completion at your chosen tier for the Great Vault, so Labyrinth is a great way to get that done. A nine-chamber run gives three completion credits, and defeating Kindo’jan adds another.
When you’re finished, tell Kinduru you want to end the run so he takes you to the treasure room. Loot it before leaving the instance - a full Tier 11 clear can also provide three Gilded Stashes if you’ve unlocked that reward through the seasonal Delves Journey.
How to Get Hero and Myth Gear From Labyrinths
The two Soul Fragment types come from different activities. Heroic Soul Fragments are found in Tier 8+ Bountiful Coffers, and Mythical Soul Fragments come from helping Wah’du with specific chamber objectives on Tier 8+. Check his quest before picking your route so you actually complete the requested room, rewards look like this:
|
Reward path |
Cost |
End Result |
|---|---|---|
|
Heroic Soul Fragments |
Three fragments |
Random Hero 2/6 equipment, 308 item level |
|
Mythical Soul Fragments |
Three fragments |
Venerated Loa Armament for chosen Myth 1/6 armor, 318 item level |
The Myth reward lets you choose an armor slot, which makes it extremely useful for filling a weak piece. The Myth gear reward preview also lists the Tier 8+ chamber quest requirement, and what makes it great is that this reward path doesn’t require defeating Kindo’jan on Tier 11. I’d definitely recommend you prioritize the quest objective and collect coffers during your runs. Wah’du’s requests’ rewards are great, so make sure you complete them whenever possible.
Labyrinth Journey and Permanent Upgrades
The Labyrinth Journey is separate from the seasonal Delves Journey. It has nine ranks, with 2,100 progress needed per rank, and opens additional secrets and shortcuts as you advance. Some treasures are locked behind seals you can’t enter without making the Journey progress, so a first run won’t uncover everything. These are the main unlocks to watch out for:
|
Journey rank |
Unlock |
|---|---|
|
1 |
Rank 5 Curios in eligible Tier 8+ Labyrinth rewards |
|
2 |
Hexmasks, the locked room, and Keeper of the Key |
|
3 |
Akil’zon’s sealed rooms |
|
4 |
Kinduru transport to completed chambers |
|
5 |
Jan’alai’s sealed rooms |
|
6 |
Spiritual Conduits with temporary buffs for the whole party |
|
7 |
Nalorakk’s sealed rooms |
|
8 |
Labyrinth destination upgrade for Delve-O-Bot 7001 |
|
9 |
Halazzi’s sealed rooms |
The sealed rooms hold more than cosmetics. You get stuff like stacking movement speed as you clear chambers, primary stat buffs, and even a once-per-run cheat death. I’d collect those before repeatedly pushing difficult solo attempts, unless you’re skilled and geared and can just breeze through content without extra buffs.
Rank 4’s transport is particularly useful when you find a key after passing its locked room. What it does is let you ask Kinduru to take you back to a completed chamber, so you can skip the travel time entirely instead of running across the whole complex.
Ancient Hash’ey Battle Arts
The sealed-room treasures also unlock reusable glove enchants that function exclusively inside Delves and Labyrinths. Their scrolls are Warbound, so you can transfer them to another character and reapply them whenever you replace your gloves. Using a scroll doesn’t consume it, and its item text limits application to gloves at 334 item level or below.
|
Battle Art |
Effect |
|---|---|
|
Falco Strikes |
Nature-damage proc, with a 20% chance for each strike to hit again |
|
Heat Wave |
A 20-second Fire-damage effect split between nearby enemies |
|
Ursine’s Ironhide |
A 15-second protective absorb proc |
|
Eye of the Lynx |
Haste and Leech for you and a nearby ally for 15 seconds |
For a difficult boss attempt, I’d choose between extra damage and protection according to what is ending your runs.
Hidden Rooms, Hexmasks, and Sturdy Chests
There are 44 Sturdy Chests to discover, and each can be looted once per character. Twenty are available without Journey-gated seals, nineteen are behind those seals, and five are in the hidden Flooded Chamber. Collecting all of them earns the Treasure Hound title.
-
Hexmasks: After Journey rank 2, look for the Frozen, Fiery, and Thundering masks. They follow you for the run and assist with combat.
-
Locked room: Defeat the Keeper of the Key, loot the Archaic Amani Key, and use it on the hidden locked door for additional treasures and buffs. If you find the door first, note its chamber so you can return after getting the key.
-
Flooded Chamber: Find the waterfalls on the eastern side of the lower Central Chamber, swim beneath them, and follow the stairs to an ice wall. Fire damage opens it; the Fiery Hexmask can help, as can Rune of Unleashed Fire from the Omnium Folio if your class lacks a Fire attack. Search all five chests once inside.
Make sure to always collect Mislaid Treasures and Mislaid Curiosities for temporary health, movement, and stat bonuses. Those boons remain active during Kindo’jan’s fight, so a longer route can make a difficult boss attempt so much easier. Sealed treasure rooms are worth revisiting even after you’ve opened their one-time Sturdy Chests, since they still contain respawning Curiosities.
Kindo’jan Boss Tactics
Kindo’jan waits beyond Akil’zon’s Roost in the Speaker’s Chamber, after the encounter with Den’zara. You fight him at Tiers 8–11, without a separate question-mark or double-question-mark difficulty. Certain avoidable hits apply Disgraceful Display, and reaching three stacks ends the attempt; the debuff lasts five minutes. He also enrages after 10 minutes, but I think that it’s more than enough to beat the boss, so you should focus on not getting hit. He’s got a lot of tools in his bag:
|
Mechanic |
What to do |
|---|---|
|
Eruption of Mojo |
Dodge the circles and place puddles near the sides of the room to preserve movement space |
|
Whirling Axes |
Avoid the four moving axe formations |
|
Hash’ey’s Command |
Handle the four Headhunters and dodge their ground circles |
|
Crushing Blow |
Avoid the impact and prepare for the Amani Juggernaut |
|
Amani Juggernaut |
Burst it down first, face its knockback toward safe space, and interrupt Amani Aegis |
Amani Aegis reduces damage taken by the add and nearby allies by 33%, so letting it finish makes cleanup much longer. Keep space available for Phalanx Charge instead of standing where a knockback can send you off the platform. The loa trials then ask you to handle the following:
|
Loa |
Trial |
|---|---|
|
Akil’zon |
Stand in the narrow clear lanes while the wind pushes you across the platform |
|
Halazzi |
Identify the real targeting line among the shadows and intercept it to free Valeera |
|
Nalorakk |
Find the gap in the first line of charging bears, then turn and find the gap in the line approaching from the other side |
|
Jan’alai |
Two circles need soaking. Valeera pings the one she will cover, so move to the other circle |
The fight starts with Kindo’jan’s own attacks, moves into the loa trials, then returns to a stage that combines both. I’d use Bloodlust and major damage cooldowns during that mixed stage. Prioritize a required soak or safe position over finishing a cast, and watch for Juggernaut knockbacks during another mechanic. If you’re struggling after taking the shortest boss route, try a full clear and collect its boons before changing your gear or build.
WoW Labyrinth Mount, Toys, and Titles
A solo Tier 11 boss kill earns the mount, and the deathless achievement requires all nine chambers to be completed. Treasure collection has its own title attached to it, and the first-week solo achievement has a deadline. Here’s the full list of rewards:
|
Reward |
Requirement |
|---|---|
|
Loa-Blessed Wayfarer mount |
Defeat Kindo’jan solo on Tier 11 during Midnight Season 2 |
|
Loa-Blessed Victory toy |
Defeat Kindo’jan and loot his bounty |
|
Maze Runner title |
Complete all nine chambers in one Tier 11 run |
|
Treasure Hound title |
Find and open all 44 Sturdy Chests |
|
Lockpickin’ title |
Open the hidden locked door 20 times for Lock and Key Master |
|
Lone Raider title |
Clear nine chambers and defeat Kindo’jan solo on Tier 11 without losing a life during Season 2 |
|
Fabled Vanquisher of the First Hash’ey title |
Defeat Kindo’jan solo on Tier 11 before the first reset after his introduction |
The sealed rooms also contain Feathers of Akil’zon, Rite of Jan’alai’s Flame, Nalorakk’s Strength Charm, and Trail of Halazzi, four toys that give your character loa-themed appearances. Check the relevant rooms as you unlock their seals at Journey ranks 3, 5, 7, and 9. Transmog and housing rewards include Amani-themed shoulders and back pieces, the Ancient Amani Mural, Brown Amani Tapestry, and Ruined Amani Ritual Urn.
Check out more useful WoW Midnight articles: